A question that comes up a lot on motorhome & caravan forums is ‘what’s the best 12V TV?’ – with the replies usually being units from either Cello or Avtex, depending on the personal preference of the responder………..
Tag: Technical (page 1 of 5)
Motorhomes are by their nature big heavy things, and often two wheel drive – due to this it is easy to get bogged down or stuck in sand, wet grass, snow etc.
Continue readingNote this article is based around late 90’s to mid 00’s Hymer A-class vans, specifically our 1999 Hymer B544.
Hymer Motorhomes have a bit of a reputation for quality build and being able to out-last many of the other Marques available. Our van is 20 years old at the time of writing and has covered over 220,000km, and whilst it has generally been good to us there are still many things that have needed attention over the years – here’s a list of all the issues with our bus, so you can look out for the same problems if you are looking for a similar vehicle! There are also links to articles on fixing some of the issues.
Continue readingThe Fiat Ducato, Citroen Relay/Jumper and Peugeot Boxer vans together account for the basis of nearly 75% of all motorhomes manufactured in Europe. Each of these vans are nearly identical apart from the finishing trim, as they are all built in the same factory and to the same design as part of a joint venture between Fiat and Peugeot/Citroen (the joint venture is the SEVEL company).
Continue readingWe recently had another issue with our 20 year old motorhome fridge – on arriving at an aire in France the fridge gas burner would not light, and with no electric hook-up available we had no other option than running it on gas.
Continue readingIn order to get to the lower fridge vent on many Hymer models with a rear kitchen it is necessary to remove the rear bumper – here’s how to do it on a late 90’s-early 00’s model
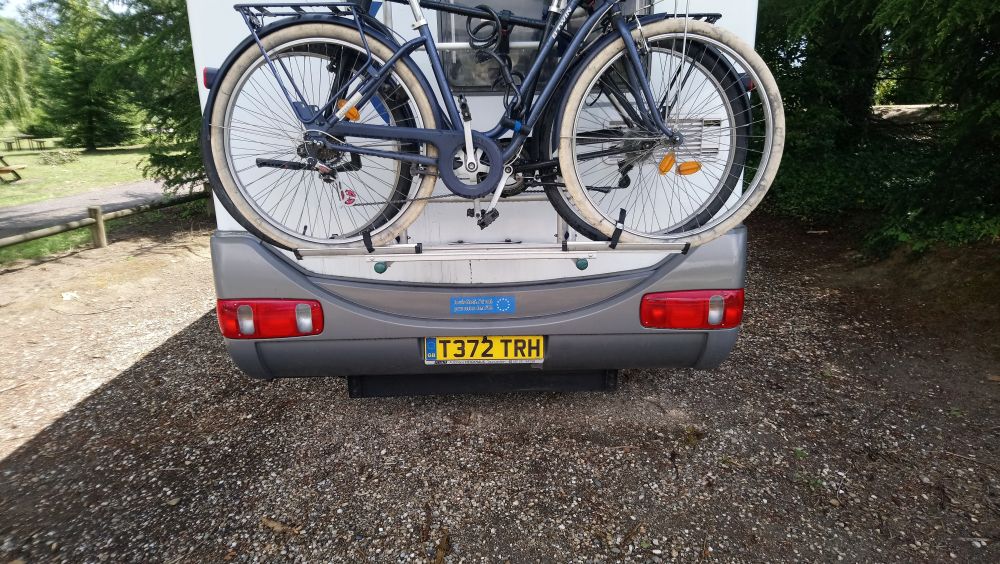
On some models there are fixing screws behind the lights and number plate – but not on this one, so no need to remove anything from the bumper
The bumper is held onto the rear of the van with screws along the top edge and down the side, mostly hidden under a flexible trim strip
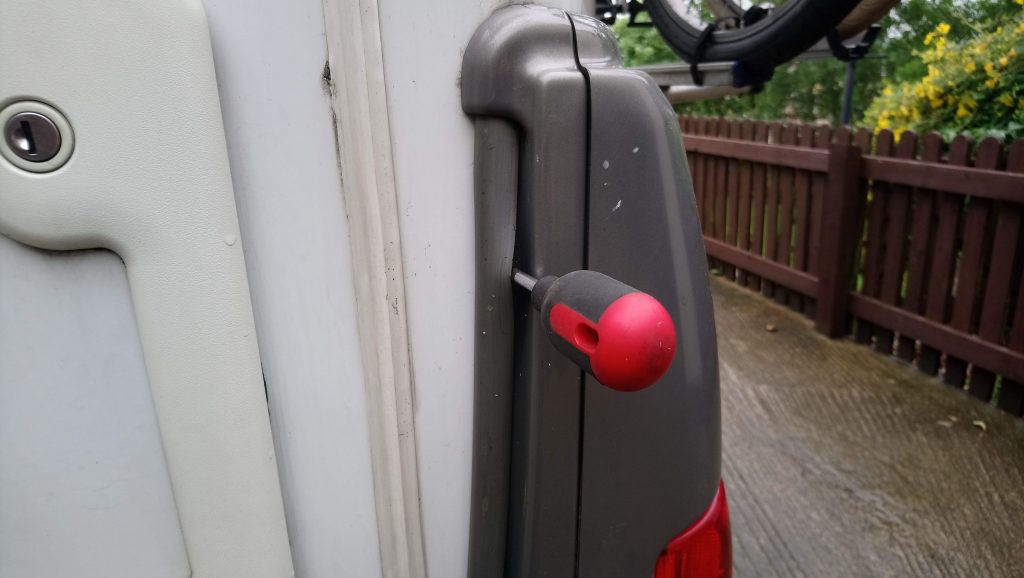
There are typically two screws under the vertical trim strip on either side of the bumper…..
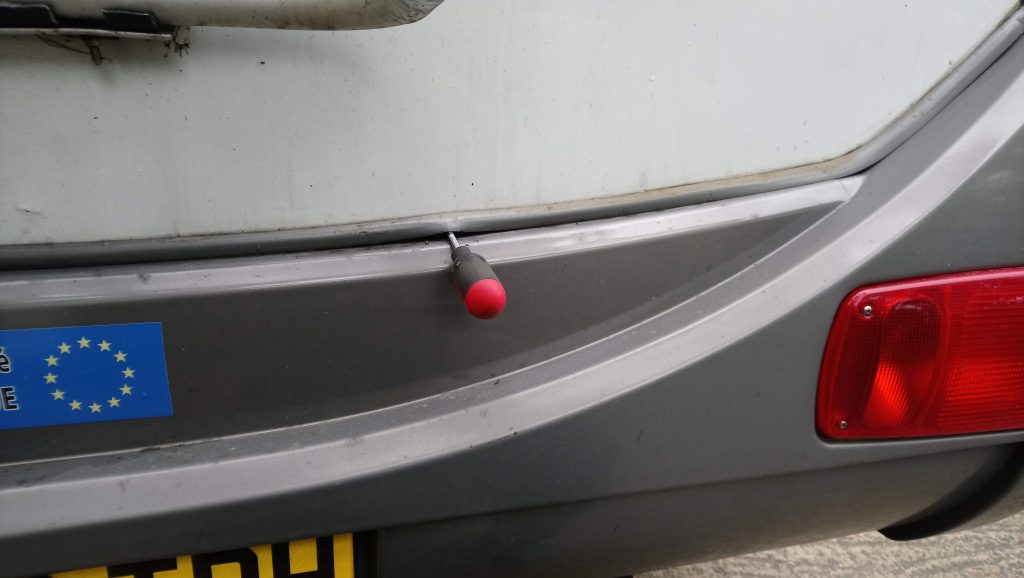
…..and a number of screws underneath the horizontal trim strip across the back of the bumper

There is also a screw on each bottom corner through the plastic of the bumper into the aluminium body
Note – it is useful to have some help on hand to hold the bumper while you remove the last of the screws, as with them removed there is nothing to stop the bumper falling off the back of the van!
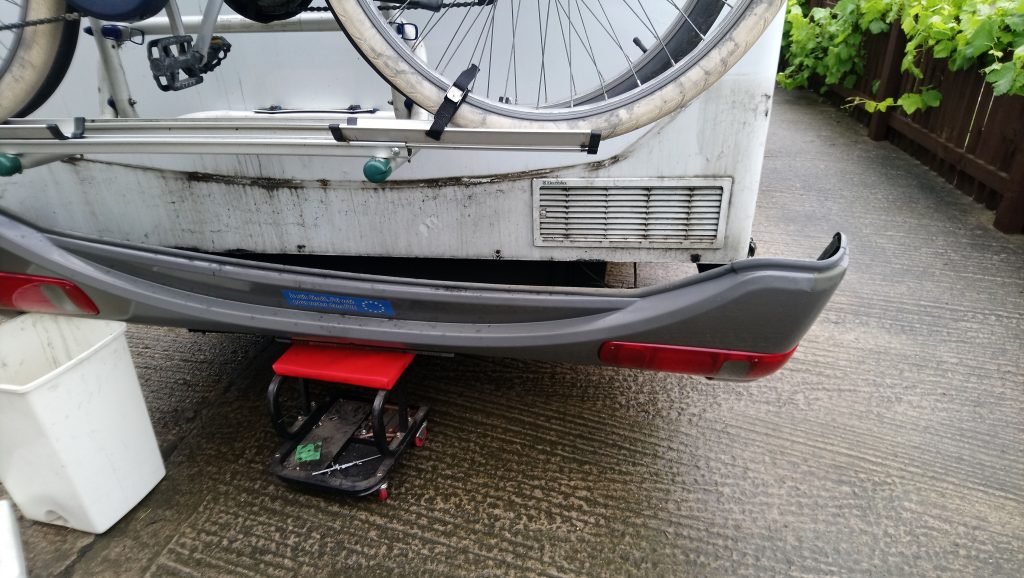
The bumper can’t be removed completely without disconnecting the wiring for the lights, but by placing something underneath it to support it you can lower it out of the way to expose the fridge vent with the wiring still attached – as shown here
For details of how to clean/service the burner on the fridge, click here
Found this information useful? – Want to support Motor-Roam?
Click here to find out how!
The three-way fridges fitted to most motorhomes and camper vans are great when they work, but the gas burned and flue assembly can get blocked up with soot and other detritus over time, reducing the fridges effectiveness. Thankfully on most vans the burner can be serviced via the two vents on the outside of the van, so there is no need to remove to the fridge entirely – here’s how…..
(Note – the fridge in this example is a Electrolux RM4410 from the late 90’s, the burner/flue assembly is similar on most Electrolux/Dometic models)
Disclaimer – any gas appliance is obviously dangerous if not it proper working order. The information here is provided for interest only, do not attempt any work on your gas appliances if you are not suitably confident or qualified!
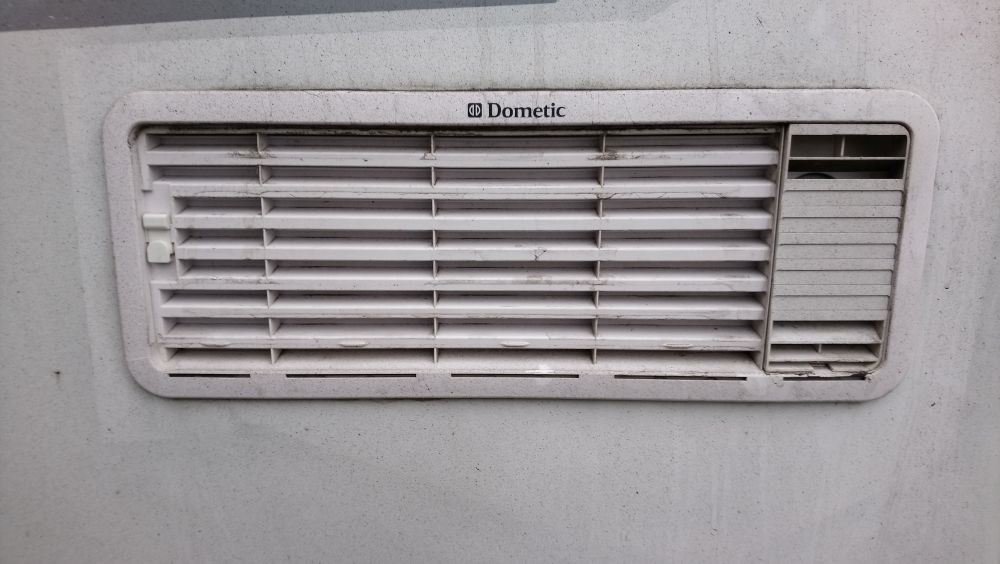
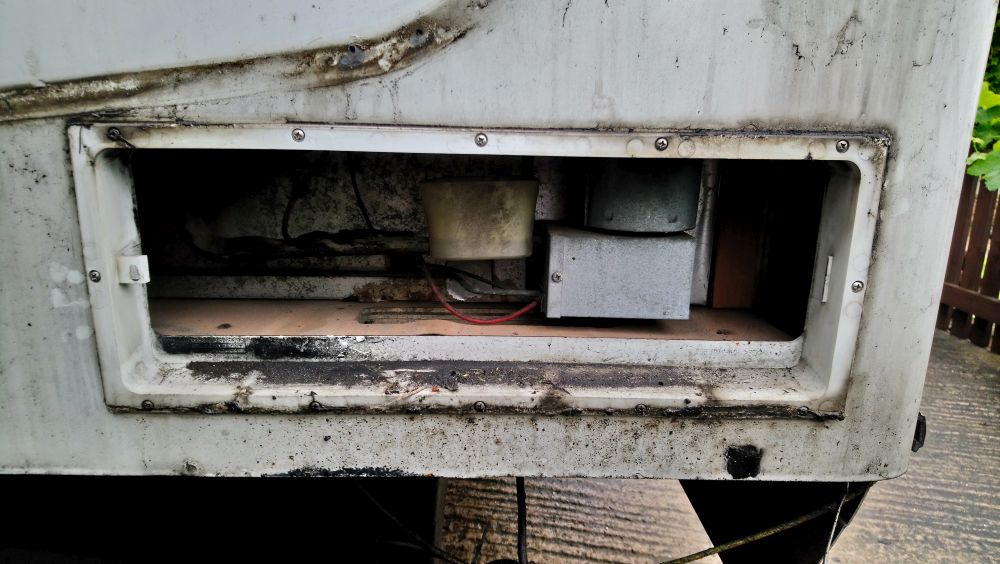
First step is to unclip the plastic cover over the gas flue on the right hand side of the upper vent (hopefully your vent is cleaner than this one!)
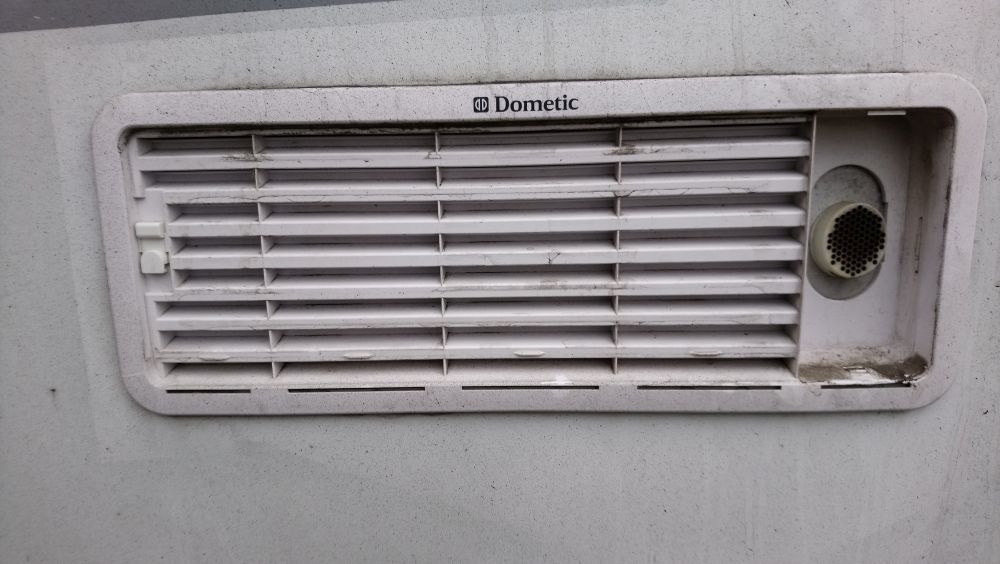
With the flue cover removed you will see the flue grille itself, as shown here. Next release the clip on the left hand side of the vent (it slides upwards on this model) and pull the left hand side towards you. Unclip the vent from the tab on the right had side and remove it completely. The flue grille can be lifted out once the vent is removed.
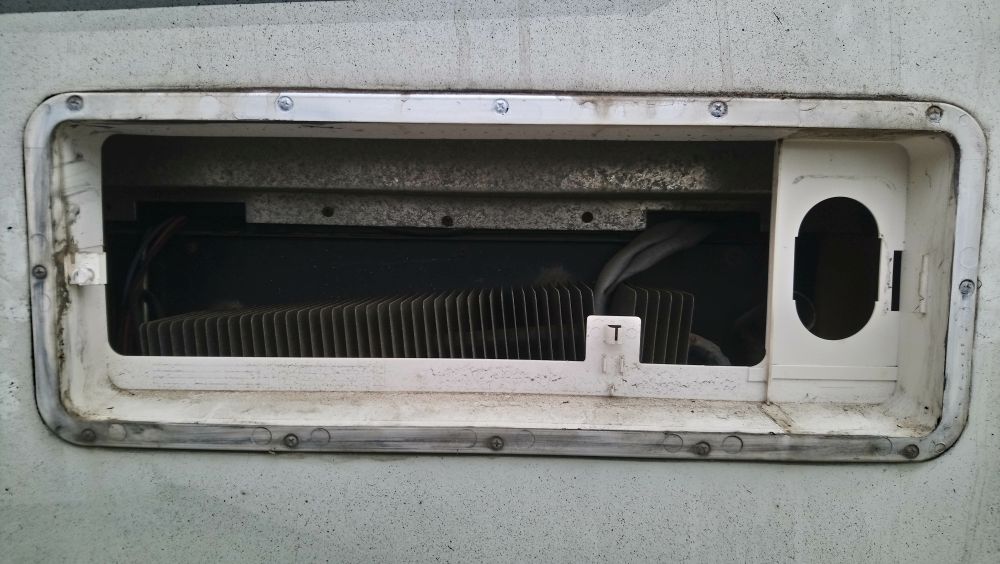
You will now have access to the top section of the rear of the fridge though the vent frame
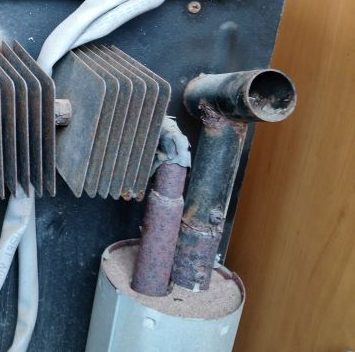
The top of the flue will have an angled section to direct gasses out of the flue grille, and possibly a flue extension. Loosen the screw closest to the heater can body and remove the top section of the flue. You should now see a small piece of wire hooked over the top of the remaining section of flue – this holds the baffle in place. Using the wire to lift the baffle out of the flue.
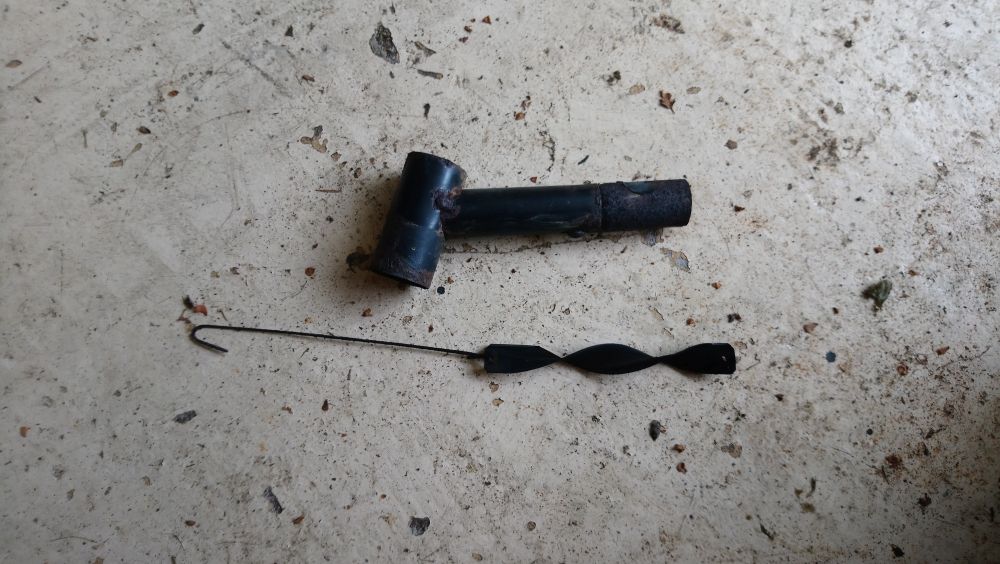
Here is the removed upper flue section and baffle – these can now be cleaned if they have a lot of soot on them.
Next step is to remove the lower vent – procedure is the same as the upper vent. The burner heat shield now needs to be removed – it is the small metal box at the bottom of the heater can and is held in place with two small screws.
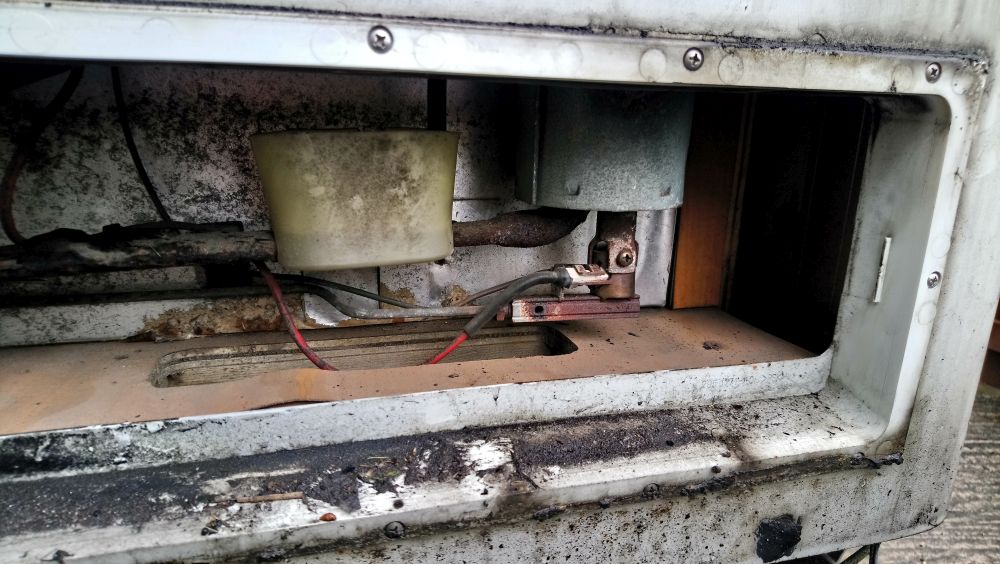
You should now be able to see the burner as shown here. If you are just cleaning the flue then you can move it out of the way by removing the one screw that holds it onto the flue. If you want to clean the burner out you will need to disconnect the gas pipe from it and undo the clamp bolt that holds the ignitor electrode and thermocouple in place.
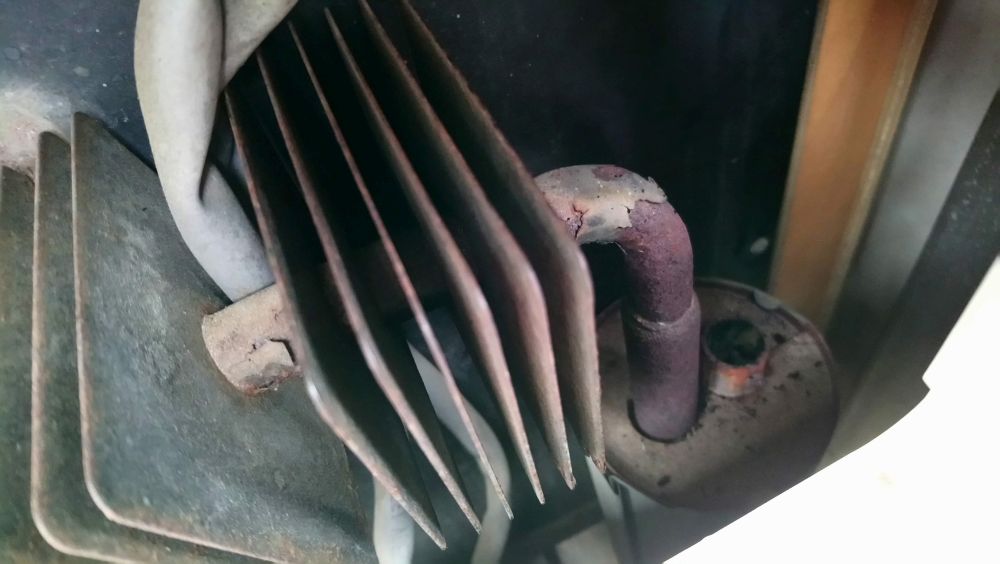
Looking in through the top vent you can see the top of the flue, with this access and the burner removed from the bottom of it you can now sweep it out.
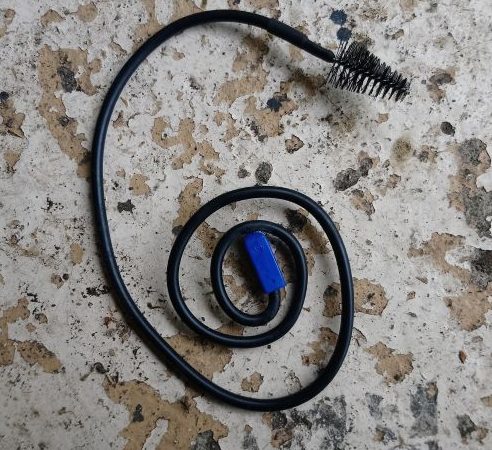
I found a small bottle brush ideal for sweeping out the flue – simple feed it into the flue from the top and keep going until it pops out of the bottom. This brush was sold as a sink drain cleaning device – if you don’t have anything like this you can use electrical cable with the ends frayed out to make your own brush,
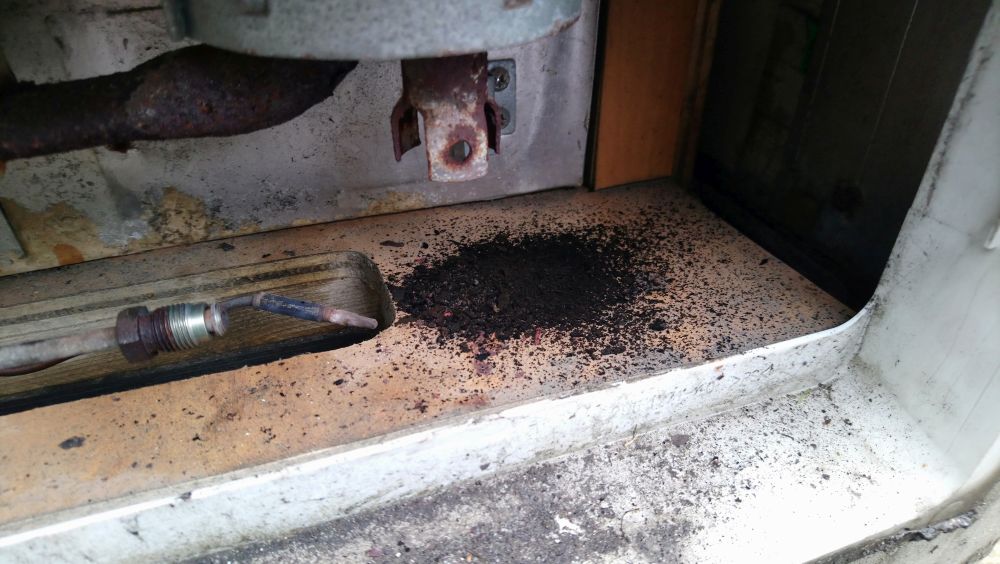
This was the result after sweeping out the flue – it’s only a small flue but you can see a lot of soot came out of it!
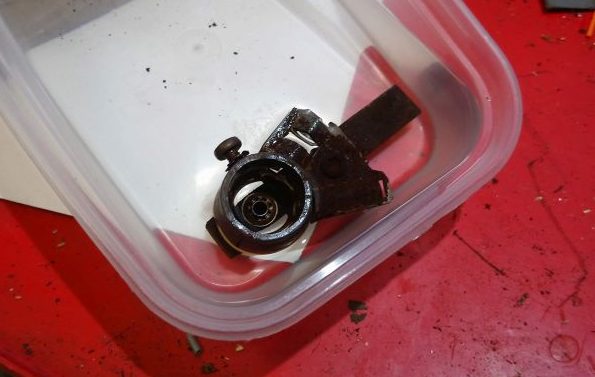
If there is any dirt build up on the burner it is a good idea to clean it up while it’s out. Here it is soaking in Acetone – brake cleaner or similar would also work well. Give it a blow out with a air gun and make sure it is completely dry before reassembly.
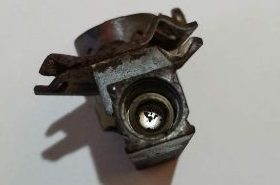
Here you can see the gas jet (which is just a metal disc with a tiny hole in it inserted into the end of the burner). As the jet is so small it is prone to getting blocked, you can see ours had some deposits on it. If required replacement jets are available online.
With everything back together you can test it out, with the fridge lit you should have a nice bright blue flame – a yellow flame indicates a lack of air and potential soot/carbon monoxide formation.
We were having issues with the flue gas smelling and soot formation on the top vent – having performed this service we got rid of these problems and got better cooling performance as well!
Found this information useful? – Want to support Motor-Roam?
Click here to find out how!
Note – the lower fridge vent is behind the rear bumper on some motorhome models – here is a post on removing the rear bumper for access on a 1999 Hymer B544
Saw this recently on a van next to me in a ski resort car park – clever modification of a rear mounted bike rack to carry skis:-
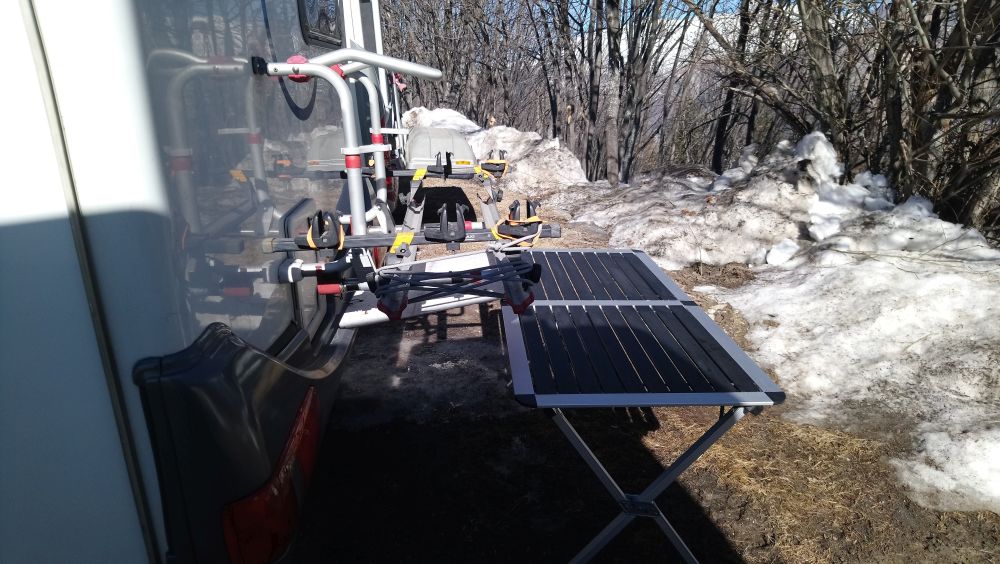
It’s a set of standard, universal ‘gutter mount’ roof bars clamped to the bike carrying channels (the bars have been cut down to suit) Standard roof-bar ski carriers are then mounted to the bars, simple and cheap solution to carrying skis!
This approach could also be extended to anything designed to mount to roof bars, providing you don’t exceed the weight limit of your bike carrier………
Found this information useful? – Want to support Motor-Roam?
Click here to find out how!
For a while we had a nasty vibration in the van (1999 Ducato Hymer B544) when climbing hills at full load around 60-70mph, this turned out to be due to a worn CV joint in one of the driveshafts. In a motorhome the driveline has a pretty tough life – pulling a vehicle that is fully loaded pretty much permanently – so I decided to replace both the driveshafts while I as at it – here’s how:-
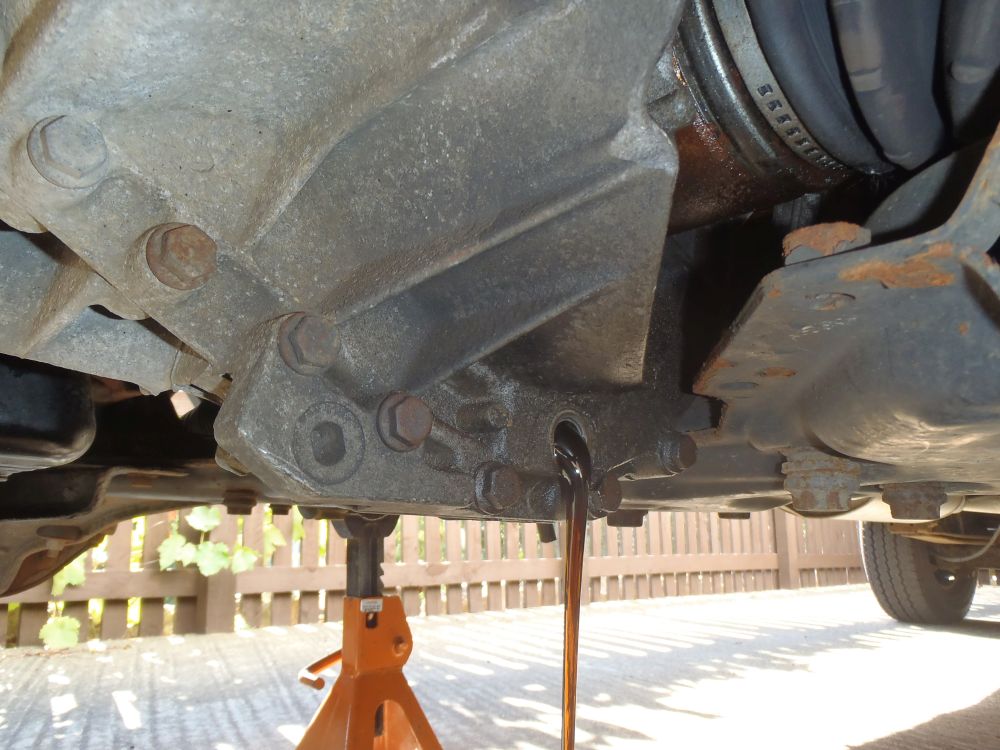
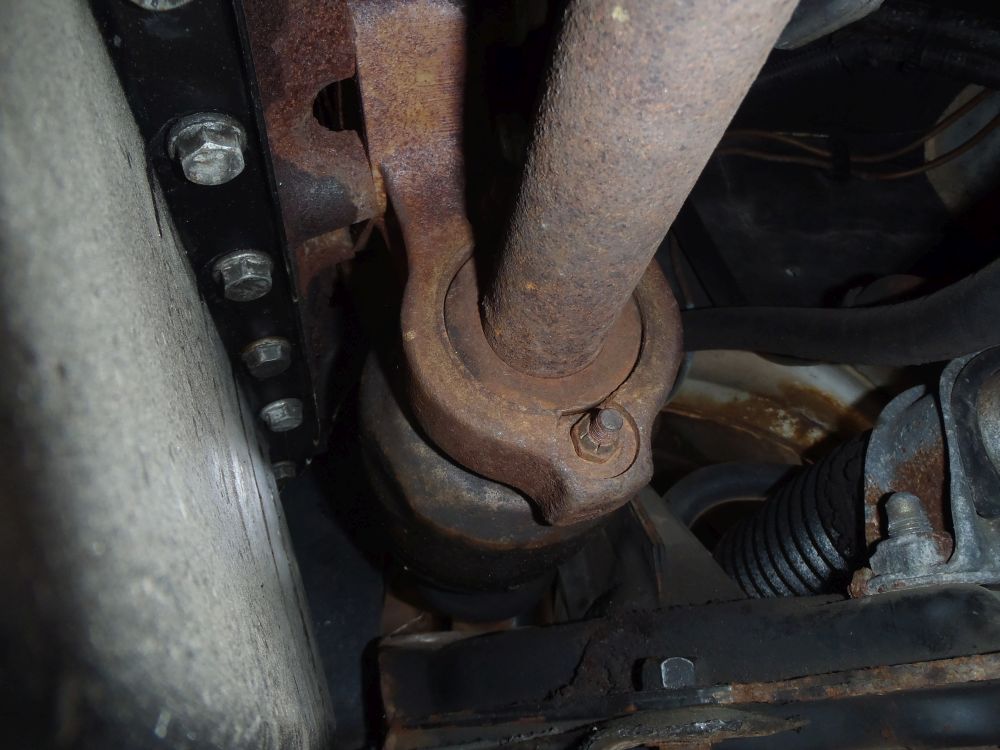
First job was to secure the van on axle stands and drain the gearbox oil (it will all come out anyway when you remove a driveshaft, so you might as well do it now!) The drain plug is in the bottom of the gearbox underneath the inboard end of the left hand driveshaft.
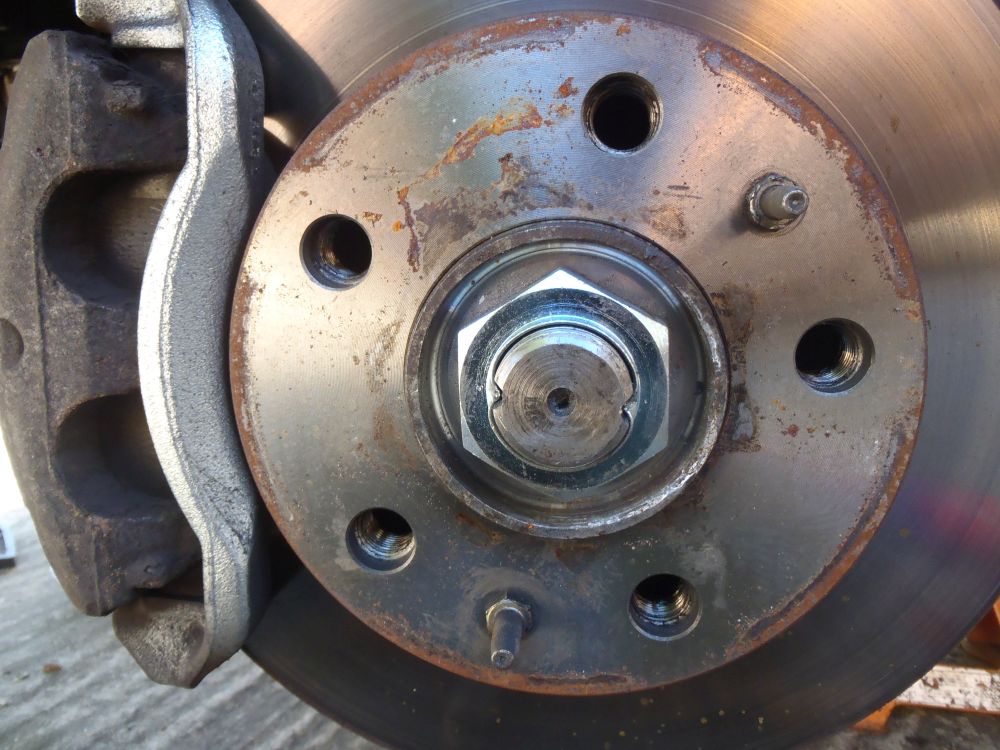
I replaced the left hand driveshaft first, to release the driveshaft from the hub you need to remove the large hub nut which is staked onto the driveshaft – it will be VERY tight!
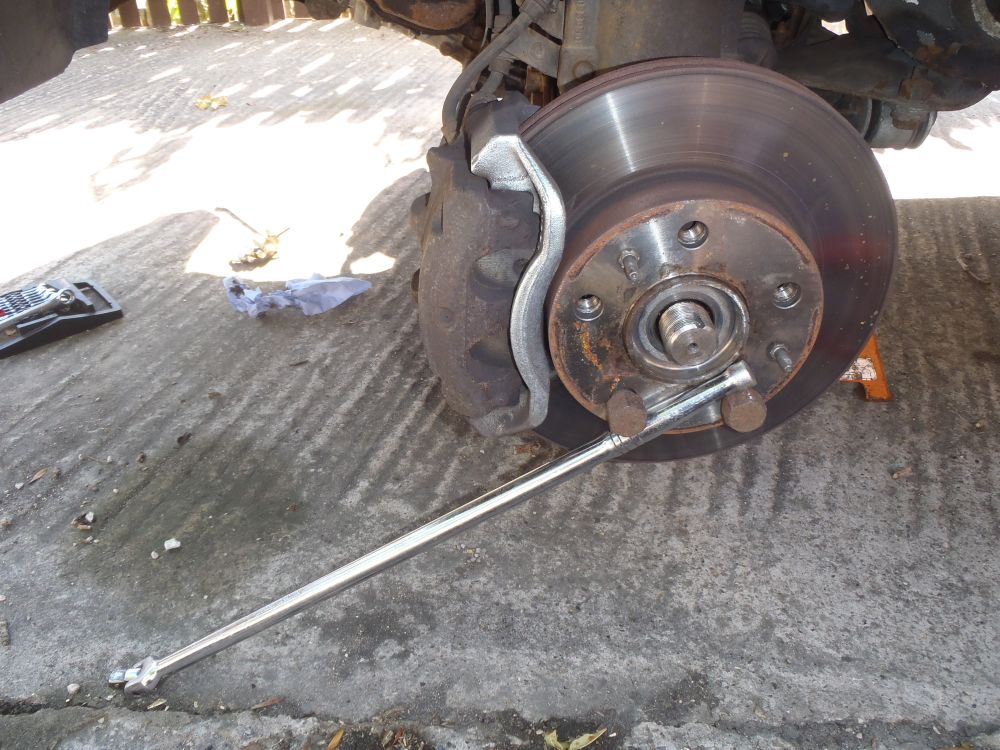
To stop the whole assembly from turning while you remove the hubnut you can put a couple of wheel bolts back in and use a large bar to brace it like this – I used a 1/2″ breaker bar for this.
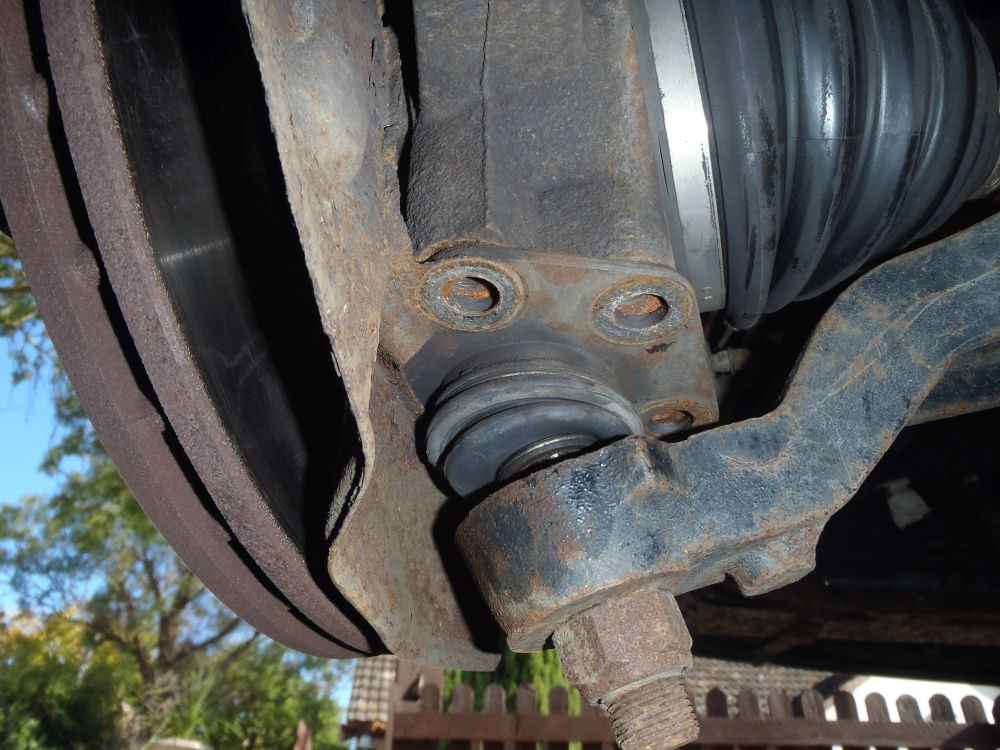
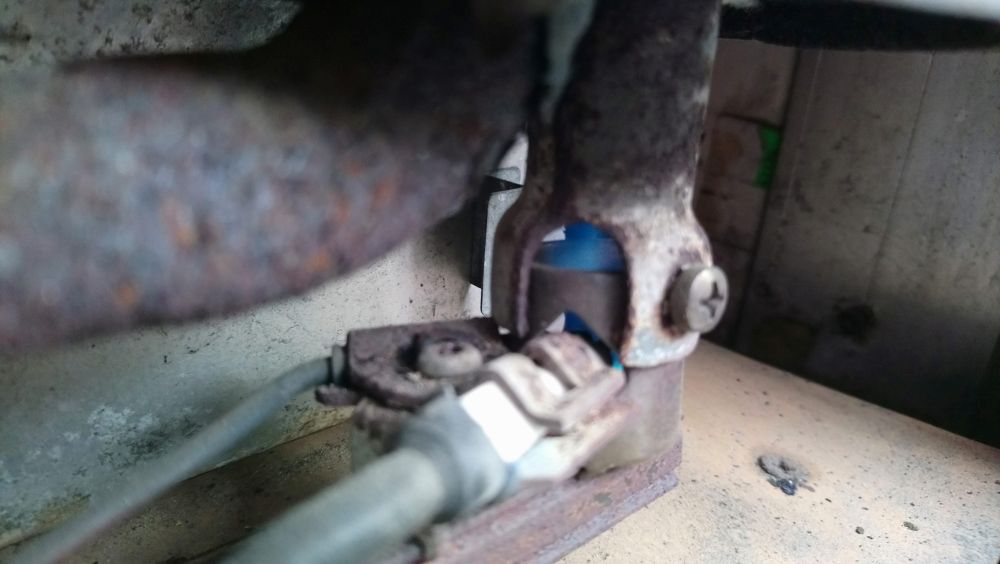
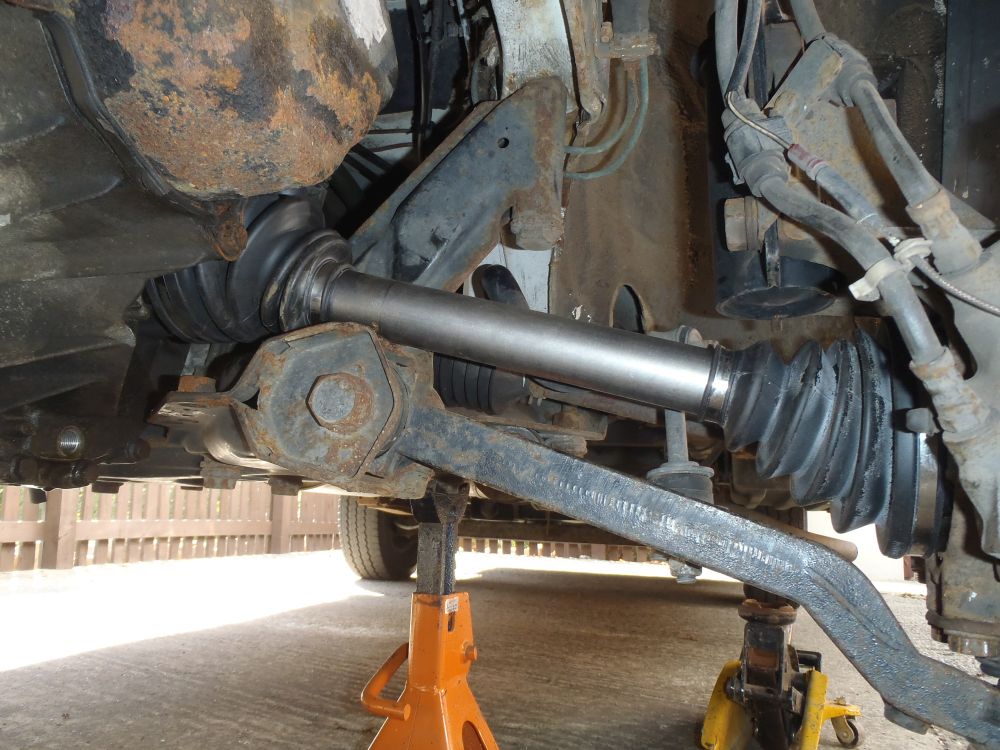
To free the end of the driveshaft from the hub we need to be able to move the hub away from the gearbox. There are a couple of ways to achieve this but I find the easiest method is to unbolt the lower ball joint from the hub to allow the whole suspension strut to swing outwards.
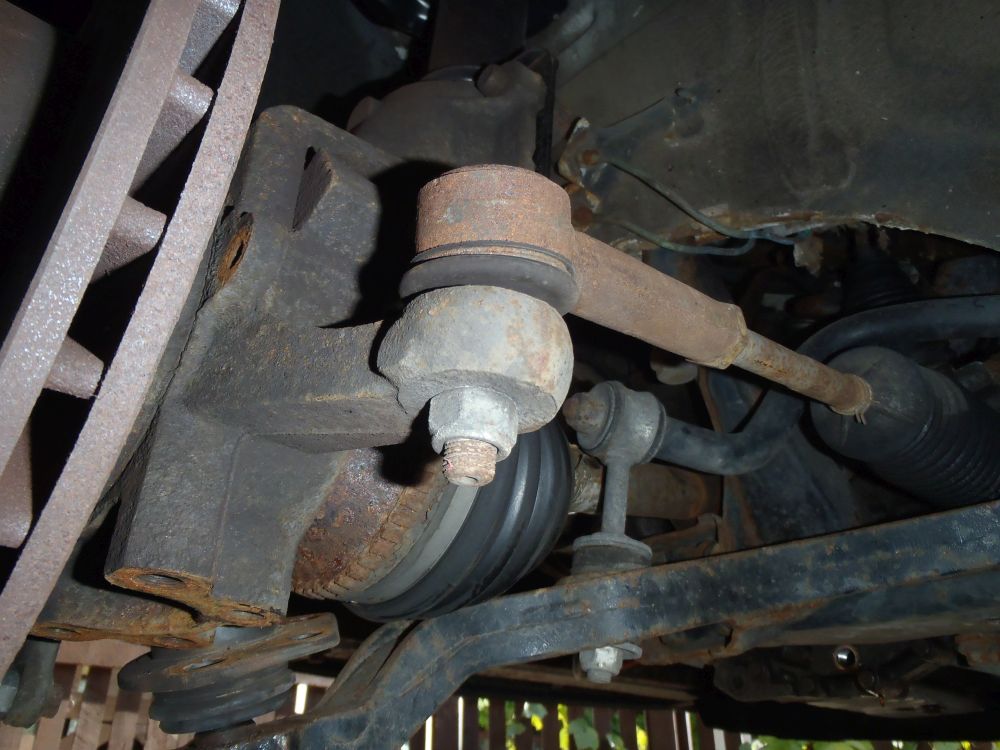
To allow the strut to move far enough you will also need to disconnect the steering arm by removing the ball joint securing nut.
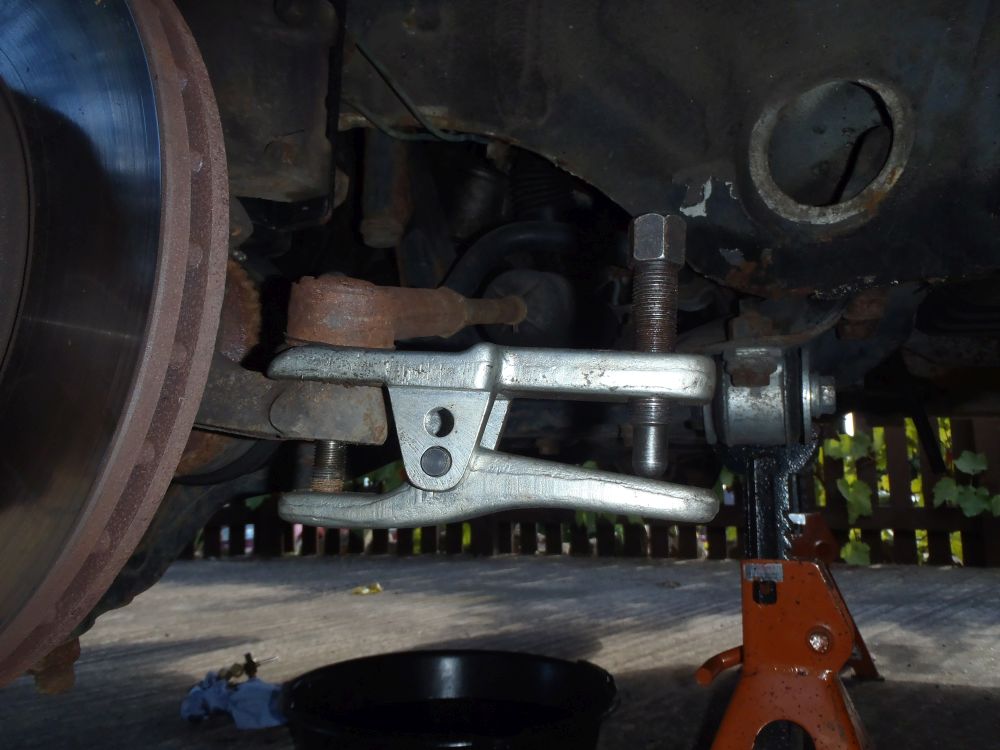
A large ball joint splitter can be used to free the ball joint from the hub. If you don’t have a splitter you could instead unscew the steering rack arm from the ball joint, but this can upset the steering geometry if you don’t screw it back in by the exact same amount when you reassemble it.
Note: you will need to lever the lower suspension arm downwards to separate the arm from the hub. Disconnecting the anti-roll back drop link from the suspension arm will make this easier.
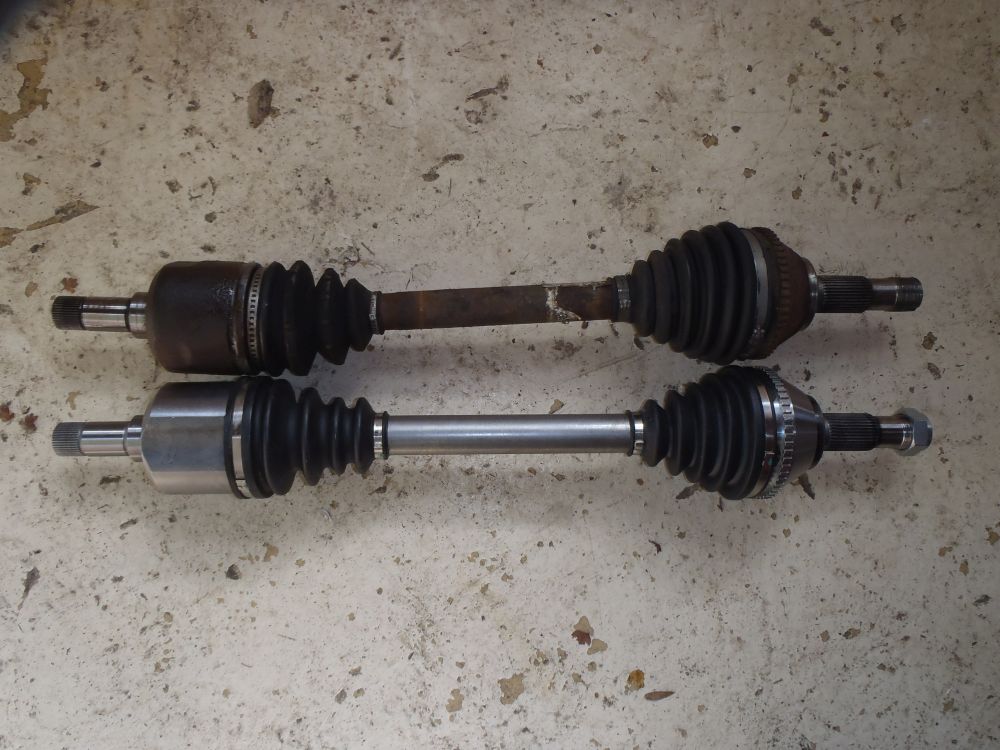
Once the outer end of the driveshaft is free from the hub you can pull the whole thing out of the gearbox – it might need a sharp tug on the inside CV joint to free it. Here is the old driveshaft on the top, shiny new one underneath.
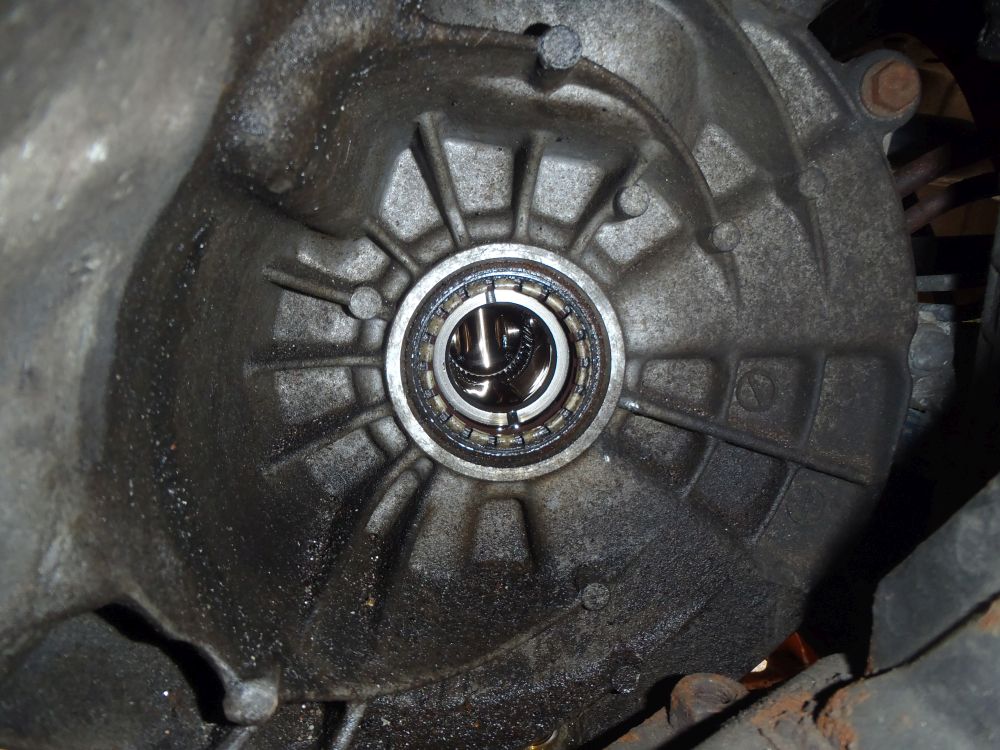
It is a good idea to replace the driveshaft seals in the gearbox while the driveshafts are out – here is the old seal at the gearbox output.
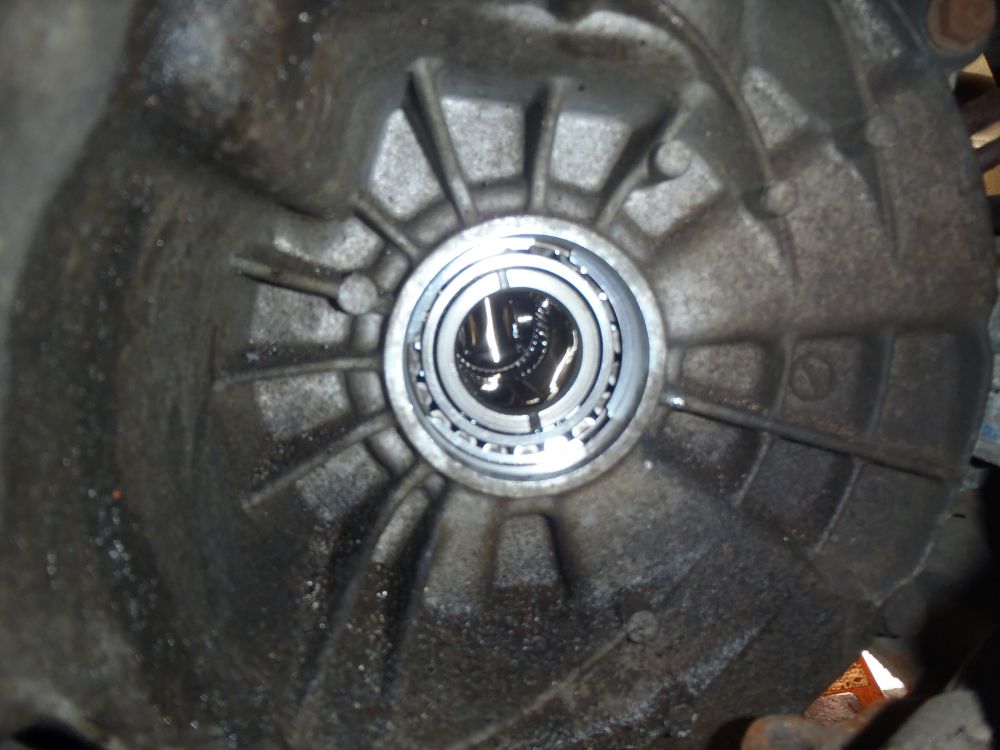
Use a large screwdriver or pry bar to lever the old seal out, being careful not to scratch the bore it goes in. Here is the gearbox with the seal removed.
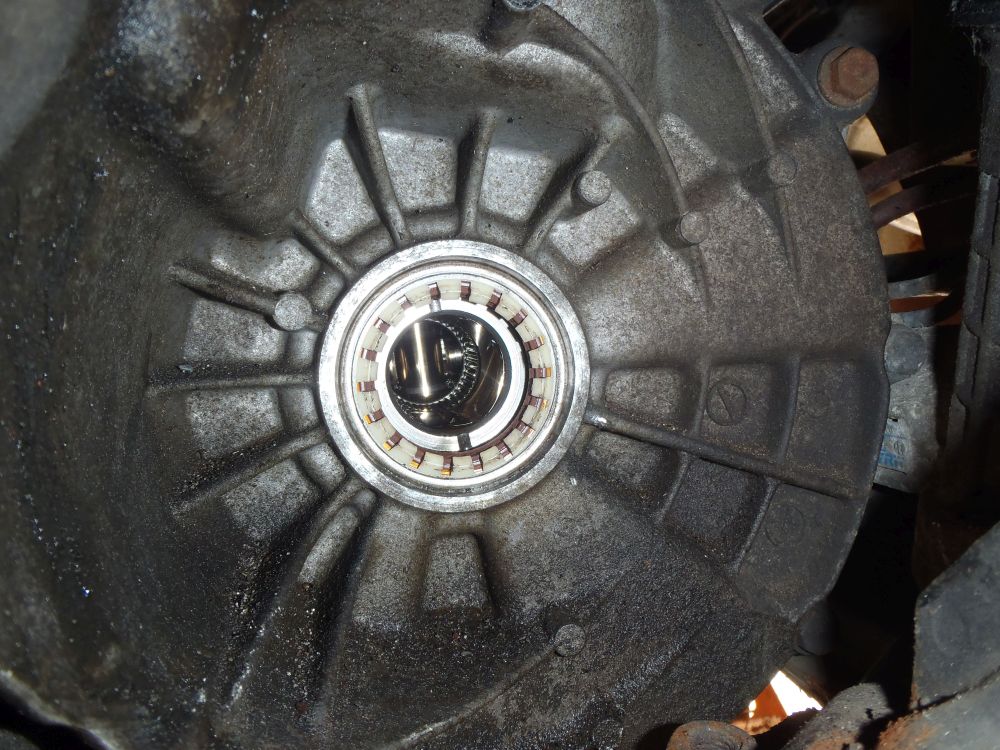
Ensure the bore is clean and lubricate the new seal with a bit of fresh gearbox oil before carefully pushing it into the gearbox. Make sure it goes in straight and seats properly.
Here is the new driveshaft in place and everything reassembled. Be careful when inserting the driveshaft into the gearbox that the splines don’t damage the seal as it goes in as this will make the new seal leak – a helper can be handy here to take the weight of the driveshaft while you guide it into place.
The process for replacing the right hand driveshaft is essentially the same except it has an intermediate bearing to support the inboard CV joint. You will need to unbolt the bearing carrier from the back of the engine block to remove the driveshaft.

Once the driveshaft is out you can take the bearing carrier off, you will be left with something like this (new driveshaft on top, old on the bottom)
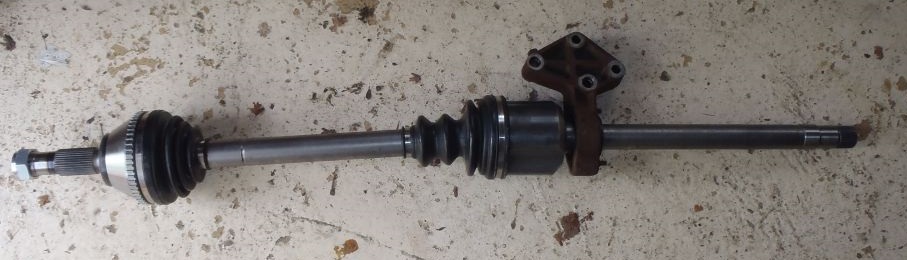
And here is the new driveshaft with the bearing carrier fitted, ready to be fitted to the van.
Once everything is back together don’t forget to refill the gearbox with fresh oil – it can be filled by removing the reversing lamp switch from the top of the gearbox and filling through the hole the switch goes in. There is no way of measuring how full the gearbox is so you will need to measure out the correct quantity of oil before filling. Some people recommend slightly over-filling the gearbox to help protect 5th gear, which can be a problem with these boxes. I use 2.7 litres, but my 5th gear had nearly 200000km on it with a 2.5 litre fill level without causing any problems!
If you found this useful you might like to read the other posts on suspension/driveline overhaul:-
Suspension struts, Engine Mounts, Brakes & Wishbones
Any questions or comments? – let me know below!
Found this information useful? – Want to support Motor-Roam?
Click here to find out how!
One of the most annoying things on our Hymer Motorhome is the barely adequate headlights – main beam is not too bad but dipped beam is terrible! I decided to try some different bulbs to see if I could improve the situation…..
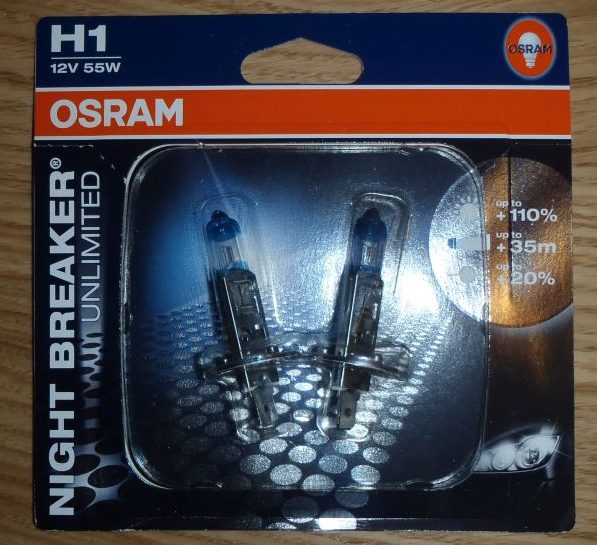
The safe choice is something like these ‘Night Breaker’ bulbs from Osram, basically a better quality standard bulb that offers 10% more light and 35m better visibility than a typical bulb
I also decided to try some of the cheap LED bulbs that seem to be flooding the market, so bought a pair of these H1 LED bulbs from eBay:-
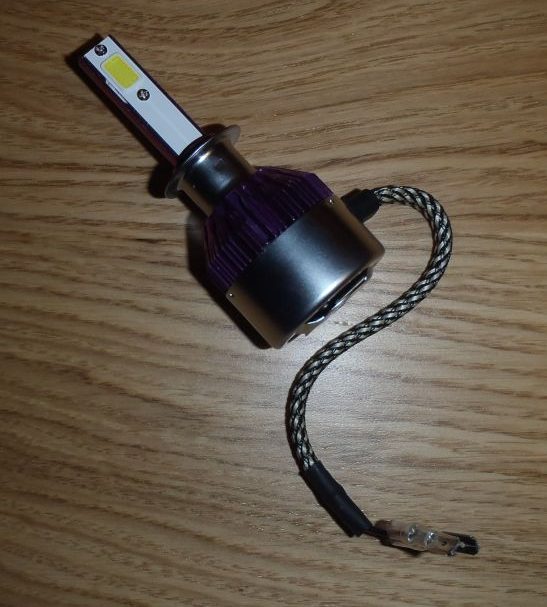
There are a bit of a fiddle to fit, as you need to modify the wiring to suit the two male spade terminals on this bulb, and the big heatsink/fan assembly sticks out of the back of the bulb holder so the rear cover no longer fits. I was also dubious as to how long they would last as they are driven pretty hard, but they’ve been in about six months now and are still going strong so far.
The light output is a reasonable amount better than standard bulbs, and is much whiter, which helps with clarity. The beam pattern seems better defined somehow as well. The cycnic in me is still expecting them to fail spectacularly at some point though, so there’s still a pair of Night Breaker bulbs in the door pocket 🙂
Found this information useful? – Want to support Motor-Roam?
Click here to find out how!
Follow us on Facebook!

© 2026 Motor-Roam
Theme by Anders Norén — Up ↑