A nasty judder through the vehicle when pulling away from a stop seems to be a common complaint with Ducato based Motorhomes – read on to understand why this happens and how to sort it…….
When you pull away from stationary you need to couple the engine’s crankshaft (which is rotating) to the drive wheels (which aren’t!) – when this isn’t achieved smoothly you get the characteristic jerky pull away/driveline judder. There are two main components likely to cause this phenomenon – the clutch and the engine/gearbox mounts. In order to understand what is going on it helps to have a basic understanding of what these components are, and what they do.
The simplest components are the engine/gearbox mounts, these are effectively just rubber blocks designed to mount the engine and gearbox to the chassis, while allowing some movement to limit transmission of vibrations into the vehicle structure. As they get old the rubber can degrade and may become detached from the rest of the mount completely – contamination with oil etc. can also accelerate the rate of decline.
When you go to pull away you are applying a torque to make the road wheels rotate, because of Newton’s third law (for every action there is an equal and opposite reaction) the engine and gearbox are trying to rotate in the opposite direction. As you can imagine this puts a lot of force on the engine & gearbox mounts, whose job it is to make sure the engine stays put and only the wheels rotate! If the mounts are worn this can cause the engine to shake, in turn causing vibration in the driveline and the annoying judder.
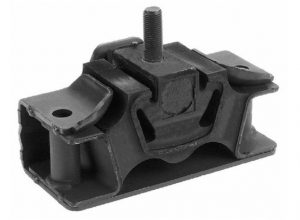
The x230 Ducato has three mounts, one at either side of the engine/gearbox assembly and one underneath at the rear of the gearbox, the side mounts like this:-
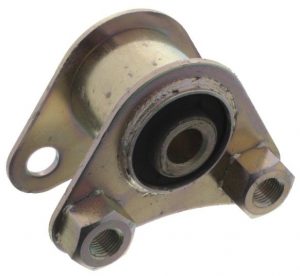
And the lower rear mount looks like this:-
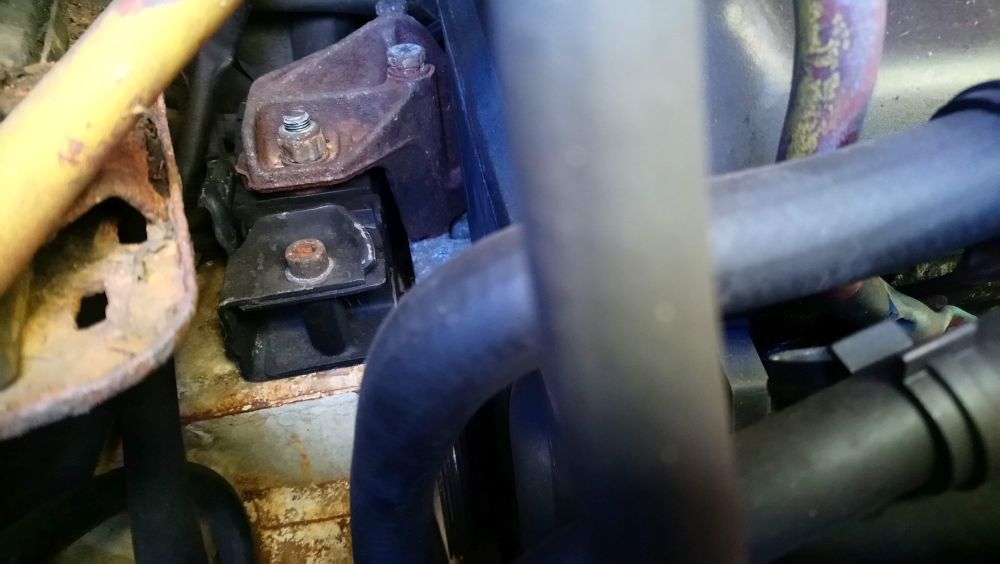
Here you can see the mounts as installed on the vehicle, left hand engine mount, looking in to the engine bay from the front (on the end of the engine, just underneath and to the right of the battery tray):-
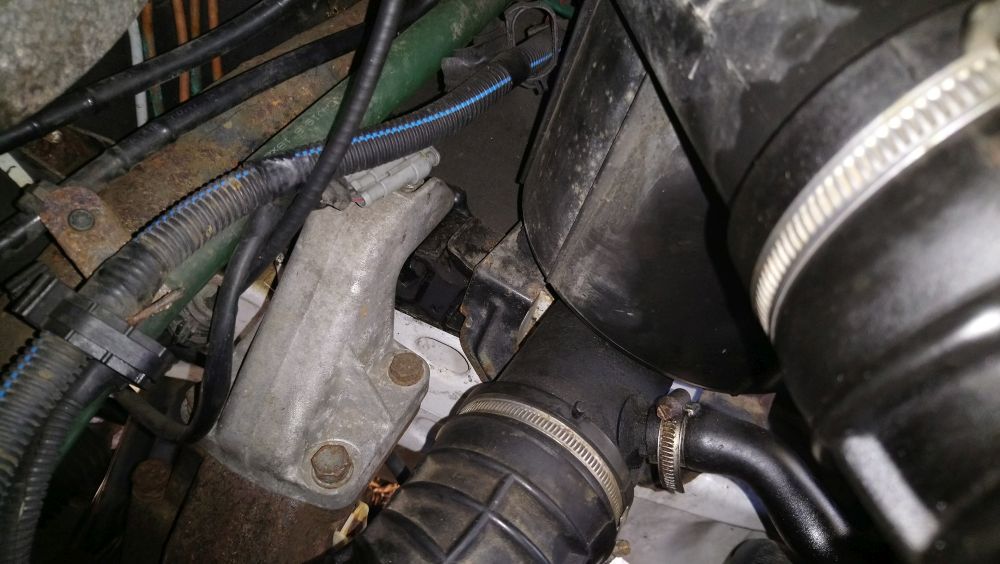
Right hand mount, above the end of the gearbox just underneath and behind the air filter housing:-
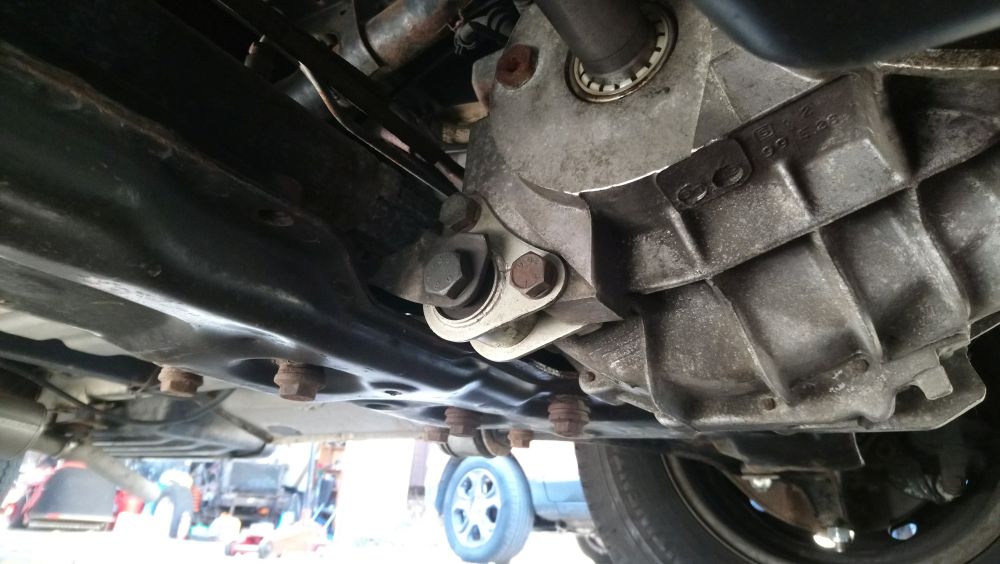
Rear mount as seen from underneath – on the back of the gearbox:-
Note – there is another rubber mount element in the link that connects the rear engine mount to the subframe, this will be obvious when you unbolt it. This may also be worn and need replacing.
All these mounts are cheap and easy to replace so a good place to start when trying to track down a judder when pulling away. If they are very old it is a good idea to replace them anyway to help prevent future issues down the road. Remember that when you unbolt them the engine & gearbox will be unsupported so only do one at a time and support the engine when you have any removed – a trolley jack underneath the engine or gearbox (with a piece of wood or similar to protect the area you are supporting) works well for this. It may also be useful to have a helper nearby when fitting the new mounts as the assembly can move a little when unsupported, making it difficult to re-align the mounting holes. Having an assistant to push/pull on the engine while you slot the bolts in makes this much easier!
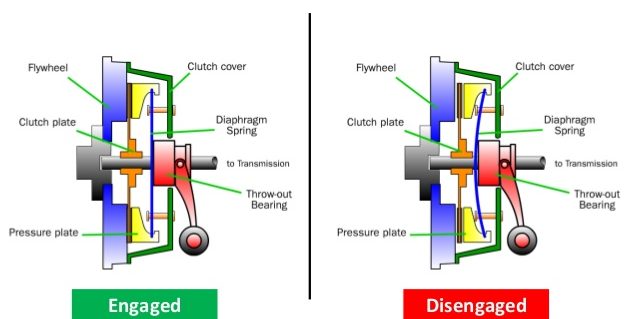
The other item that may be causing problems is the clutch – this is a friction element that connects the gearbox input shaft to the engine’s crankshaft – allow power transfer into the gearbox and on to the wheels. When you press the clutch pedal the clutch disc is moved out of contact with the flywheel on the end of the crankshaft disconnecting the engine from the gearbox, when you release the clutch pedal spring pressure pushed the disc onto the flywheel, reconnecting the two. When you are stationary the flywheel is rotating at engine speed but the clutch disc is stopped, so there is a period as the clutch pedal is released where the disc is in contact with the flywheel but slipping rather than being locked together solidly. If the clutch is not performing as well as it should it can ‘grab and release’ as it slips on the flywheel, causing the juddering effect as you pull away. This can be caused by a worn clutch, contamination (oil or similar) on the clutch/flywheel surfaces, or sometimes damage to the flywheel surface itself.
This diagram may help explain the working of the clutch:-
The clutch itself (normally a three-part kit of friction plate, clutch cover/pressure plate and throw-out bearing) is not too expensive, but there is a lot of labour involved so it can be expensive to have a clutch replaced at a garage. It is entirely possible to replace the clutch on your driveway at home (I did), but it is fairly involved as it requires removal of the entire gearbox, and manhandling the heavy gearbox can be tricky – especially if you are on your own!
I won’t go in to the full details of how to change the clutch (I assume if this is a job you are willing to tackle you are competent enough to work it out!), but there is one point worth noting:- The clutch on the Ducato 230 5-speed gearbox is a ‘pull-clutch’ not the typical ‘push-clutch’. This means the throw out bearing pulls on the diaphragm spring rather than pushes on it as shown in the diagram above. Because of this you can’t simply unbolt the gearbox from the engine and pull it away like you normally would, as the throw out bearing is attached to the clutch, while the clutch fork which operates the throw out bearing is attached to the gearbox…..
To enable removal of the gearbox the clutch fork pivots on a pin/shaft that can be removed from the side of the gearbox – you will either need a special tool to pull it out of the gearbox or knock something up with metal tube/washers/bolts to do the same job (that’s what I did!) With the pivot pin removed the clutch fork can then be pulled out of the thrust bearing and removed from gearbox, allowing the gearbox to be removed normally. Re-fitting is the reverse – gearbox back on, fork back in then shaft pushed back though the fork. New release bearing come with a plastic collar on them that retains the circlip which fixes it to the diaphragm spring – this allows the bearing to snap into place by pulling on the clutch fork once everything is back together.
When the clutch is removed you will also be able to check for damage to the surface of the flywheel – if there are patches of glazing on the flywheel cleaning it up with a light abrasive can help smooth out clutch engagement, if it’s really bad it is a good idea to take the flywheel to an engineering shop for resurfacing.
Replacing the mounts and clutch completely sorted the judder on my 1999 Hymer B544 – hopefully it will be the same for you!
Note – driveline clocks/judder can also be caused by work suspension components, but in this case it is usually over rough surfaces rather than while pulling away from standstill. Click here for a post of refreshing Ducato suspension components:-
Ducato suspension refresh

Leave a Reply