The Fiat Ducato, Citroen Relay/Jumper and Peugeot Boxer vans together account for the basis of nearly 75% of all motorhomes manufactured in Europe. Each of these vans are nearly identical apart from the finishing trim, as they are all built in the same factory and to the same design as part of a joint venture between Fiat and Peugeot/Citroen (the joint venture is the SEVEL company).
Continue readingTag: Ducato (page 1 of 2)
For a while we had a nasty vibration in the van (1999 Ducato Hymer B544) when climbing hills at full load around 60-70mph, this turned out to be due to a worn CV joint in one of the driveshafts. In a motorhome the driveline has a pretty tough life – pulling a vehicle that is fully loaded pretty much permanently – so I decided to replace both the driveshafts while I as at it – here’s how:-
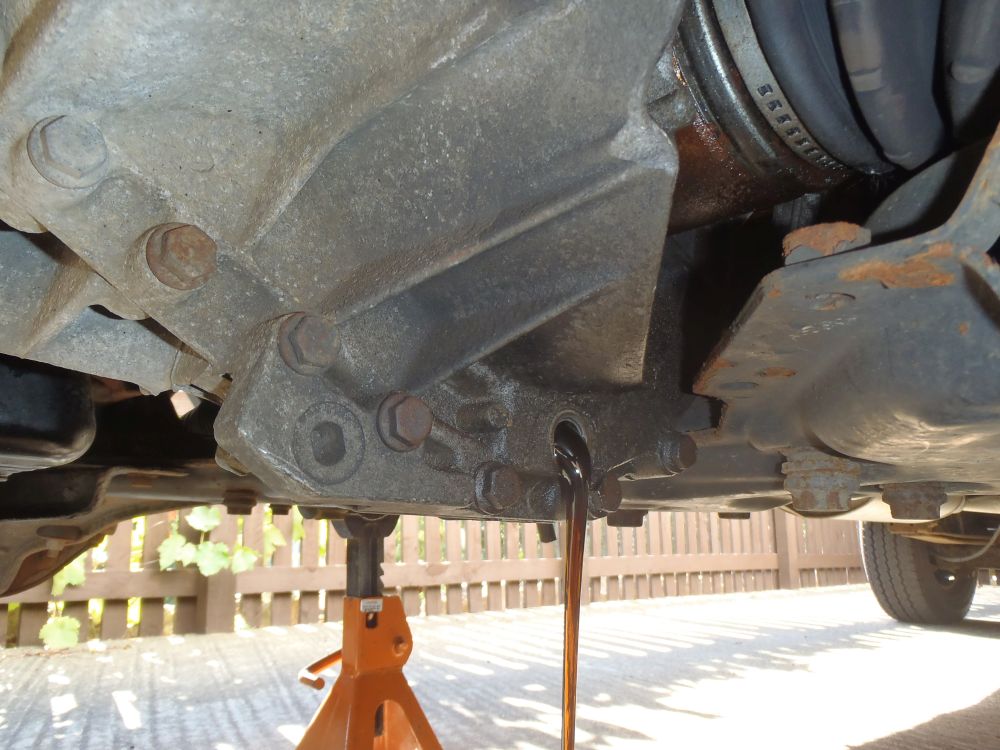
First job was to secure the van on axle stands and drain the gearbox oil (it will all come out anyway when you remove a driveshaft, so you might as well do it now!) The drain plug is in the bottom of the gearbox underneath the inboard end of the left hand driveshaft.
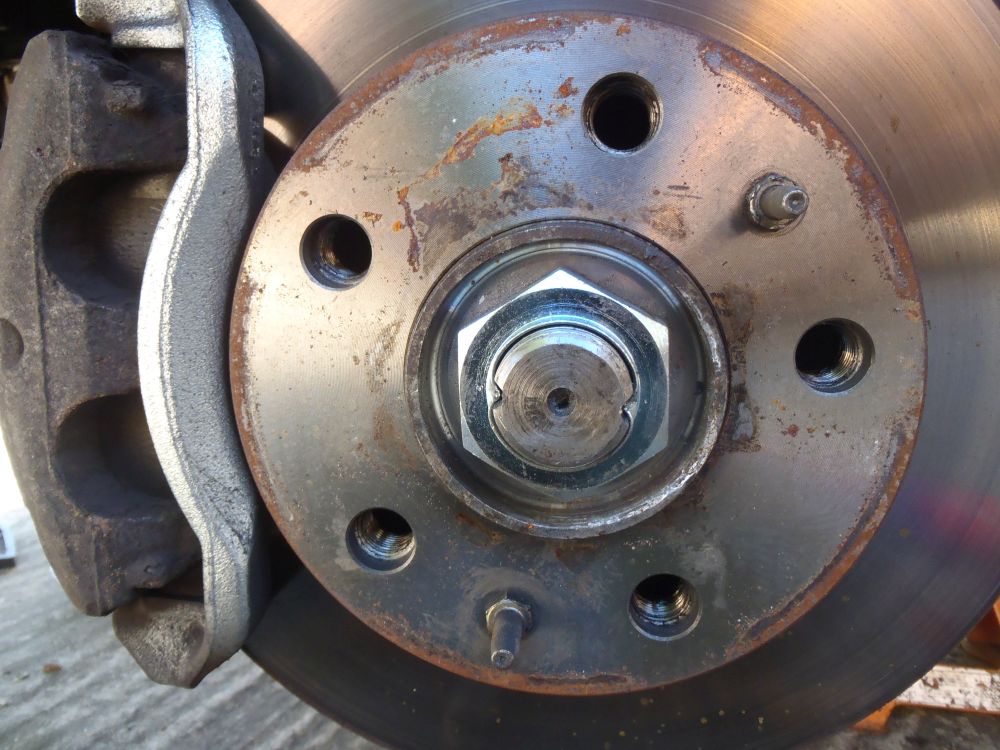
I replaced the left hand driveshaft first, to release the driveshaft from the hub you need to remove the large hub nut which is staked onto the driveshaft – it will be VERY tight!
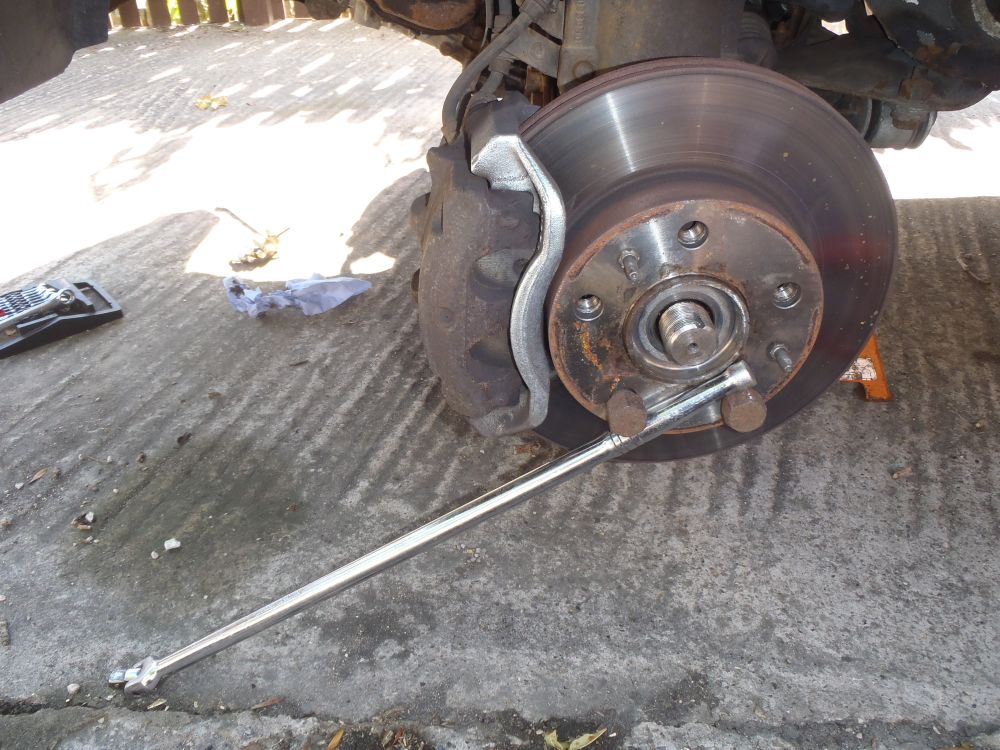
To stop the whole assembly from turning while you remove the hubnut you can put a couple of wheel bolts back in and use a large bar to brace it like this – I used a 1/2″ breaker bar for this.
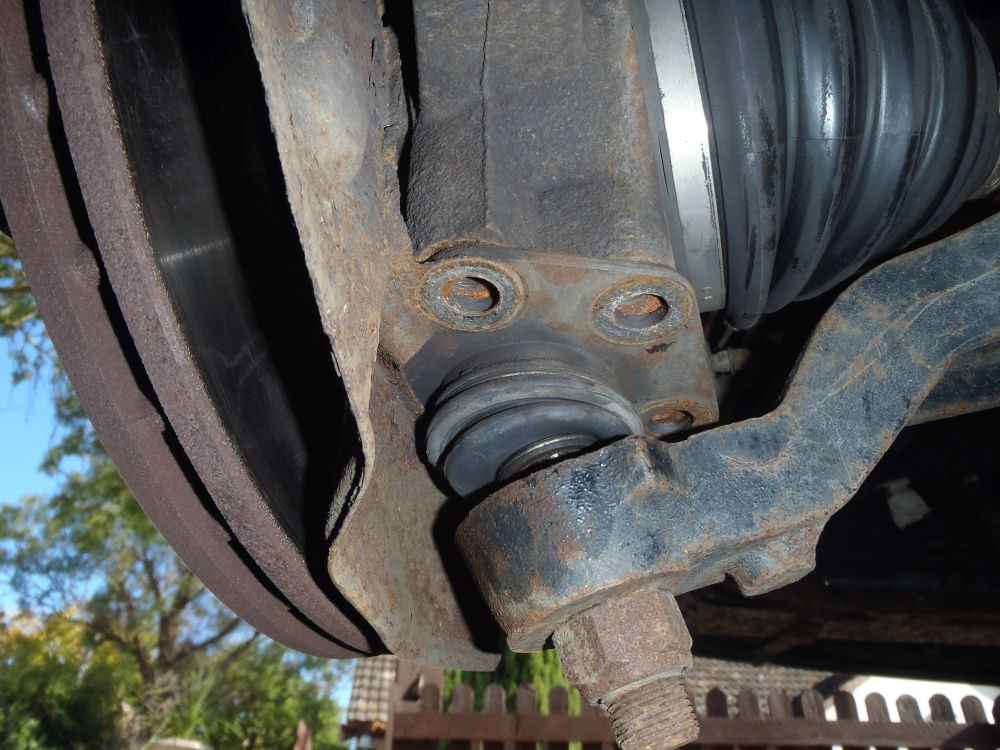
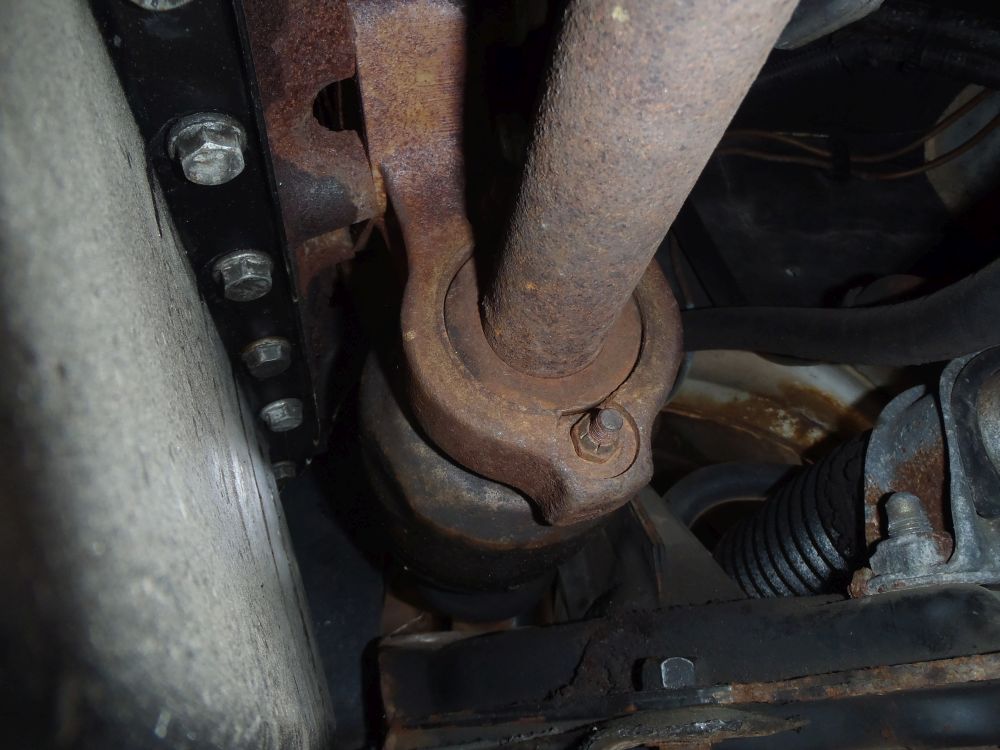
To free the end of the driveshaft from the hub we need to be able to move the hub away from the gearbox. There are a couple of ways to achieve this but I find the easiest method is to unbolt the lower ball joint from the hub to allow the whole suspension strut to swing outwards.
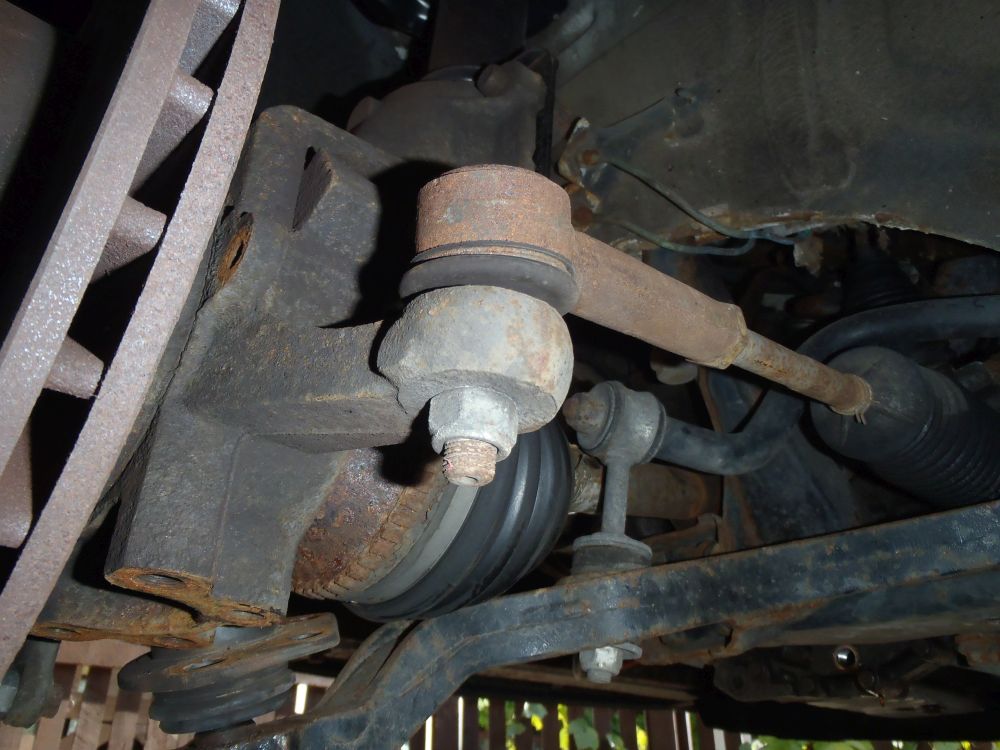
To allow the strut to move far enough you will also need to disconnect the steering arm by removing the ball joint securing nut.
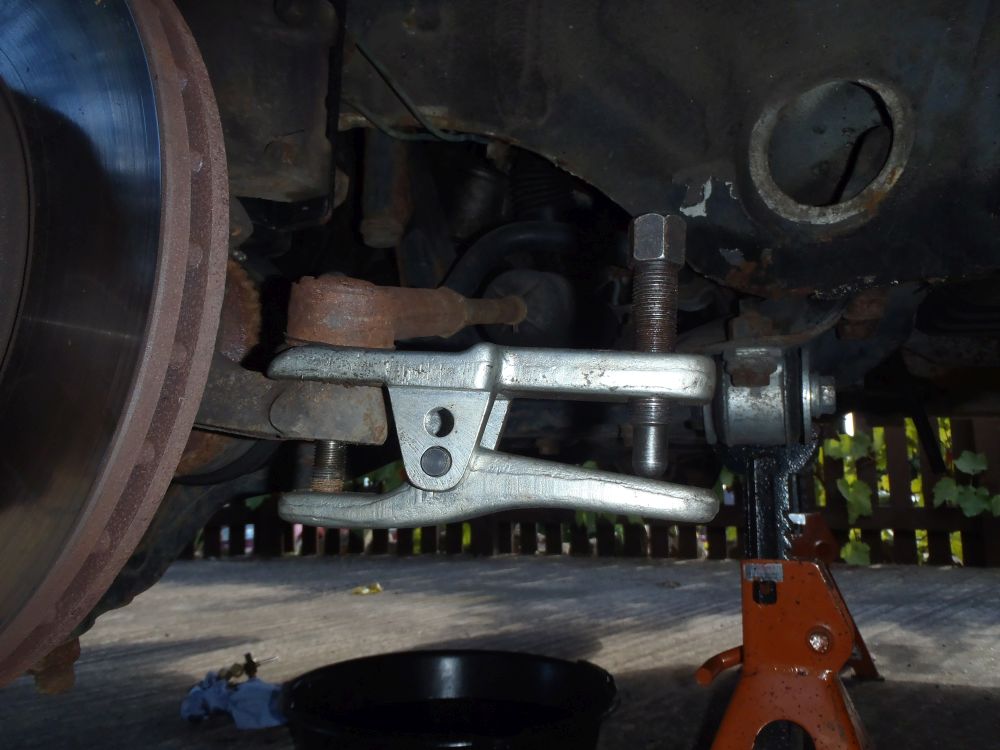
A large ball joint splitter can be used to free the ball joint from the hub. If you don’t have a splitter you could instead unscew the steering rack arm from the ball joint, but this can upset the steering geometry if you don’t screw it back in by the exact same amount when you reassemble it.
Note: you will need to lever the lower suspension arm downwards to separate the arm from the hub. Disconnecting the anti-roll back drop link from the suspension arm will make this easier.
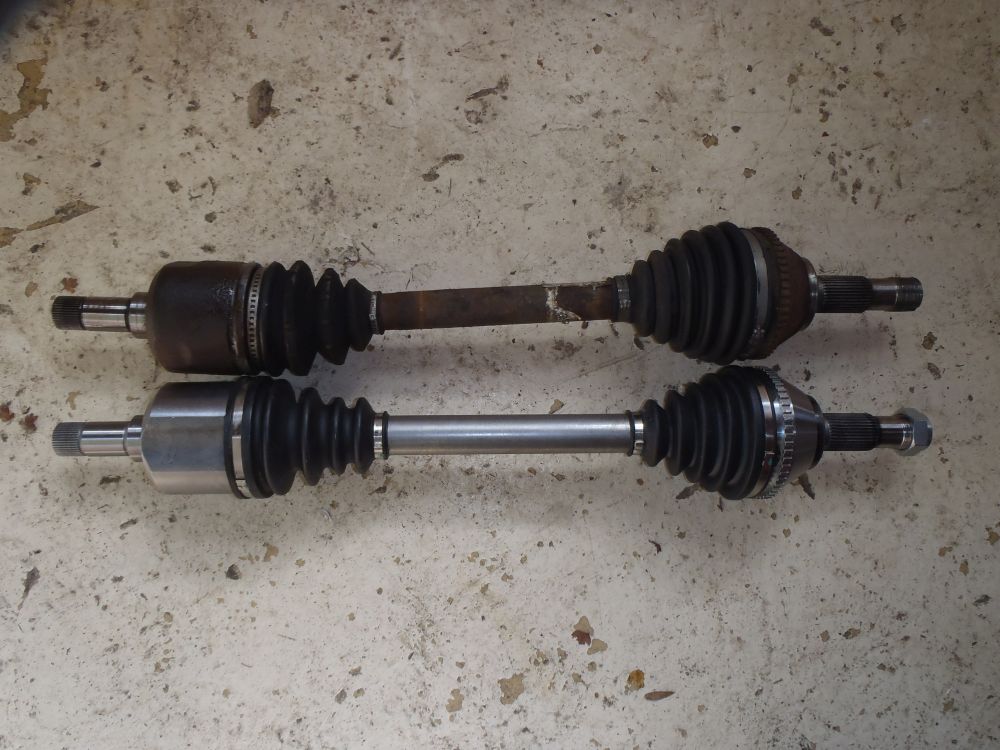
Once the outer end of the driveshaft is free from the hub you can pull the whole thing out of the gearbox – it might need a sharp tug on the inside CV joint to free it. Here is the old driveshaft on the top, shiny new one underneath.
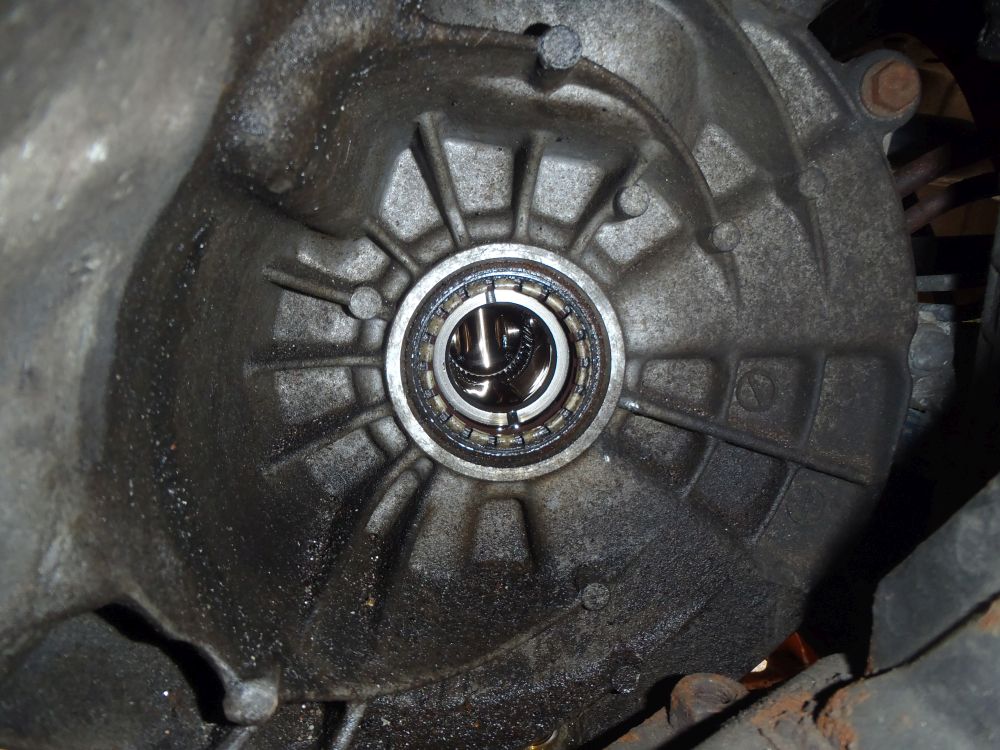
It is a good idea to replace the driveshaft seals in the gearbox while the driveshafts are out – here is the old seal at the gearbox output.
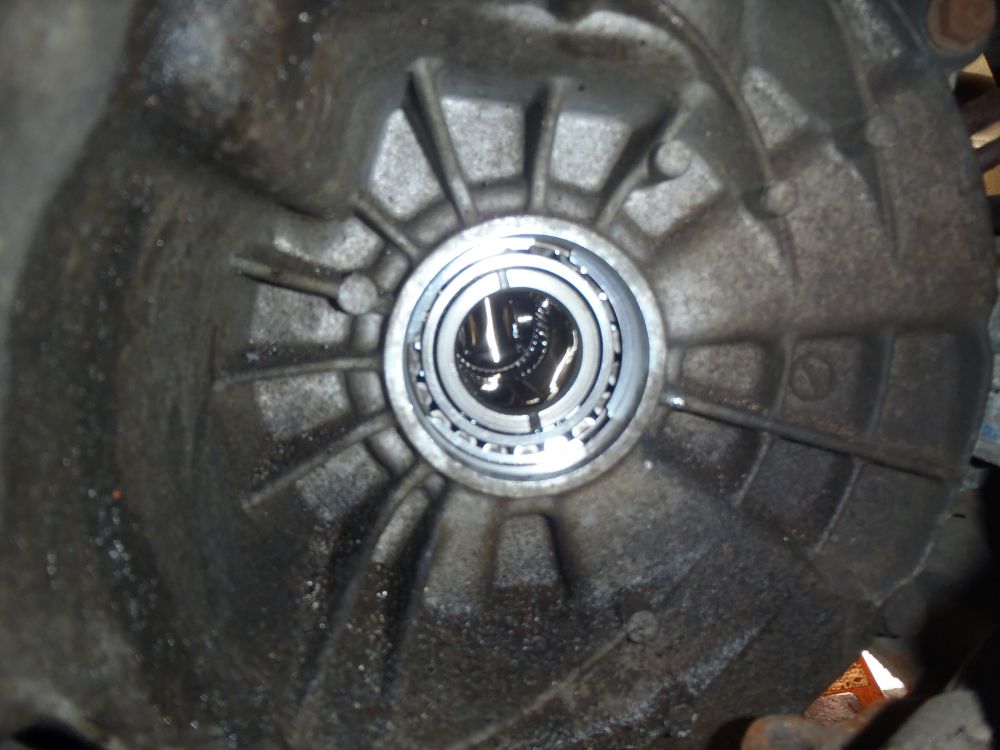
Use a large screwdriver or pry bar to lever the old seal out, being careful not to scratch the bore it goes in. Here is the gearbox with the seal removed.
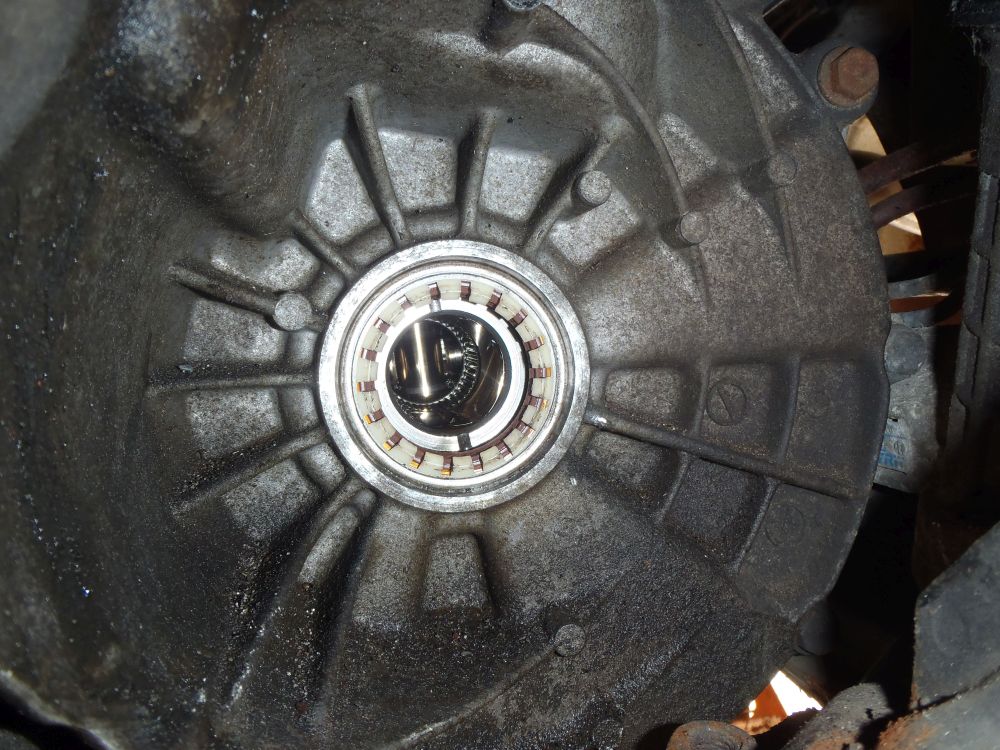
Ensure the bore is clean and lubricate the new seal with a bit of fresh gearbox oil before carefully pushing it into the gearbox. Make sure it goes in straight and seats properly.
Here is the new driveshaft in place and everything reassembled. Be careful when inserting the driveshaft into the gearbox that the splines don’t damage the seal as it goes in as this will make the new seal leak – a helper can be handy here to take the weight of the driveshaft while you guide it into place.
The process for replacing the right hand driveshaft is essentially the same except it has an intermediate bearing to support the inboard CV joint. You will need to unbolt the bearing carrier from the back of the engine block to remove the driveshaft.

Once the driveshaft is out you can take the bearing carrier off, you will be left with something like this (new driveshaft on top, old on the bottom)
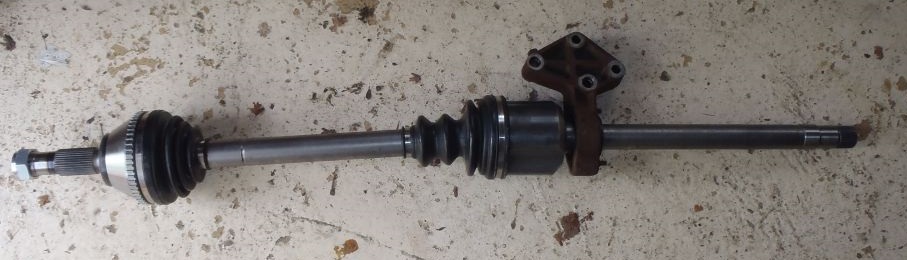
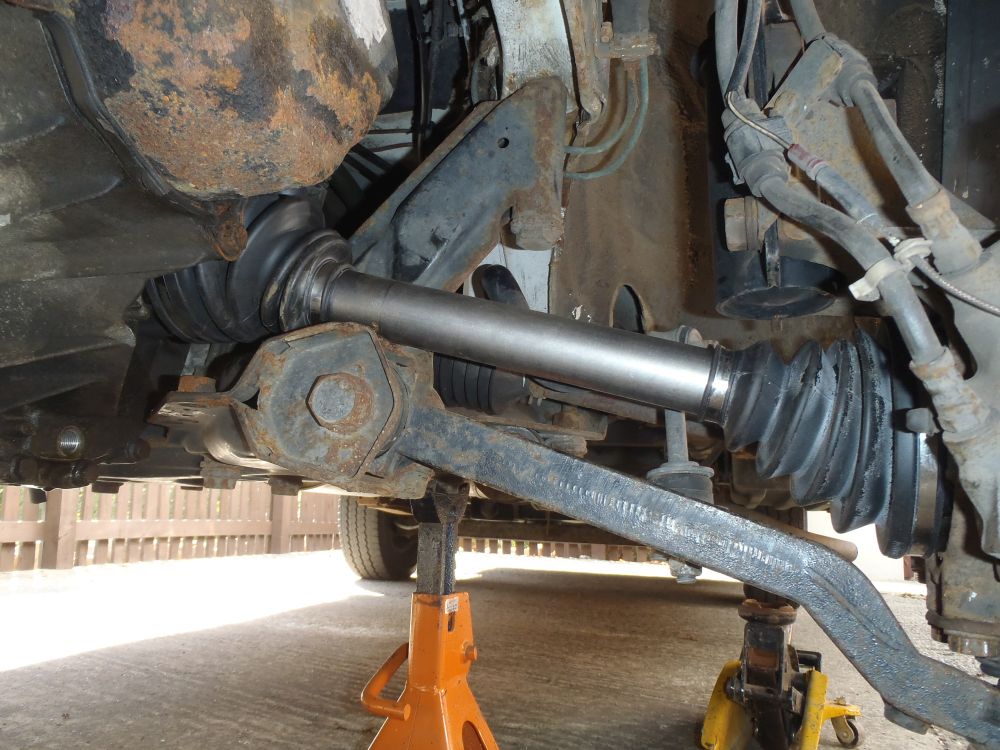
And here is the new driveshaft with the bearing carrier fitted, ready to be fitted to the van.
Once everything is back together don’t forget to refill the gearbox with fresh oil – it can be filled by removing the reversing lamp switch from the top of the gearbox and filling through the hole the switch goes in. There is no way of measuring how full the gearbox is so you will need to measure out the correct quantity of oil before filling. Some people recommend slightly over-filling the gearbox to help protect 5th gear, which can be a problem with these boxes. I use 2.7 litres, but my 5th gear had nearly 200000km on it with a 2.5 litre fill level without causing any problems!
If you found this useful you might like to read the other posts on suspension/driveline overhaul:-
Suspension struts, Engine Mounts, Brakes & Wishbones
Any questions or comments? – let me know below!
Found this information useful? – Want to support Motor-Roam?
Click here to find out how!
The 8140.43 2.8L Diesel engine used in various Fiat Ducato, Peugeot Boxer, Citroen Relay and other vans and MotorHomes uses a fairly unusual cold start system, here we’ll look at how it works so if you need to do any troubleshooting, you know where to start!
Continue readingA common issue on Hymer B-class motorhomes seems to be the headlight height adjustment failing.
The system is hydraulic and consists of a main unit on the back of height adjuster knob in the dash connected to hydraulic actuators on the headlights themselves via tubing. Over time the oil can leak out of the system leaving the headlights in their lowest position.
Fortunately replacement parts are available. Unfortunately it is a sealed system that needs to be replaced as a whole, and is likely to cost over £100 for the parts! Occasionally you might get lucky and find cheaper parts overseas. I managed to get parts shipped from Germany which saved a decent amount versus buying them in the UK.
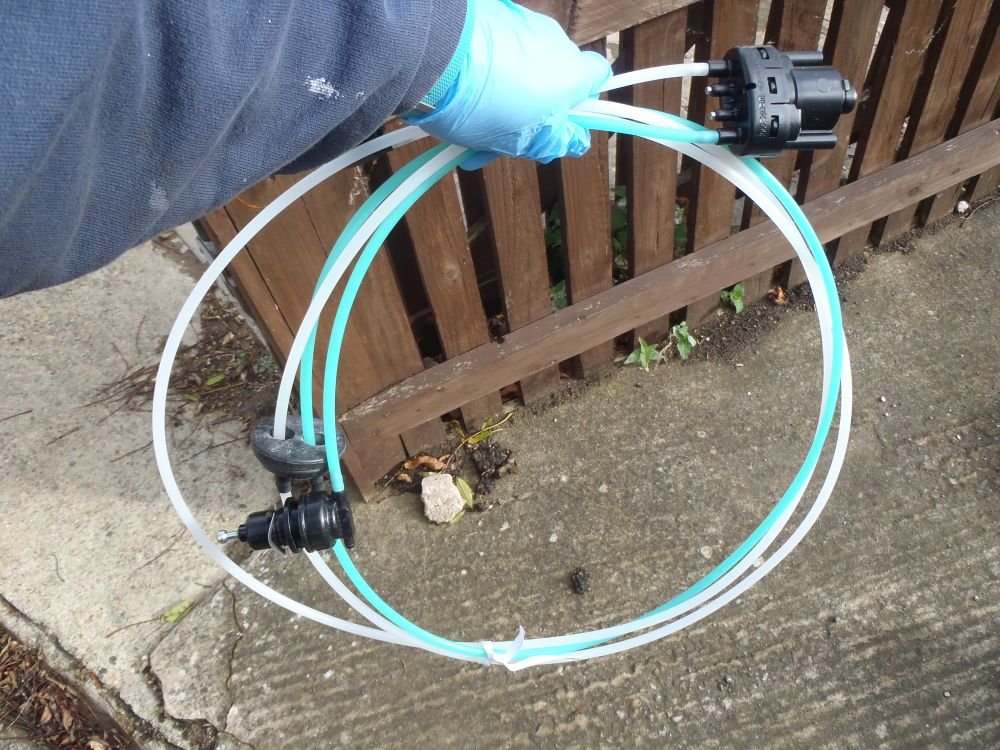
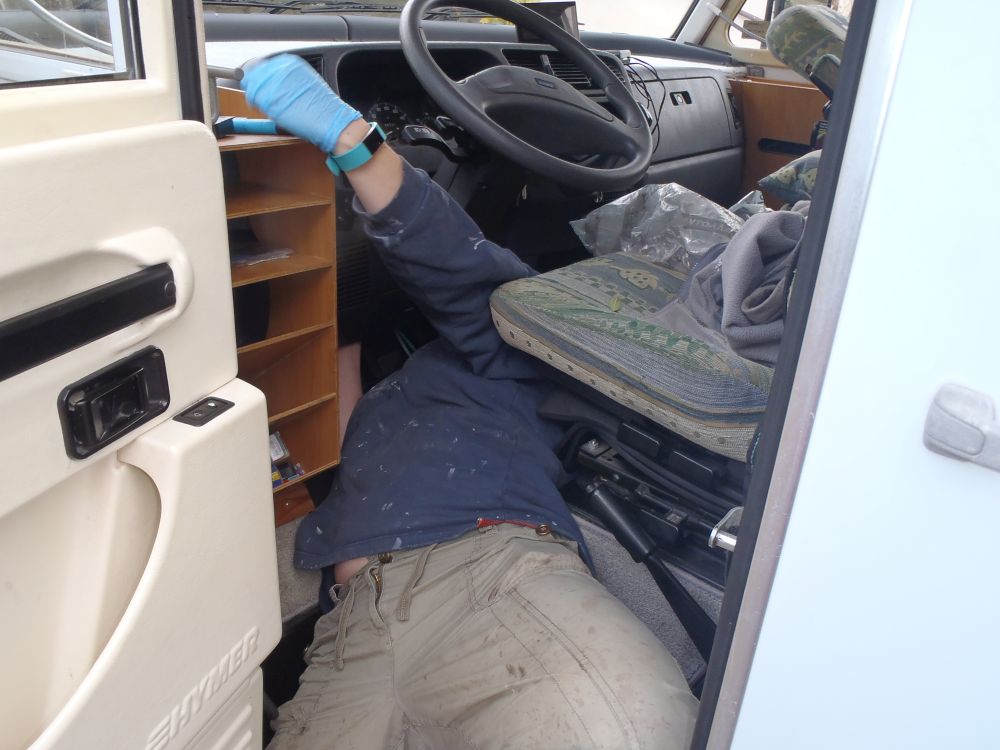
This is the system as supplied (as modeled by Muffin) with the dash mounted unit on the top right. You can see one of the headlight actuators at the end of the blue hose on the bottom left (the other headlight unit is hidden behind Muffin’s sleeve!)
First step in replacing this lot is to get the old unit out of the van! If you pull the adjuster knob off on the dashboard you can get to the two fixing screws that hold the adjuster.
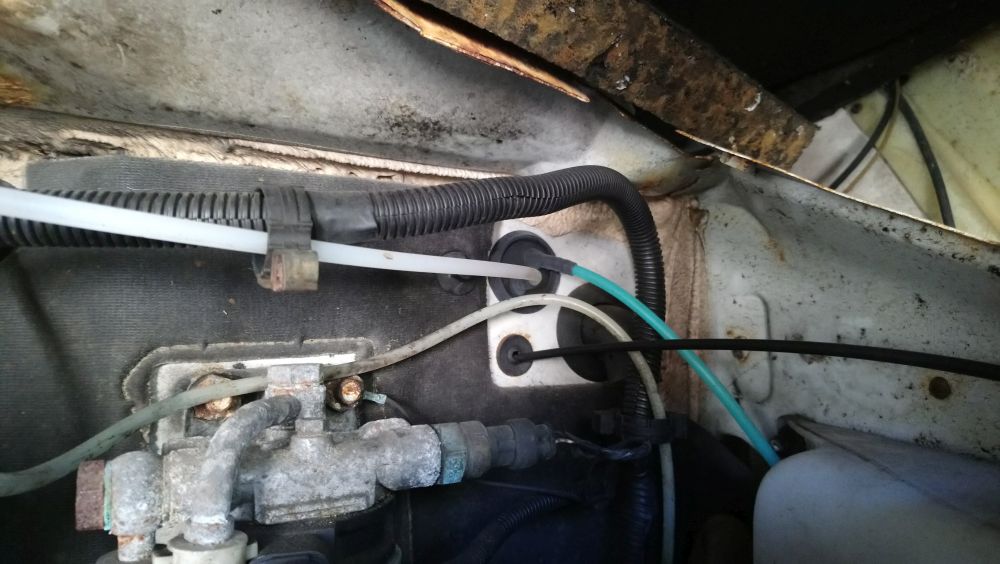
The hoses on the adjuster go up underneath the dashboard to the bulkhead where they pass through a grommet into the engine bay.
Here you can see the grommet and hoses on the bulkhead:-
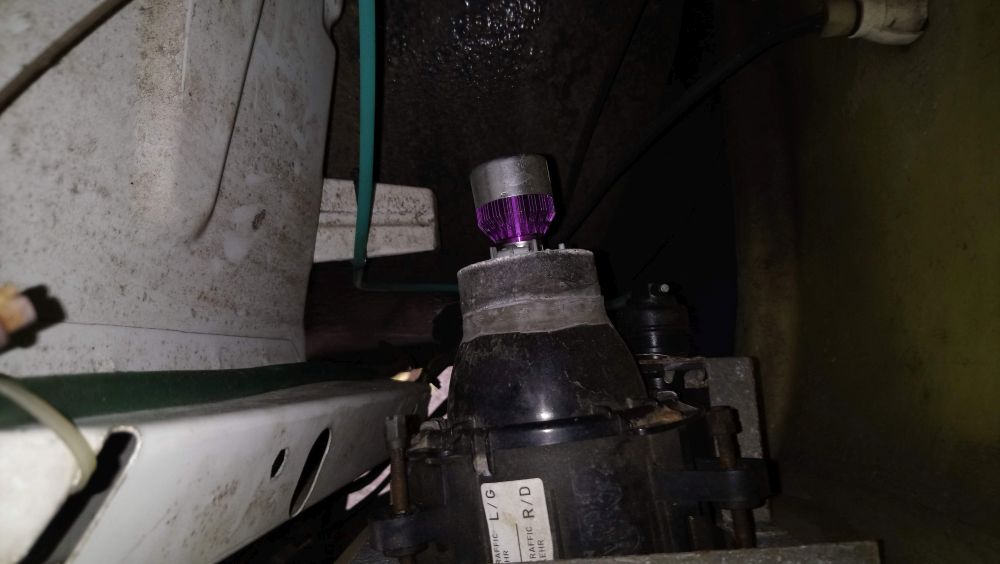
Next step is to remove the actuators from the back of the headlight units – these just twist to unclip.
You can just about see one of the actuators to the right of the headlight unit here (looking down from the top):-
Once you’ve removed both actuators from the headlights you need to poke the grommet through the bulkhead (from the engine side) and feed the hoses complete with actuators through the hole in the bulkhead to underneath the dashboard. The whole lot can then be pulled out from under the dash.
Fitting the new system is effectively the reverse of removal:
- Feed the actuators though to the engine compartment from the dashboard side and seat the grommet in the bulkhead.
- Route the hoses to the headlights and clip on the actuators.
- Attach the switch unit to the back of the adjuster knob.
In reality it’s a bit more difficult than that makes it sound as access/visibility under the dash is limited, and access to the headlights requires a bit of a contortionist act. It’s all do-able with a bit of grunting and swearing.
Here’s Muffin in position feeding the actuators through the hole in the bulkhead:-
Total repair time – a couple of hours including brew breaks……..
Front Suspension struts are a very important part of your overall suspension system – and if they wear out you can lose damping performance resulting in an unpleasant, and potentially dangerous, ride.
A nasty judder through the vehicle when pulling away from a stop seems to be a common complaint with Ducato based Motorhomes – read on to understand why this happens and how to sort it…….

The fuel filter is a service item that is often overlooked, but it very cheap and easy to replace – and a neglected fuel filter can cause all sorts of engine running problems if it becomes blocked from not being replaced on time. Continue reading
Earlier this year we were trundling down a French motorway in our old Hymer B544 motorhome on our way to the mountains for a couple of weeks of snowboarding when suddenly an ominous metallic rattling noise started…. Continue reading
Quick preventative maintenance job this time – The sump on our old Fiat Ducato based Hymer was looking very crusty so I thought I would renew it while I was changing the oil before it rotted through completely and dumped all the engine all at an inopportune moment! Continue reading
Common Problem?
It seems to be a common problem with Ducato’s that the fuel gauge either intermittently stops working, or fails completely. There are a couple of common causes for this (note: this is for a 1999 Ducato 2.8idtd. much earlier or later vans are likely to be different):-
Follow us on Facebook!

© 2026 Motor-Roam
Theme by Anders Norén — Up ↑