Oil Pressure Warning light Problems?
The Oil Pressure Warning light on the dash is designed to let you know if the engine oil pressure drops below a safe level, so you can shut off the engine – hopefully before any irreversible damage is done!
The Oil Pressure Warning light on the dash is designed to let you know if the engine oil pressure drops below a safe level, so you can shut off the engine – hopefully before any irreversible damage is done!
There are various rubber bushes/ball joints etc. in virtually all suspensions systems, and over time these components wear and the rubber hardens and cracks – all affecting handling, stability and ride quality.
If you are heading off on a winter trip many European countries require you to carry snow chains and fit them when weather conditions and roadside signage dictate – heavy penalties can be incurred for not carrying chains or not using them when required!
I recently replaced the front wheel bearings on the bus, not that they particularly needed doing (there was a little bit of play but nothing too serious), more because I was already tearing into the front end to sort out worn wishbone bushes, a seized brake caliper slider and a couple of other bits & pieces – so it seemed like a good time to do some preventative maintenance!
Note – my bus is a 1999 model, so has two separate tapered roller bearings in each front hub with a spacer ring in between them. Models from about 2001 have the bearings in a single cartridge assembly but the process is very similar. (the main difference as far as I’m aware is the bearing cartridge is secured into those hub carriers with a large circlip that needs removing before pressing out the hub)
This job can be done with hand tools but life is a lot easier with a few more specialised bits and pieces, as you will see below. I’ve included some links to my favorite tools used during this job at the end of the article, in case you need to pick up some gear.
Here’s how I went about it:-
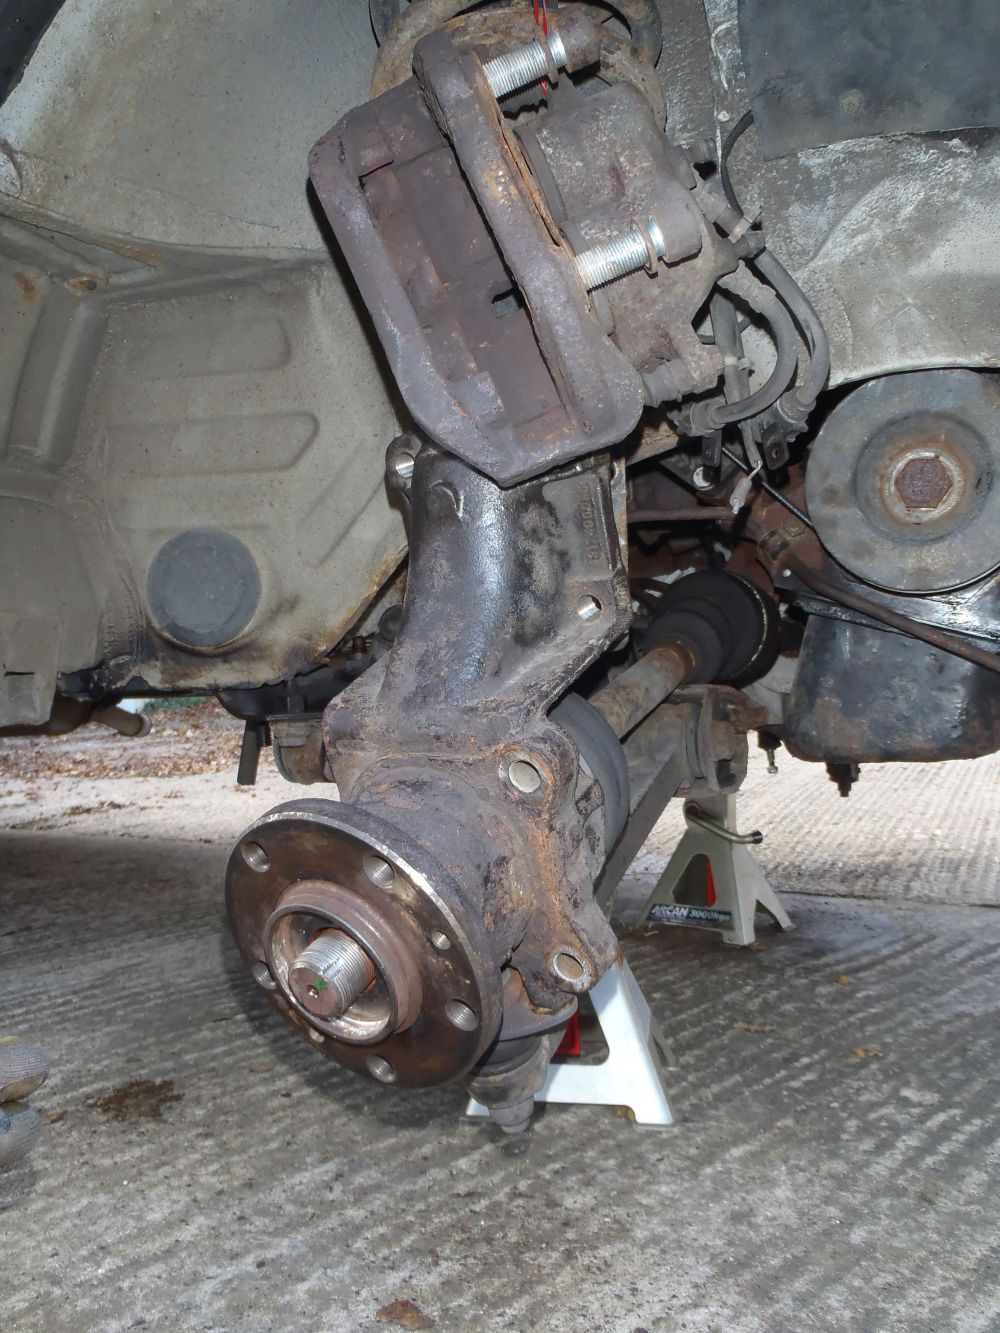
Remove road wheel, brake caliper, brake disc and hub cap. As you can see here the brake caliper has been tied up to the suspension spring to keep it out of the way. It is important not to let the brake caliper hang off the hydraulic hoses as this can damage them, potentially leading to loss of fluid and brake failure.
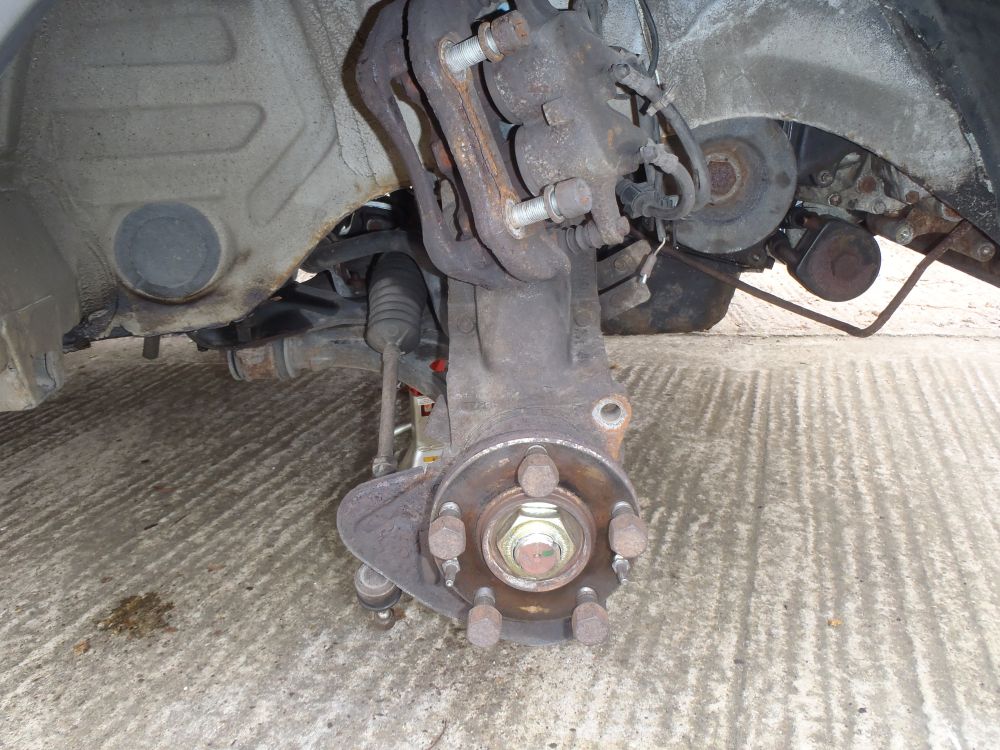
Remove the hub nut. This is REALLY tight! If you’ve though ahead you can loosen this while the brakes are still attached by getting someone to press the brake pedal to stop the driveshaft from rotating while you loosen it, but I’d already removed the brakes so braked the hub with a breaker bar and a couple of wheel bolts to hold it. (In reality the nut can be so tight that the brakes alone can’t hold it, especially without the engine running (so there is no servo assistance)).
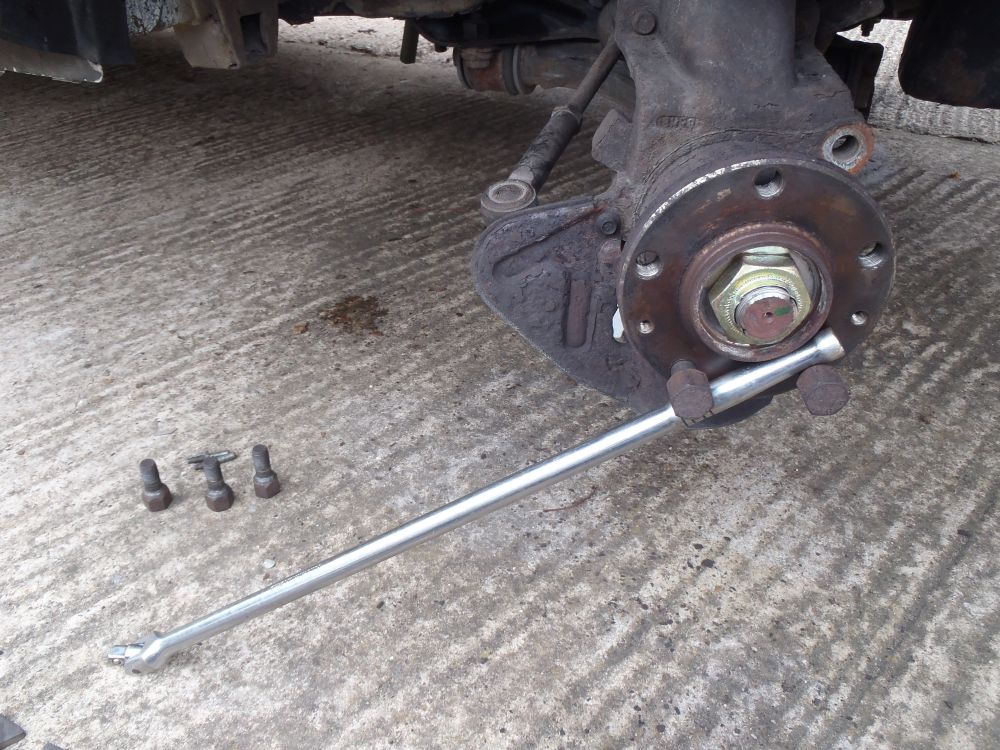
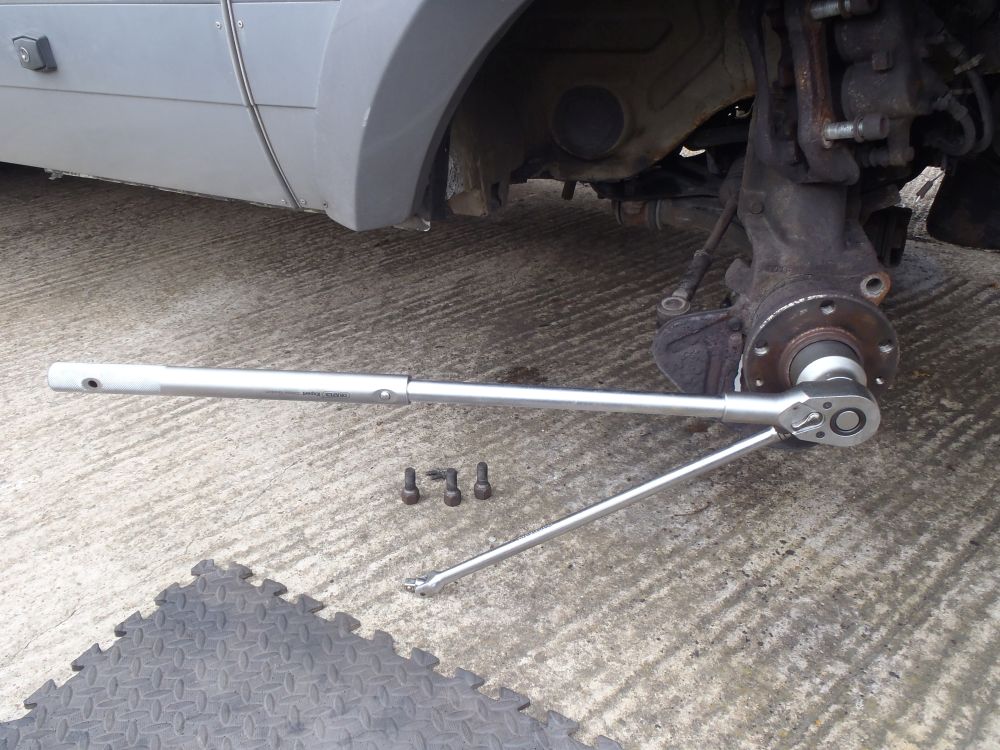
Next step is to remove the hub carrier by undoing the four bolts that hold the hub carrier onto the suspension strut, and another four that hold the lower ball joint onto the hub carrier.

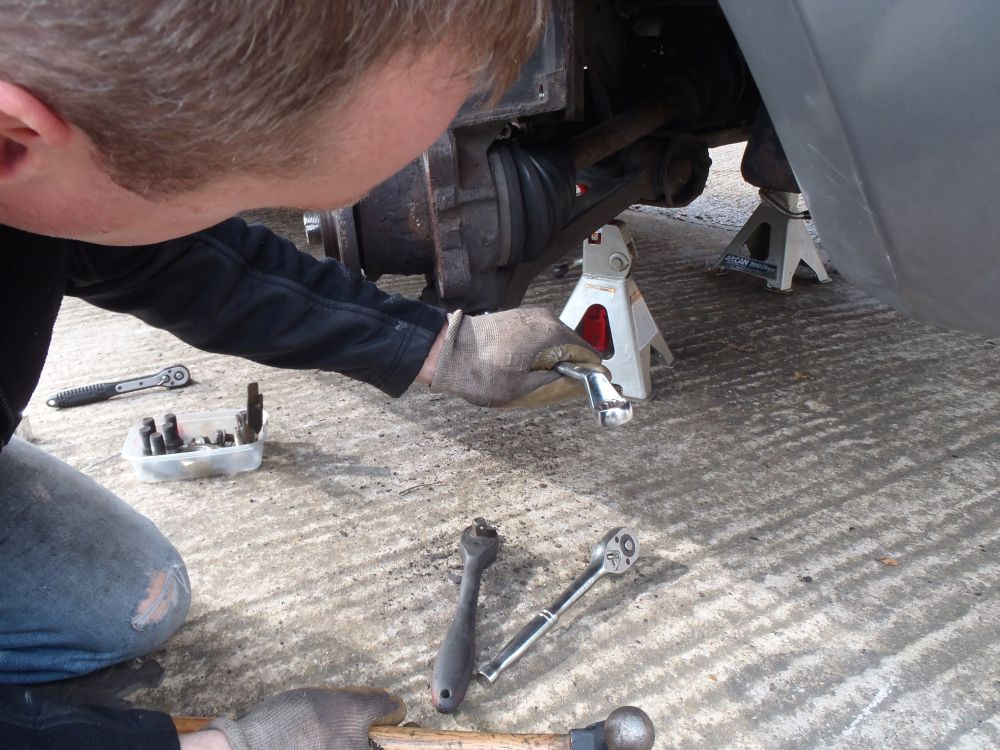
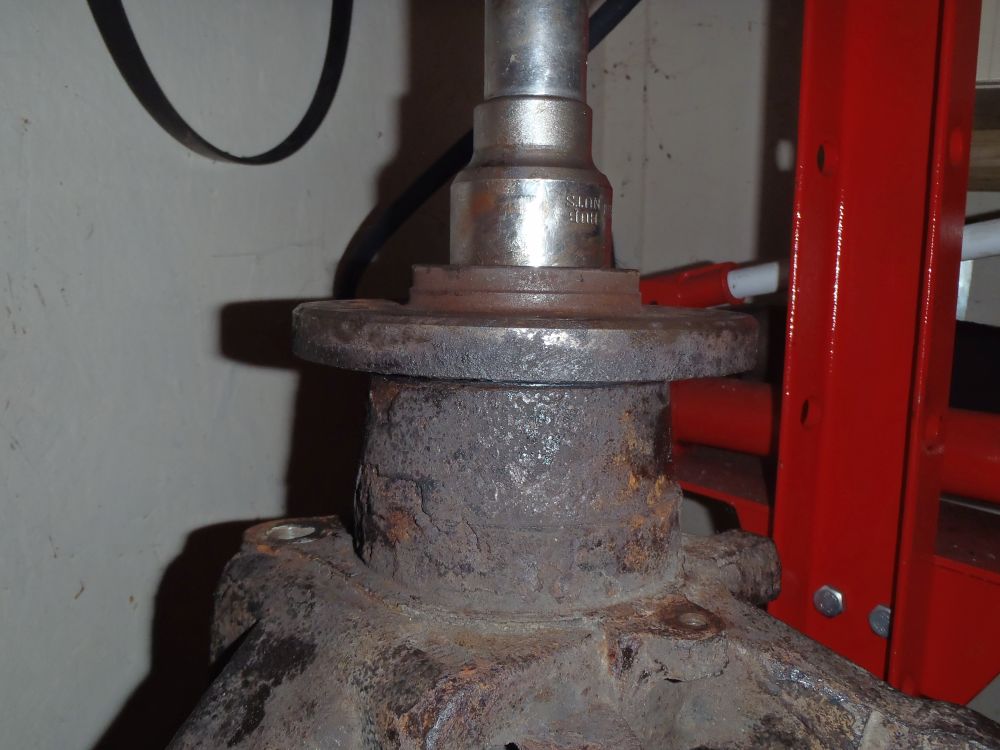
The hub carrier can then be removed from the vehicle and taken into the empire of dirt for the surgery to begin. The drive shaft can slide out of the middle of the hub now the hub nut is removed.
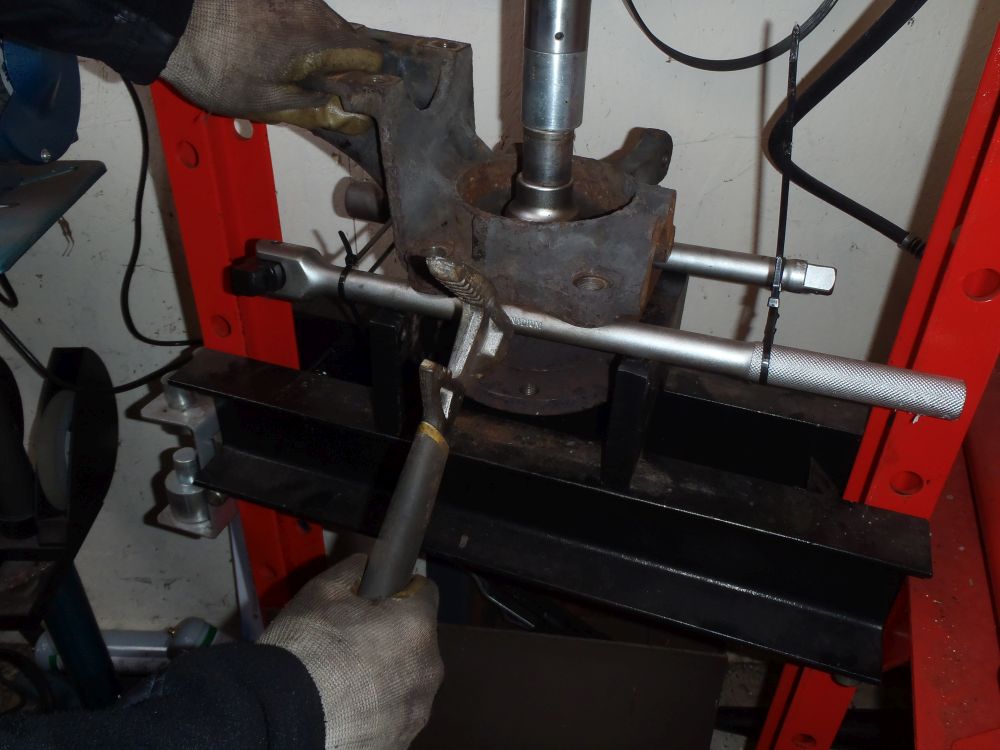
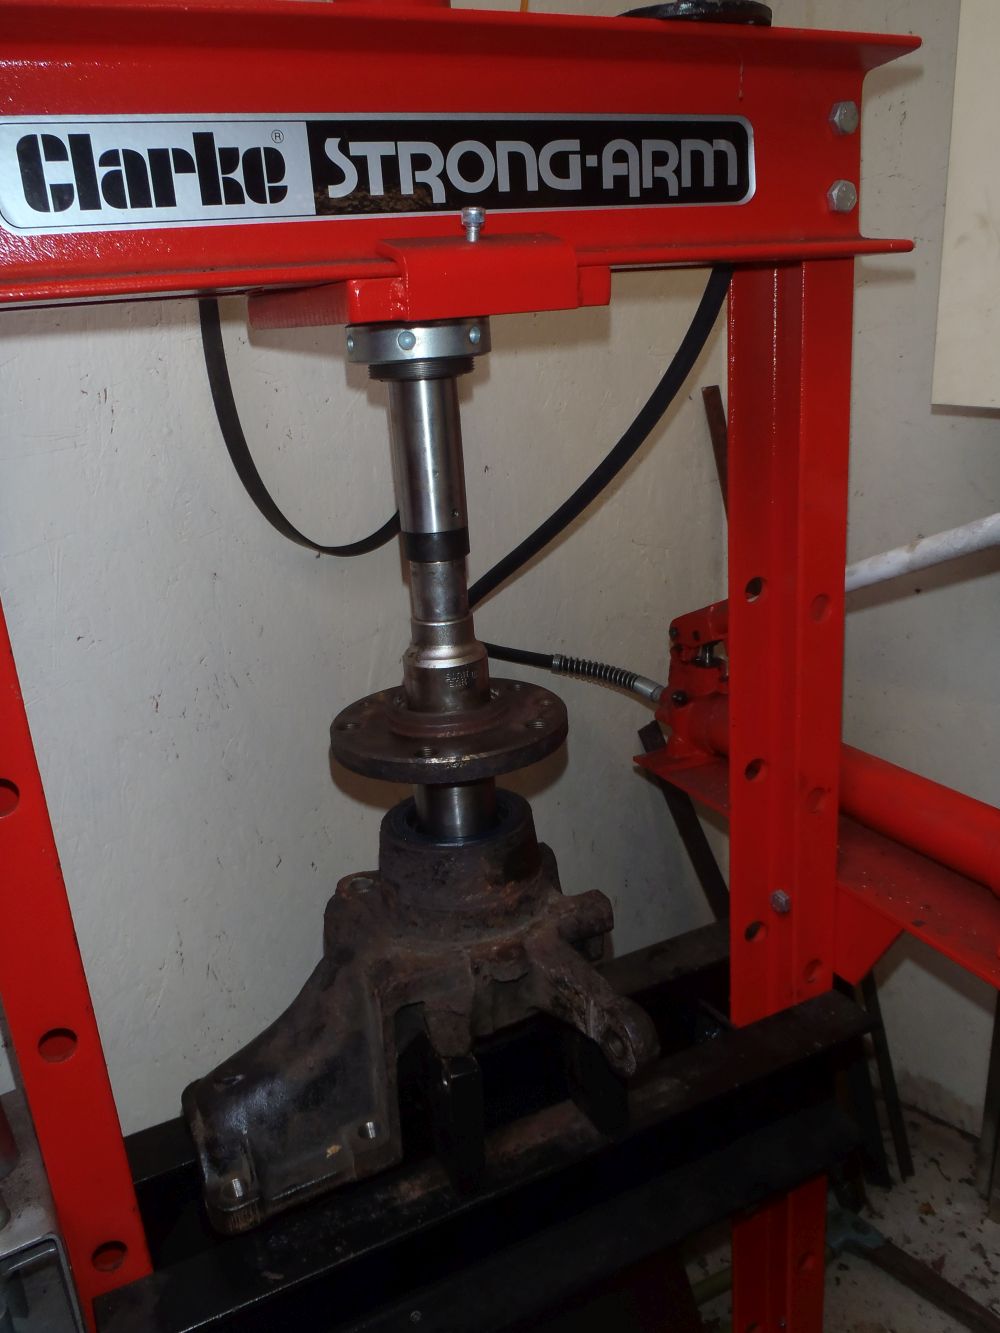
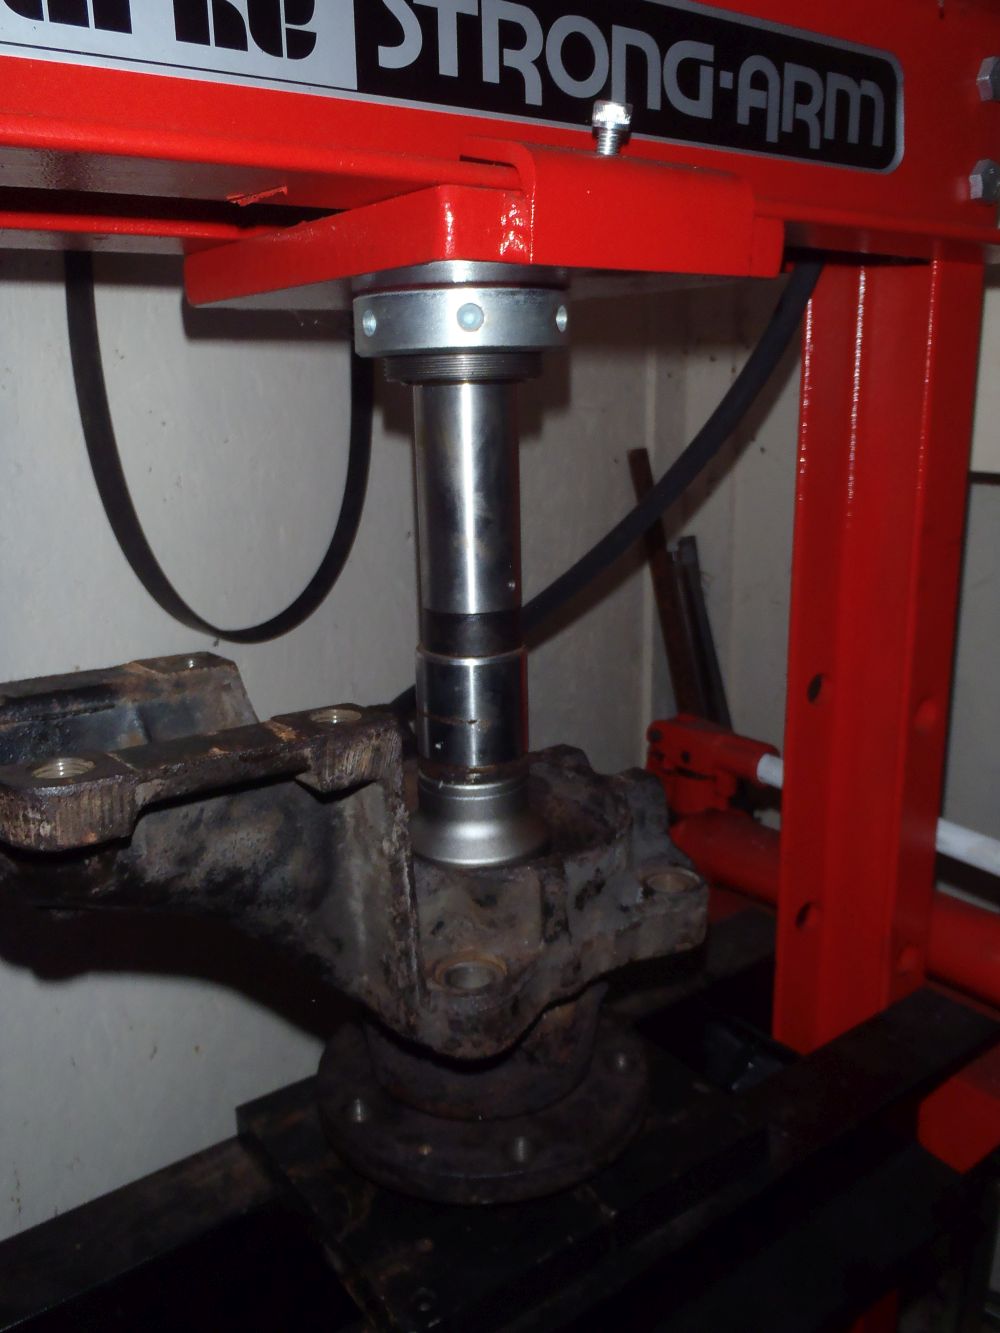
Next step is to press or drive the hub out from the bearings. This means pushing it out from the back of the hub carrier. I used my 12-ton press for this, and I don’t recommend you follow my sketchy example for holding the hub carrier in the press – take your time and devise a better method to hold it, if something gives was while you’ve got a few tons of force on the arrangement things can go very badly very quickly!
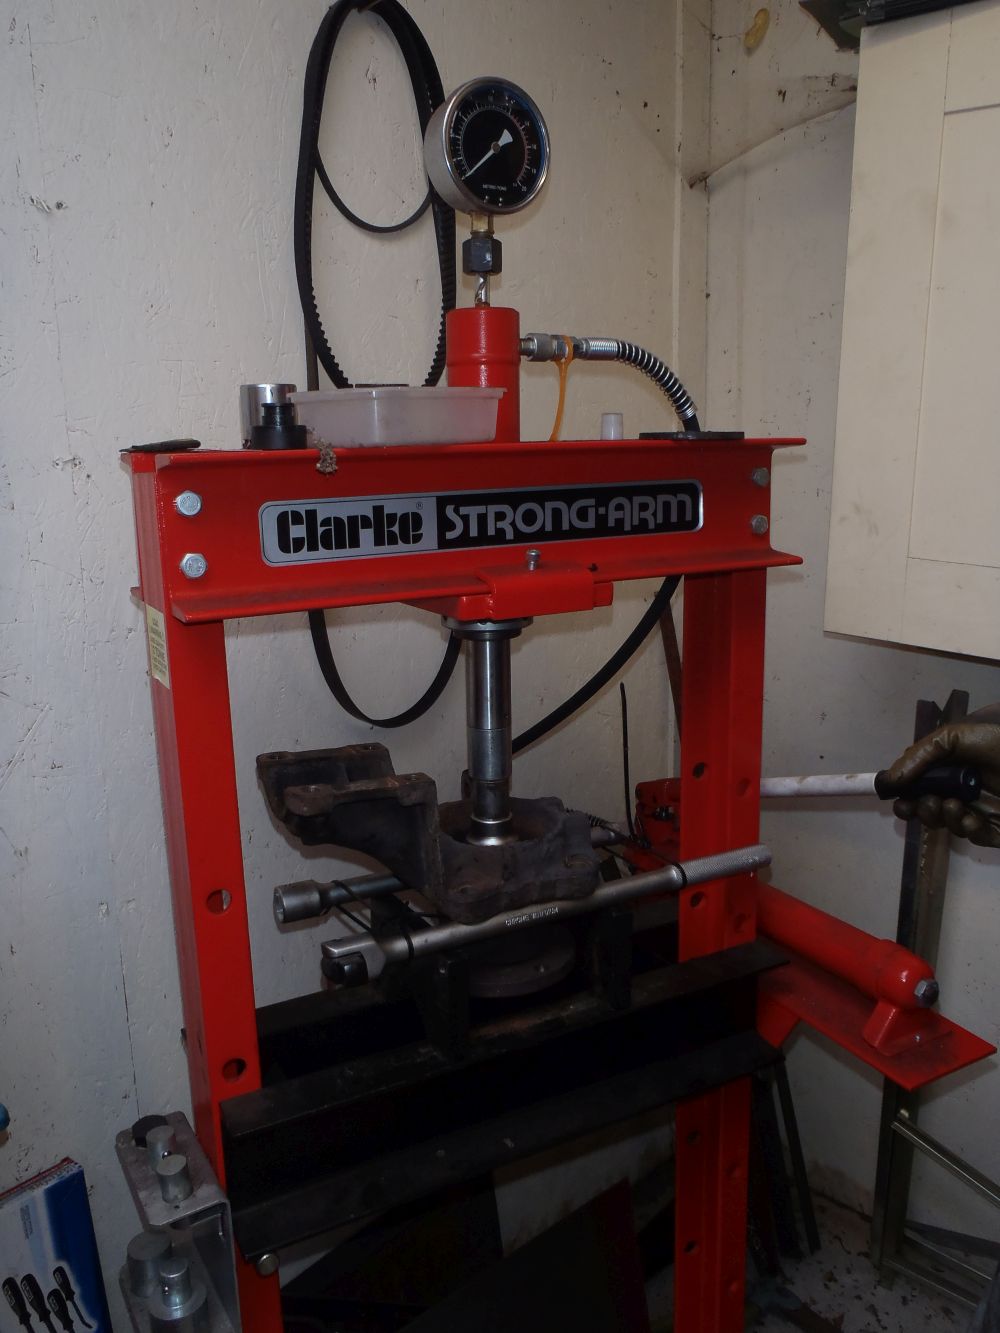
While doing this job one side came out fairly easily, but the other was stuck fast – even with a few tonnes on the press it took a bit of ‘percussive persuasion’ to get it to release!
If you get to this point in the job and you can’t get the hub to release the whole assembly is pretty portable, so you can always take it down to your local garage or engineering shop and get them to remove the old bearings and insert the new ones. It should be fairly cheap as it will be a relatively quick job for them, so you still save the expense of paying a garage for the time to strip down and reassemble the front end.
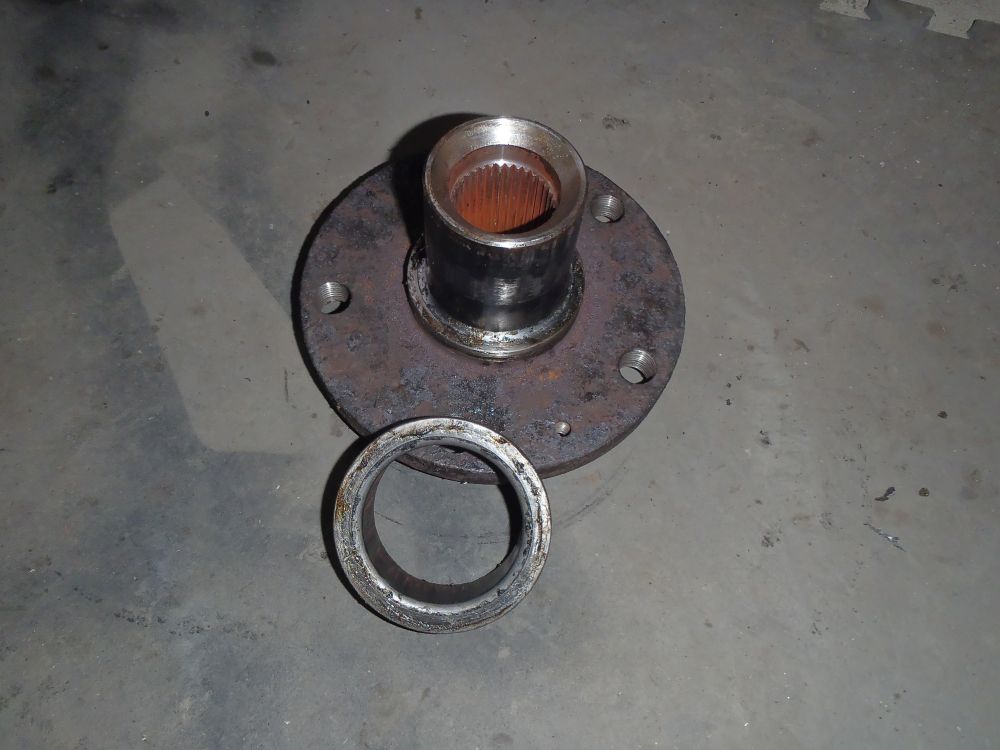
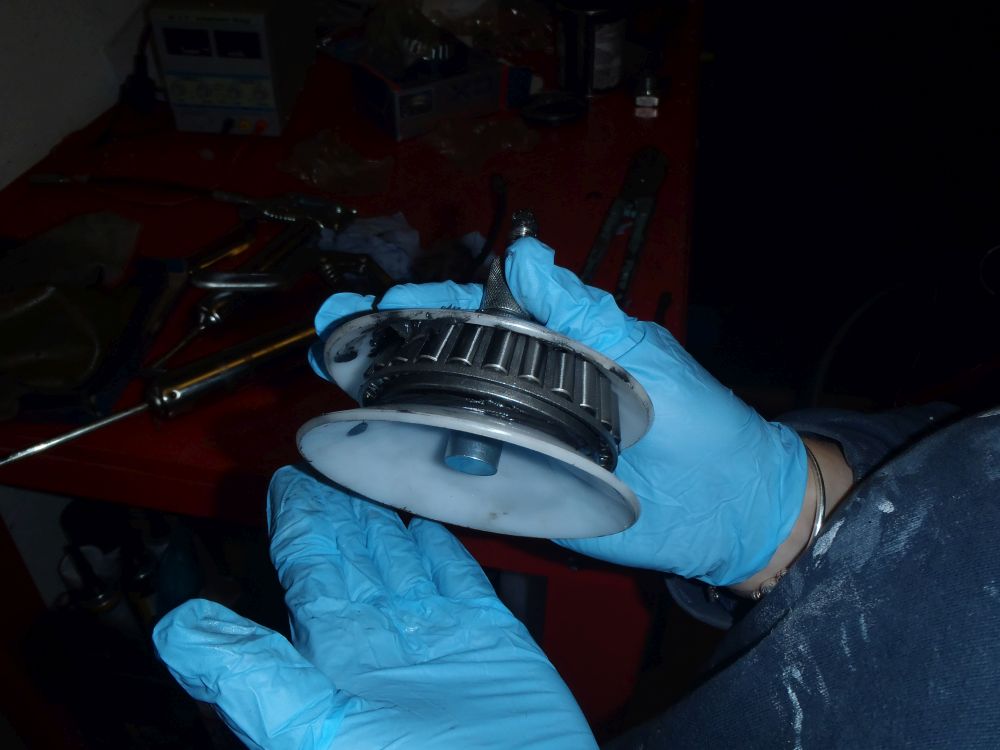
Once the hub had released and exploded bits everywhere we were left with this:-

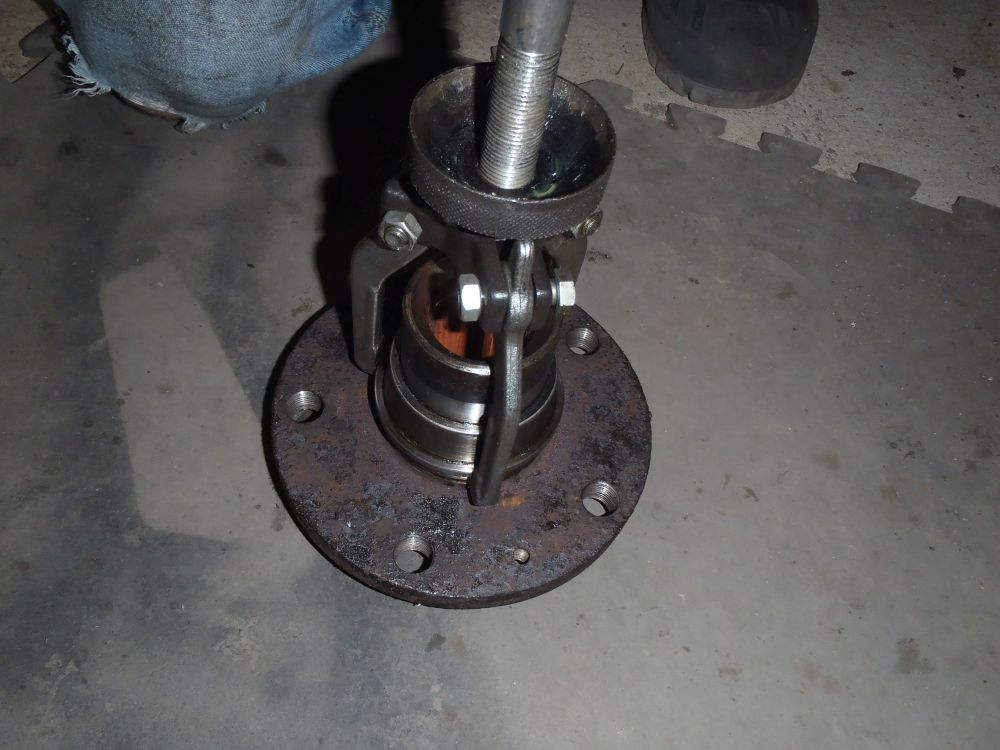
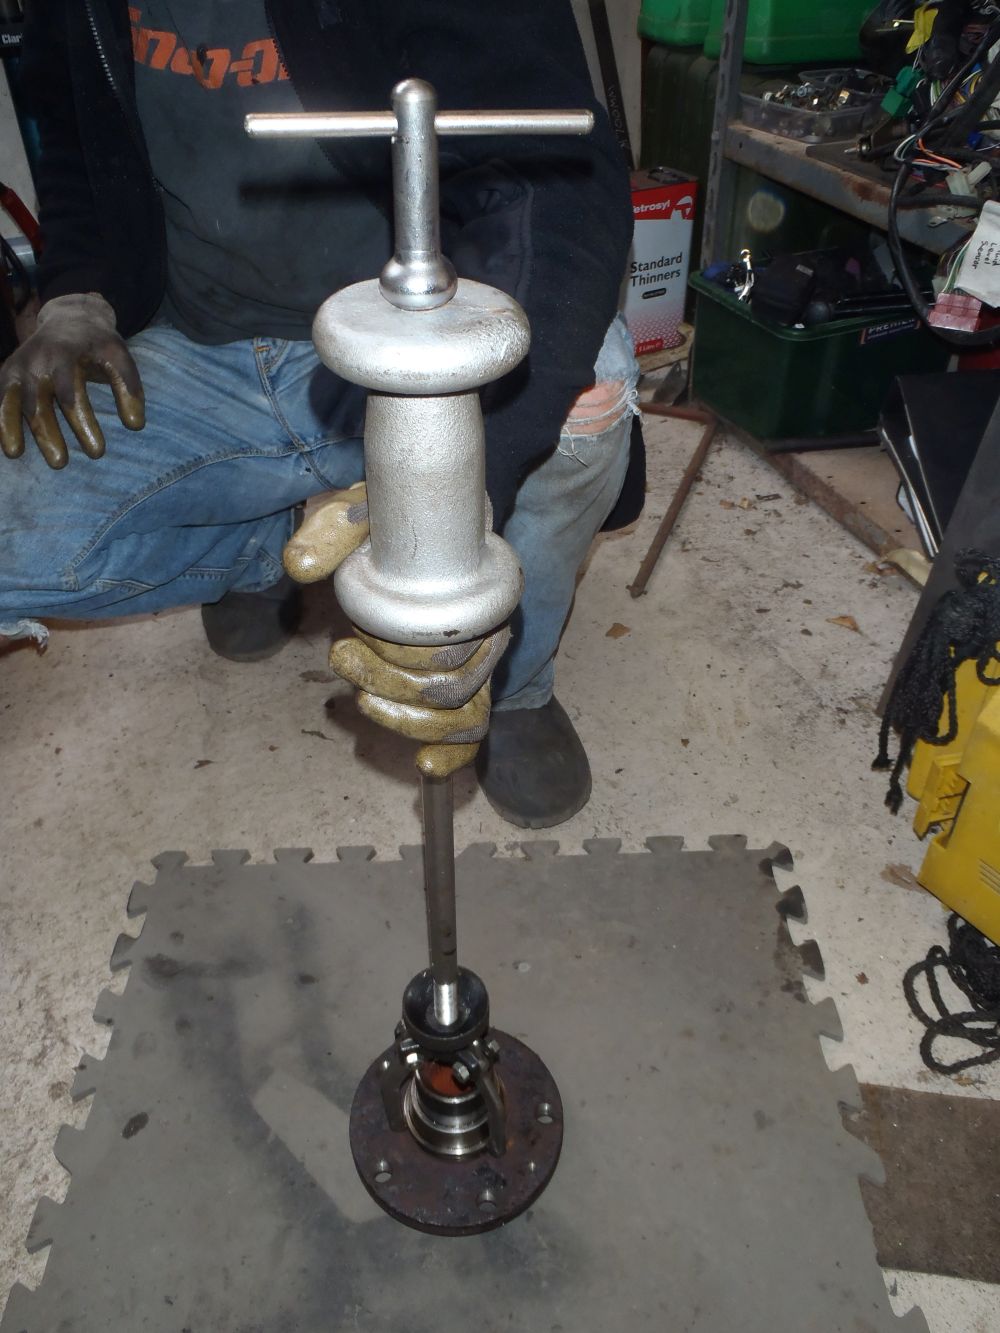
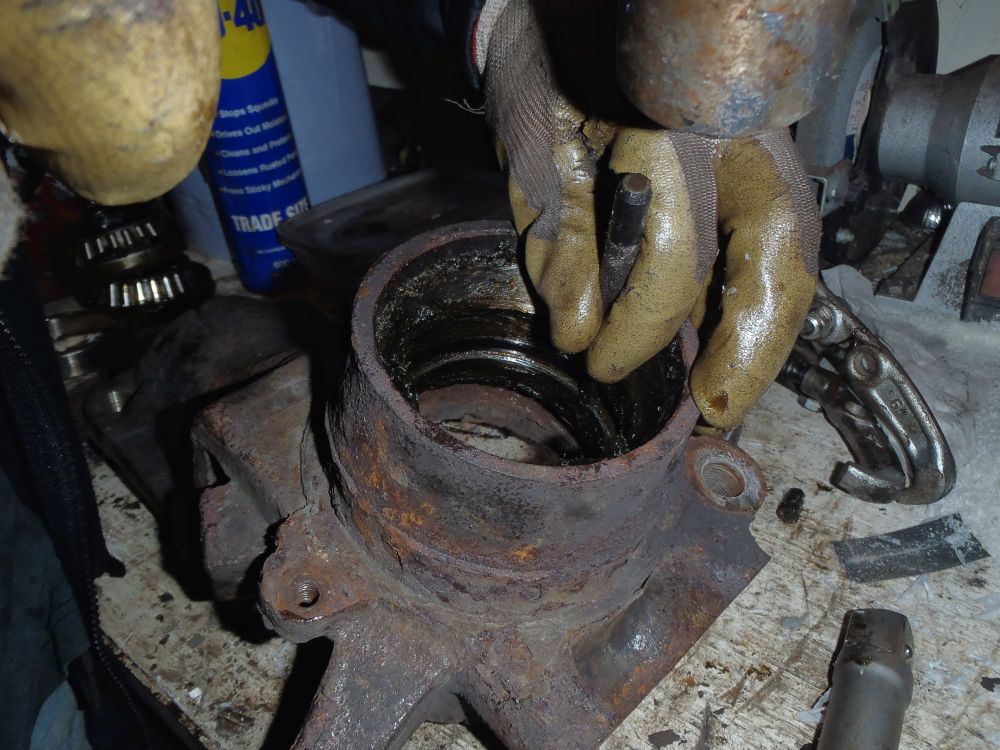
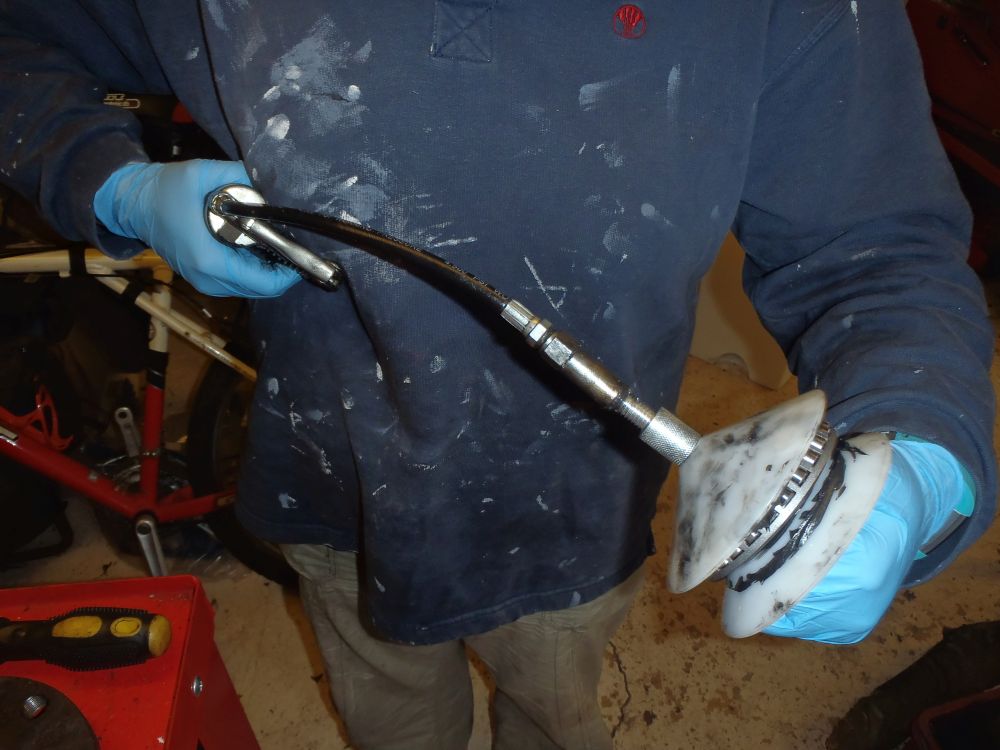
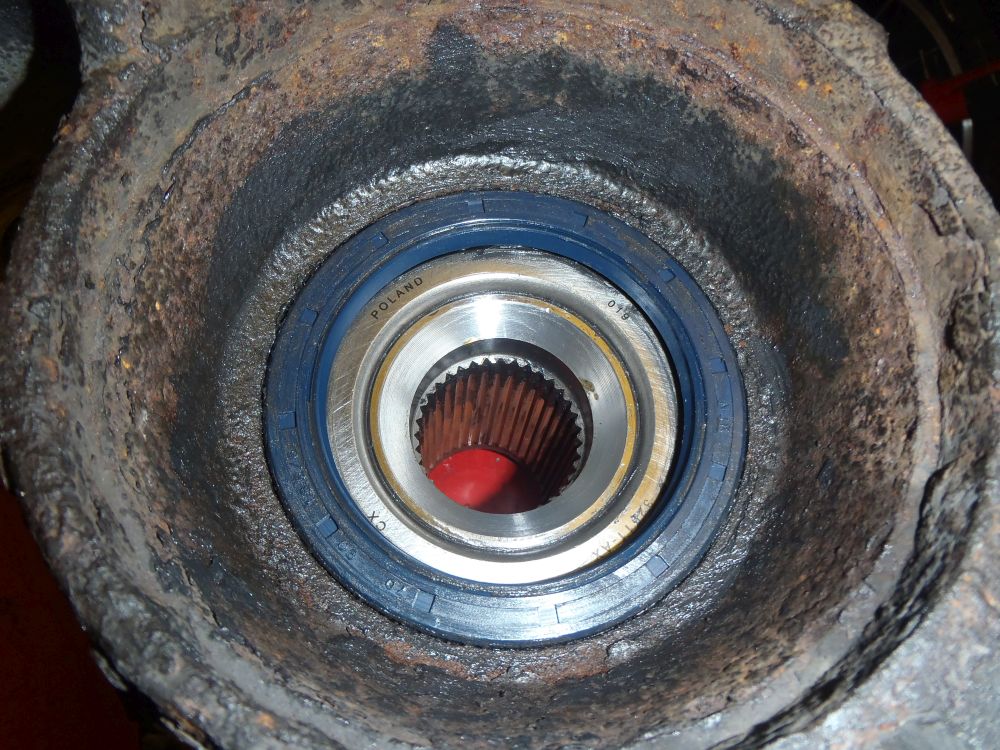
As you can see the outer bearing and grease seal remained on the hub, so we now need to remove these. I find the easiest way to do this is to lever at the bearing cage until all the roller bearings fall out, at which point you can easily remove the cage and grease seal. With these out of the way the inner bearing race will still be stuck to hub however, I removed this by using a slide hammer with a puller attachment so you can stand on the hub flange and drive the bearing race towards you:-
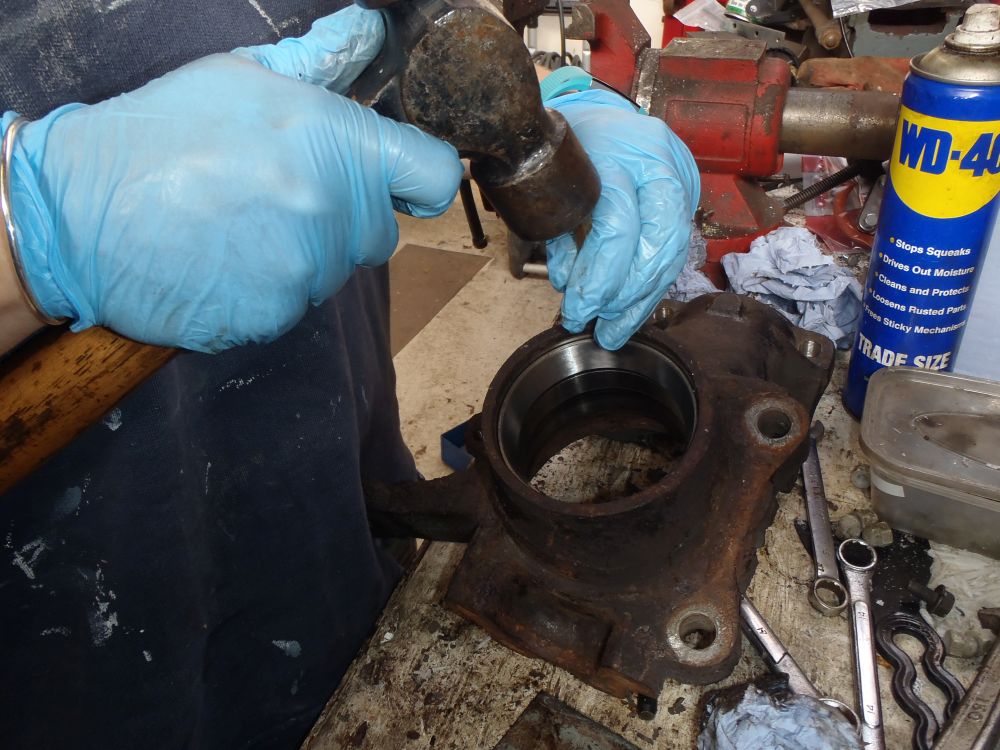
Next step is to drift the outer bearing races from the hub carrier, one from either side:-
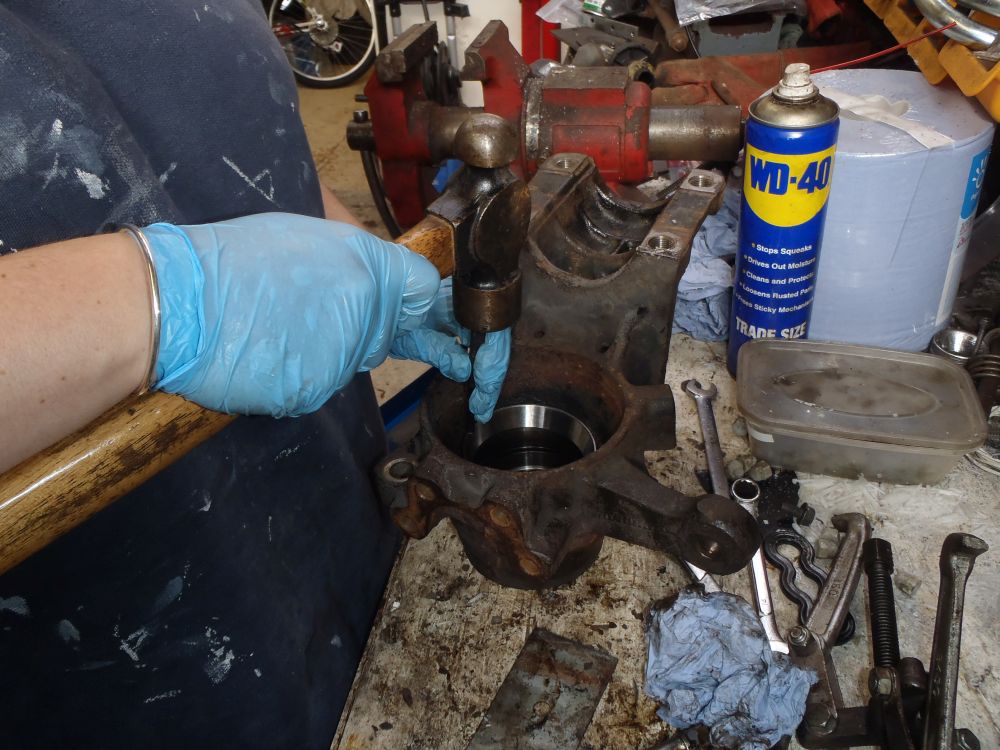
With the old races removed the inner surfaces of the hub carrier can be cleaned up and the outer races from the new bearings carefully drifted into place:-

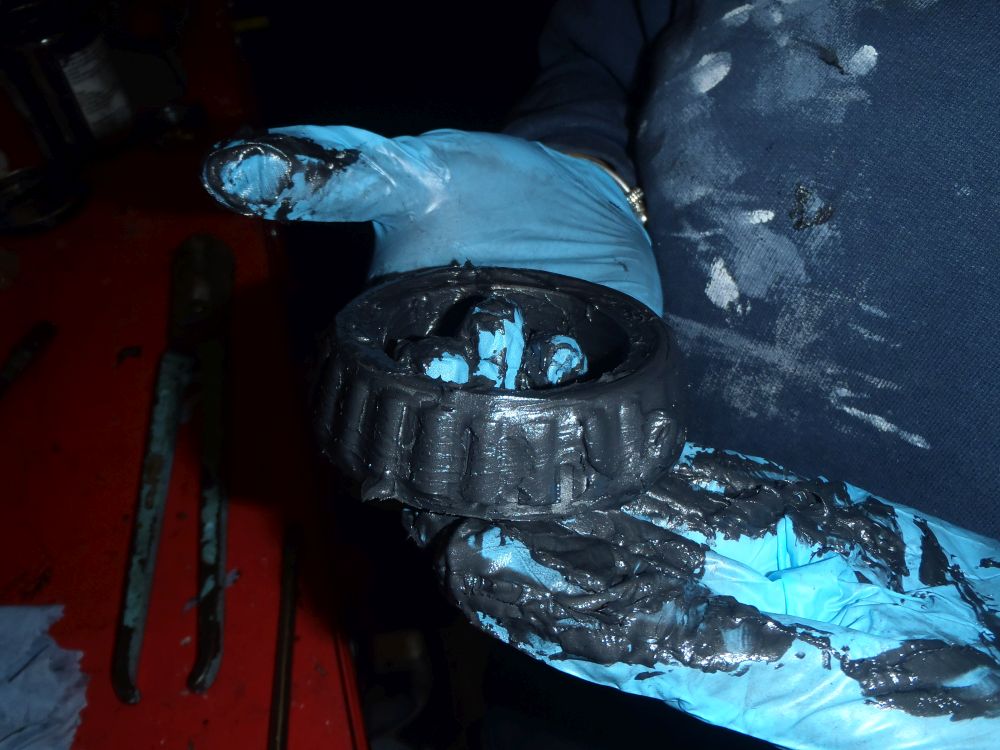
The bearings themselves can then be packed with grease ready for fitting. I used Molybdenum Disulphide grease and a cheap bearing packer with a grease gun. If you don’t have a packer you can do this by hand, it’s just a bit messier (it’s a fairly messy job anyway!)
With one bearing prepared you can now drop it into the outer bearing race and fit the new grease seal, before pressing the hub back in:-
The hub carrier assembly is then turned over and the inner bearing pressed onto the hub from the other side (don’t forget to put the spacer ring back in before fitting the second bearing):-
Before fitting the other grease seal:-
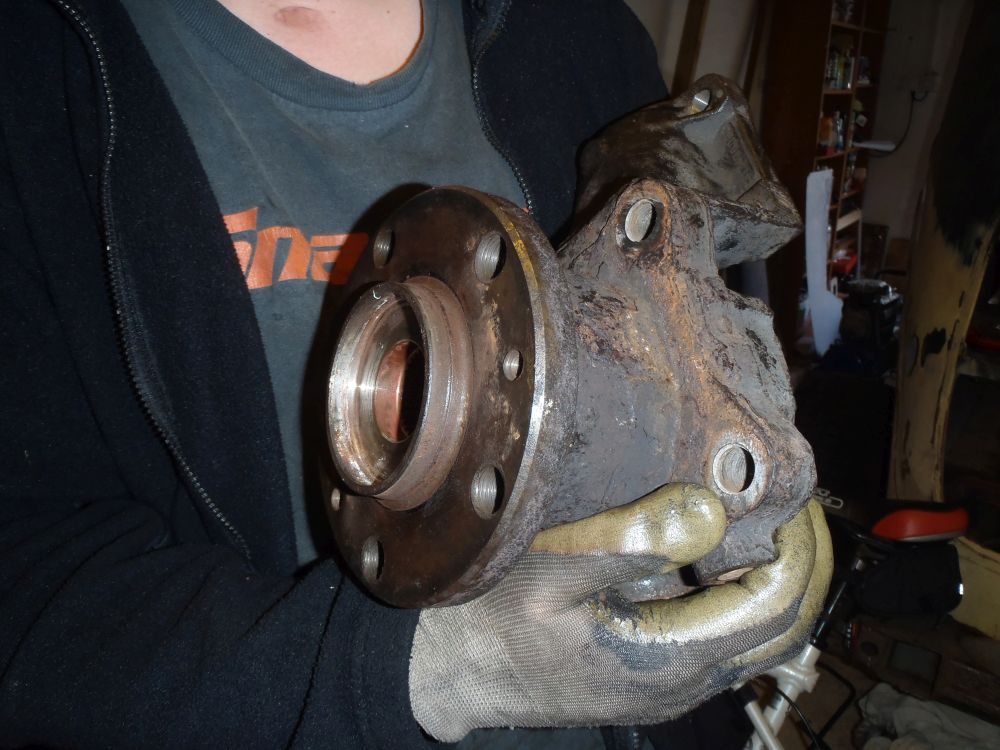
All complete ready to go back on the bus:-
In the words of a Haynes Manual, ‘reassembly is the reverse of removal’
Once everything is back together it’s time to fit the hub nut, torque it to spec (REALLY tight! – 495Nm for the 1800kg payload bus) and stake the nut to secure it. It is good practice to use a new hub nut as it’s a safety critical fastener, normally a bearing kit will come with a new nut but not always (I bought 2x bearing kits from the same supplier, one had a new nut and the other didn’t so someone had obviously been into the box and nicked the nut out of one of them!). If your bearings don’t come with new nuts they can be bought for a couple of quid each.
On our bus the bearings had obviously been replaced previously without fitting new nuts, judging by the two lots of stake marks on the old ones:-

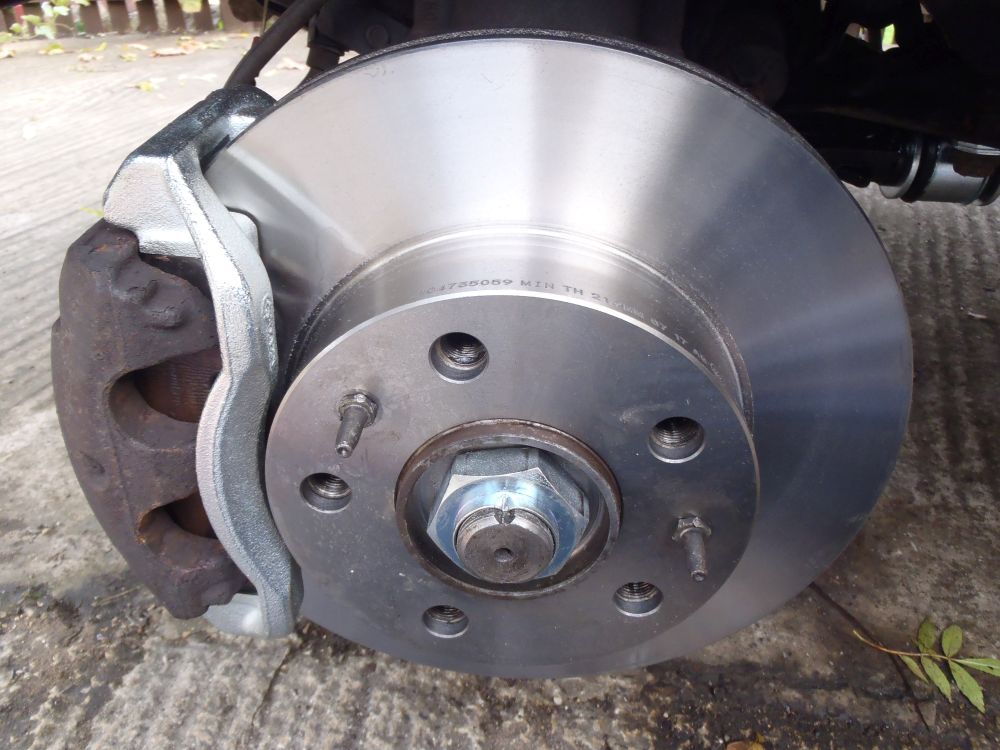
All back together! (you can also see the new brake disc & brake caliper mount in this picture, see the ‘Front Suspension Overhaul’ post for details on this)
Any questions/comments? – let me know below!
Awesome tools for jobs like these!:-
Giant 3/4″ drive socket set, great for large stubborn fasteners and generally breaking stuff. The various sizes of sockets also come in really handy as dies for the hydraulic press!
12 tonne hydraulic floor press – if you’ve ever spent a painfully week end fighting with suspension bushes using heat, hammers, hacksaw blades and vices you need a hydraulic press in your life!. They’re not cheap but worth every penny! These are available in various sizes, both bench mounted and floor standing – get the biggest on you can afford, you won’t regret it……..
Slide hammer, awesome for more stuff than you would think. If you’ve ever needed to hammer on something but not been able to get round the back of it to hammer where you need to, this is the tool for that!
And finally a cheap one, a bearing packer. Not vital but makes greasing bearings a lot easier and can get grease into areas that are difficult to get grease into by hand, potentially avoiding premature bearing failure (which is soul destroying if you’ve spent a whole weekend replacing them!)
© 2026 Motor-Roam
Theme by Anders Norén — Up ↑