Motorhomes tend to have pretty appalling rear visibility, so reversing cameras are a popular accessory. You don’t need to spend hundreds of pounds, perfectly acceptable wireless reversing cameras kits are available for less than £25 from places like eBay, and are really easy to install!
Continue readingTag: Hymer (page 2 of 5)
A common issue with the absorption refrigerators fitted to most motorhomes is insufficient cooling performance when operating on gas. Absorption fridges are interesting devices that cool using no moving parts, and require only heat to drive the cooling process (which seems counter intuitive, but if you want to read more about the working principles Wikipedia has a good article here)
Continue readingYou may need to remove the fridge from your B544 for troubleshooting (see article on troubleshooting a fridge not working on gas here), or just for access to something else. Here’s the process for fridge removal based on our 1999 model:-
Continue readingA common issue on Hymer B-class motorhomes seems to be the headlight height adjustment failing.
The system is hydraulic and consists of a main unit on the back of height adjuster knob in the dash connected to hydraulic actuators on the headlights themselves via tubing. Over time the oil can leak out of the system leaving the headlights in their lowest position.
Fortunately replacement parts are available. Unfortunately it is a sealed system that needs to be replaced as a whole, and is likely to cost over £100 for the parts! Occasionally you might get lucky and find cheaper parts overseas. I managed to get parts shipped from Germany which saved a decent amount versus buying them in the UK.
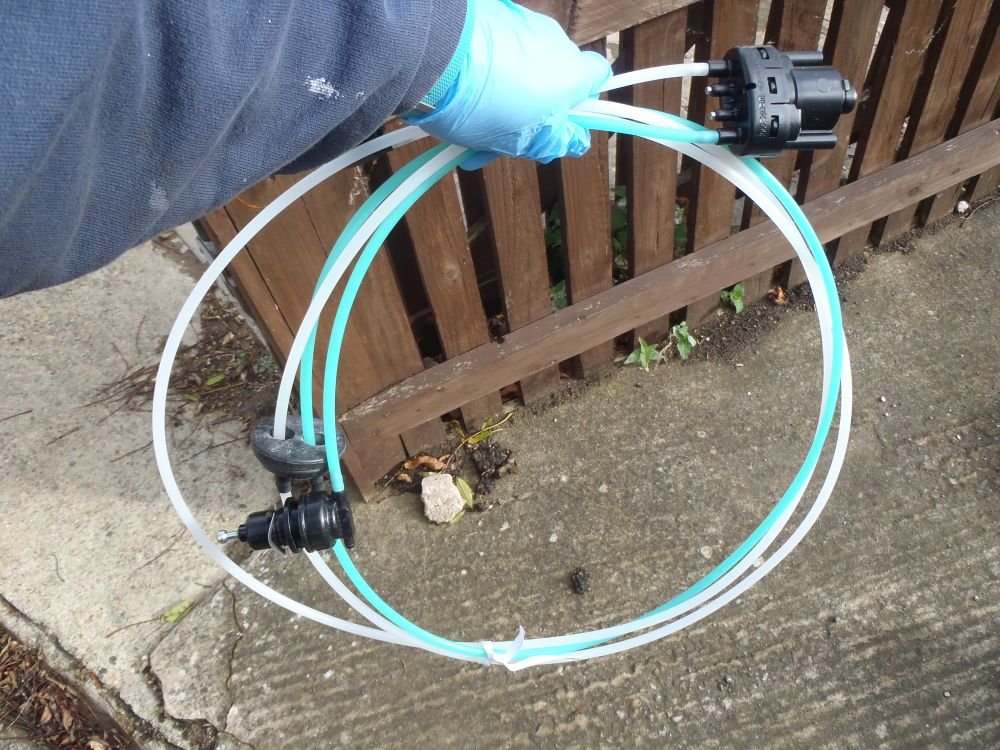
This is the system as supplied (as modeled by Muffin) with the dash mounted unit on the top right. You can see one of the headlight actuators at the end of the blue hose on the bottom left (the other headlight unit is hidden behind Muffin’s sleeve!)
First step in replacing this lot is to get the old unit out of the van! If you pull the adjuster knob off on the dashboard you can get to the two fixing screws that hold the adjuster.
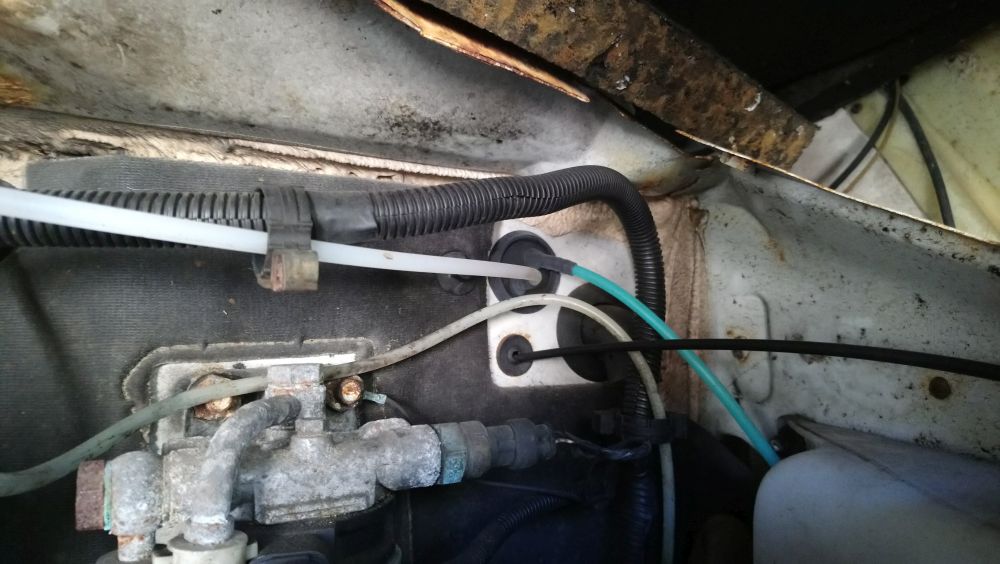
The hoses on the adjuster go up underneath the dashboard to the bulkhead where they pass through a grommet into the engine bay.
Here you can see the grommet and hoses on the bulkhead:-
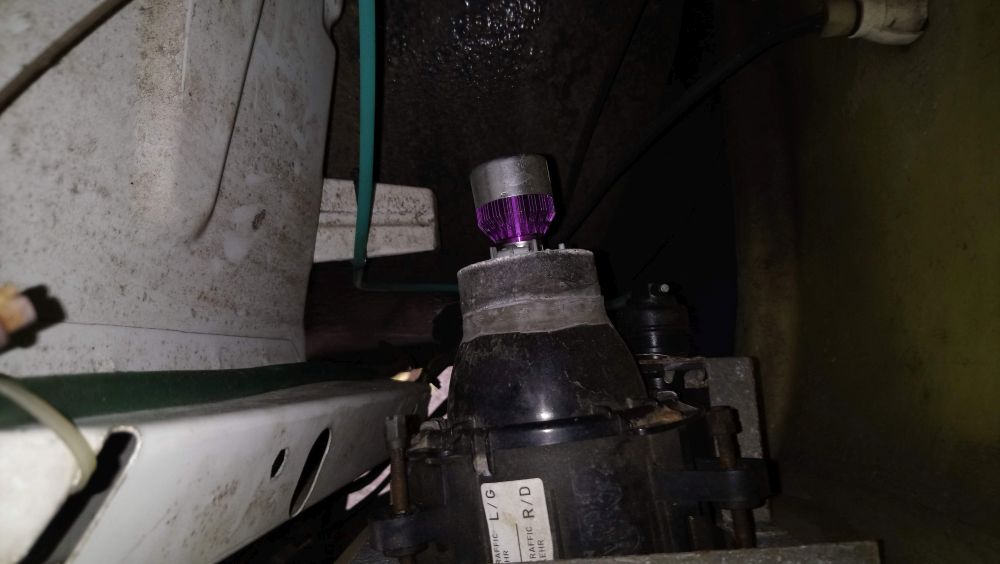
Next step is to remove the actuators from the back of the headlight units – these just twist to unclip.
You can just about see one of the actuators to the right of the headlight unit here (looking down from the top):-
Once you’ve removed both actuators from the headlights you need to poke the grommet through the bulkhead (from the engine side) and feed the hoses complete with actuators through the hole in the bulkhead to underneath the dashboard. The whole lot can then be pulled out from under the dash.
Fitting the new system is effectively the reverse of removal:
- Feed the actuators though to the engine compartment from the dashboard side and seat the grommet in the bulkhead.
- Route the hoses to the headlights and clip on the actuators.
- Attach the switch unit to the back of the adjuster knob.
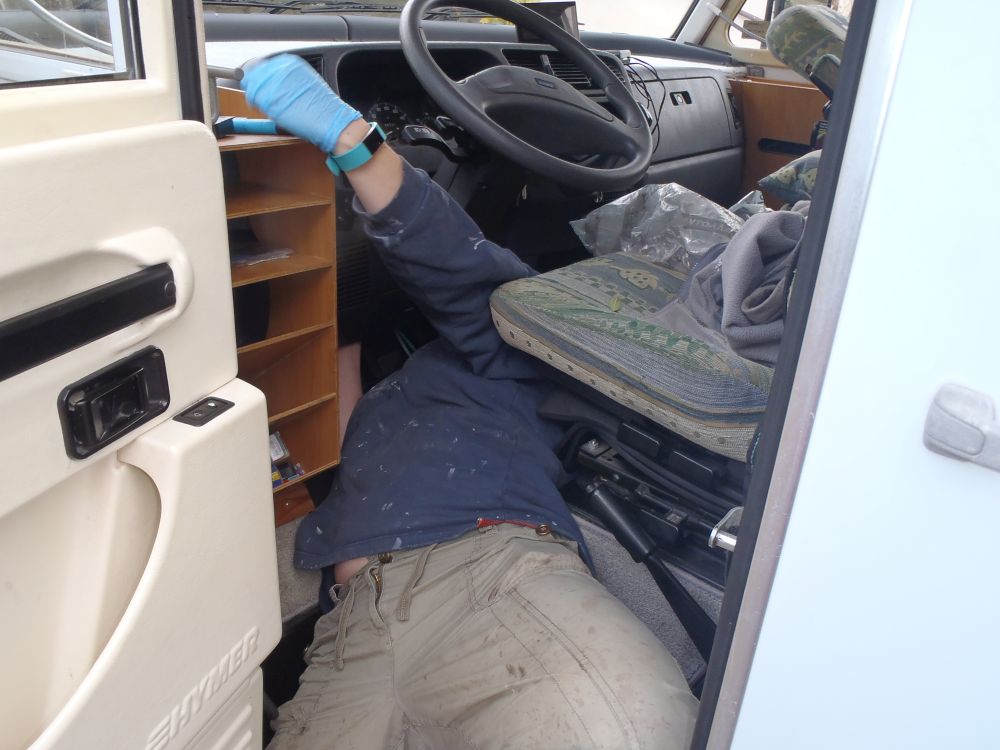
In reality it’s a bit more difficult than that makes it sound as access/visibility under the dash is limited, and access to the headlights requires a bit of a contortionist act. It’s all do-able with a bit of grunting and swearing.
Here’s Muffin in position feeding the actuators through the hole in the bulkhead:-
Total repair time – a couple of hours including brew breaks……..
How to equip your motorhome with multiple user WiFi – without spending a fortune!
Even if you use your motorhome regularly over the winter it is still vital you prepare it properly for any period of storage where the temperature is likely to drop below freezing. Failure to do this can cause expensive damage to your motorhome!
Quick job today – replacing the motorhome electric hook-up mains power inlet
Front Suspension struts are a very important part of your overall suspension system – and if they wear out you can lose damping performance resulting in an unpleasant, and potentially dangerous, ride.
Solar panels on a motorhome are a quick and easy way to reduce your reliance on electric hook-ups or noisy generators, here’s how I added a 100W panel and controller to our 1999 Hymer B544……
12V batteries are often regarded as one of those ‘fit and forget’ items, but leisure batteries in motorhomes take a fair amount of abuse, and if you don’t look after them they may fail on you just when you need them most! Continue reading
Follow us on Facebook!

© 2026 Motor-Roam
Theme by Anders Norén — Up ↑