You may need to remove the fridge from your B544 for troubleshooting (see article on troubleshooting a fridge not working on gas here), or just for access to something else. Here’s the process for fridge removal based on our 1999 model:-
First step is to remove the gas hob for access to the top of the fridge, loosening the four small screws under the bungs in corners of the hob (looking down from the top – no need to remove the screws completely, loosing them will pivot the clamps out of the way so the hob can be lifted) and removing the screw from the centre of the drain plug will allow the hob to be lifted out of the worktop to disconnect the gas supply line. With the hob lifted up the electrical connections for the earth and igniter can be disconnected, allowing the hob to be removed completely.
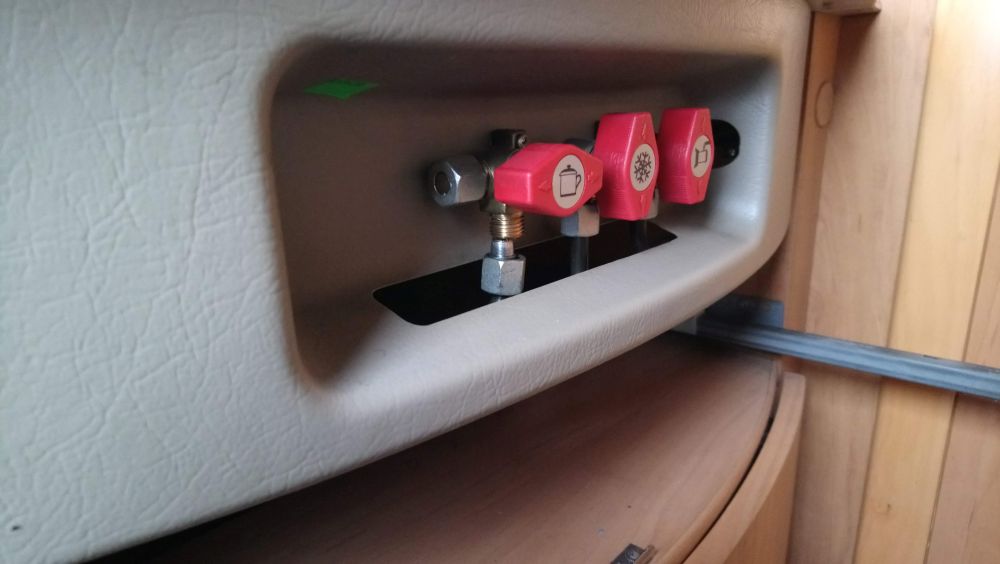
The gas supply line is rigid so you can only lift the hob so far with it connected, I disconnected it at the isolator valve under the sink to allow a bit more movement. This makes it easier to get tools under the hob to disconnect it there
Hob lifted to show Igniter connection (lower left), Earth connection (centre right), Gas supply line connection (upper left) and sink-type drain (lower right)
12V connection to igniter system

Earth connection to hob
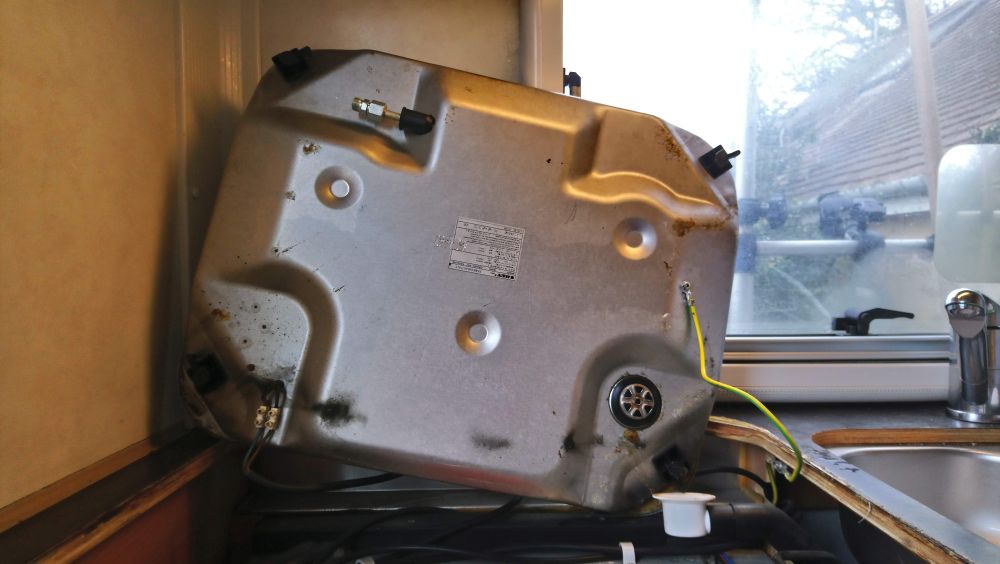
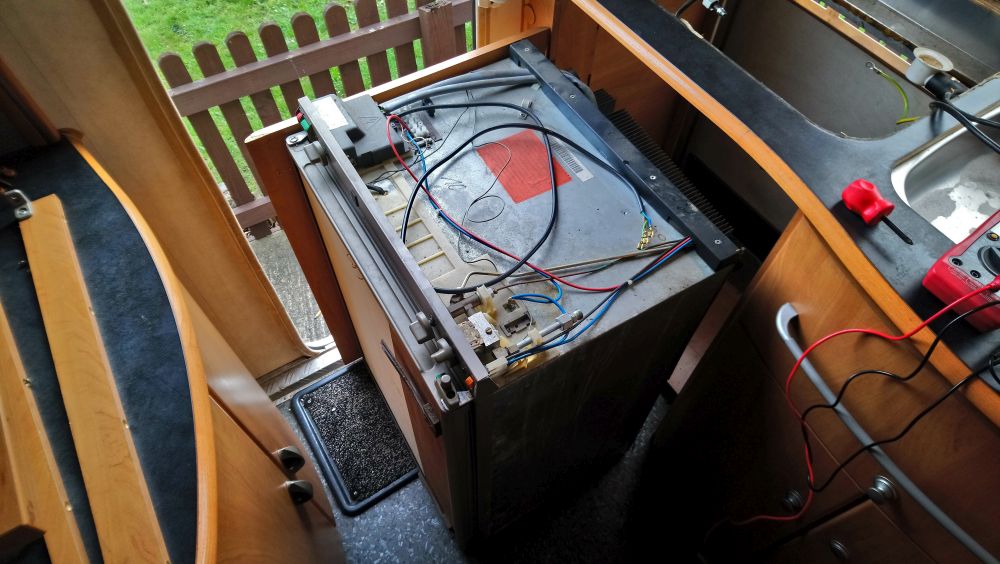
With the hob out of the way you will now have access to the electrical and gas connections on the top of the fridge. You will need to disconnect the 12V feed to the heater (supplied from the alternator with the engine running), the 240V feed to the heater (supplied from an electric hook up), the 12V feed for the internal light & gas igniter (supplied from the leisure battery) and the gas supply line. (To avoid any accidental short circuits make sure the 12V is switched off at the control panel before disconnecting any wiring, and of course make sure you are not connected to the mains before touching any of the 240V wiring!)
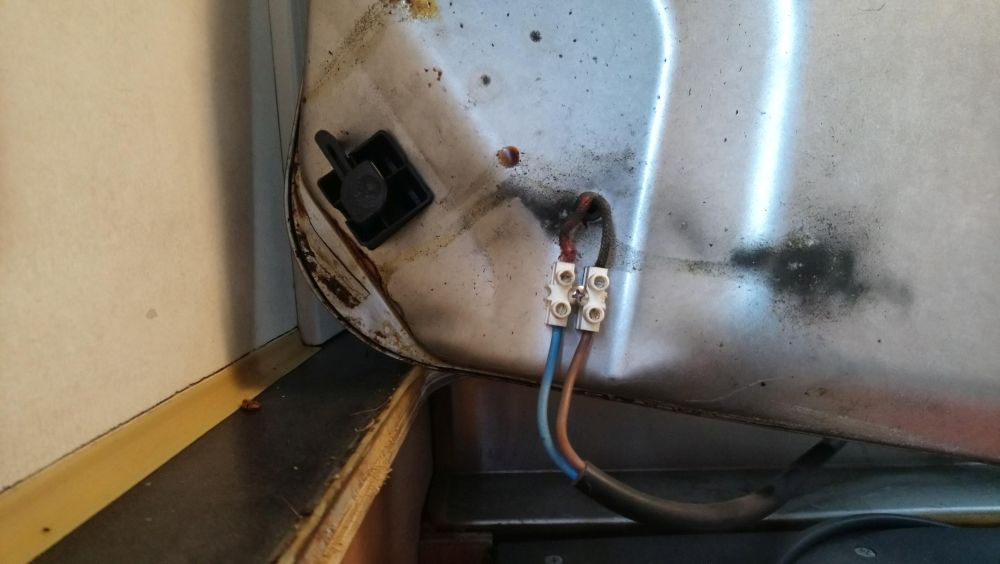
The 12V feed for the heater (red & white wires to the 1st and 2nd terminal block) and 12V feed for light & igniter (brown and blue wires to the 4th and 5th terminal block) can be removed from the terminal blocks directly. The mains feed is the black cable running over the top of the terminal blocks and this is easier to disconnect at its other end…..
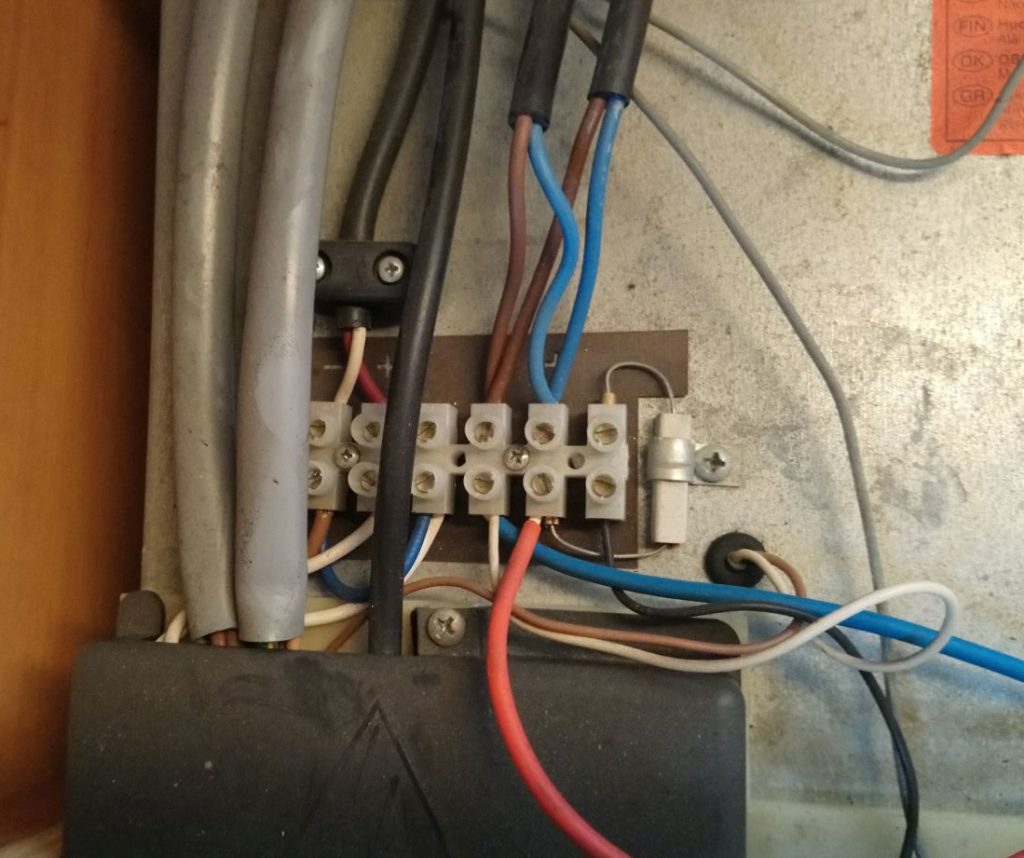
The mains supply to the fridge is connected in a junction box in the cupboard to the right of the fridge – it can be disconnected from here. Note – if you have an oven in your B544 instead of a cupboard here the mains connection may be located elsewhere!
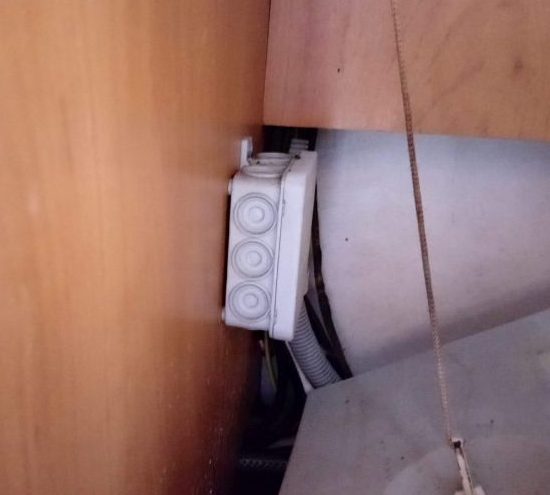
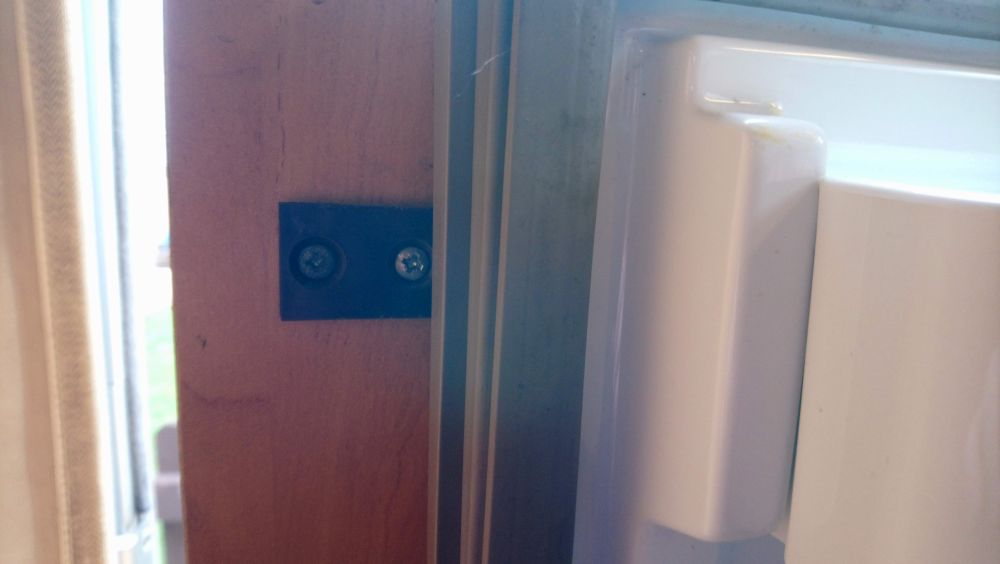
Here is the junction box mounted on the left side of the back of the cupboard. Removing the top and bottom mounting screws that hold it to the wall provides better access.
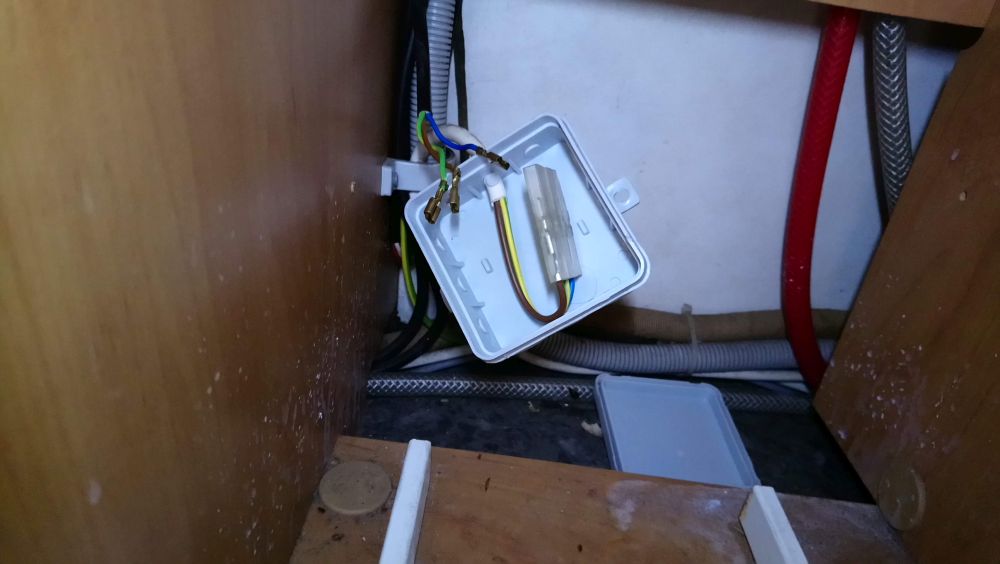
The lid is just clipped on, with the lid removed the electrical connections can be unplugged and pulled out of the terminal box – the cable can then be pulled up to the top of the fridge.
The gas supply line is on the top of the fridge on the right hand side looking down, use one spanner to counter-hold the fridge side of the connection while removing the gas pipe side with another spanner.
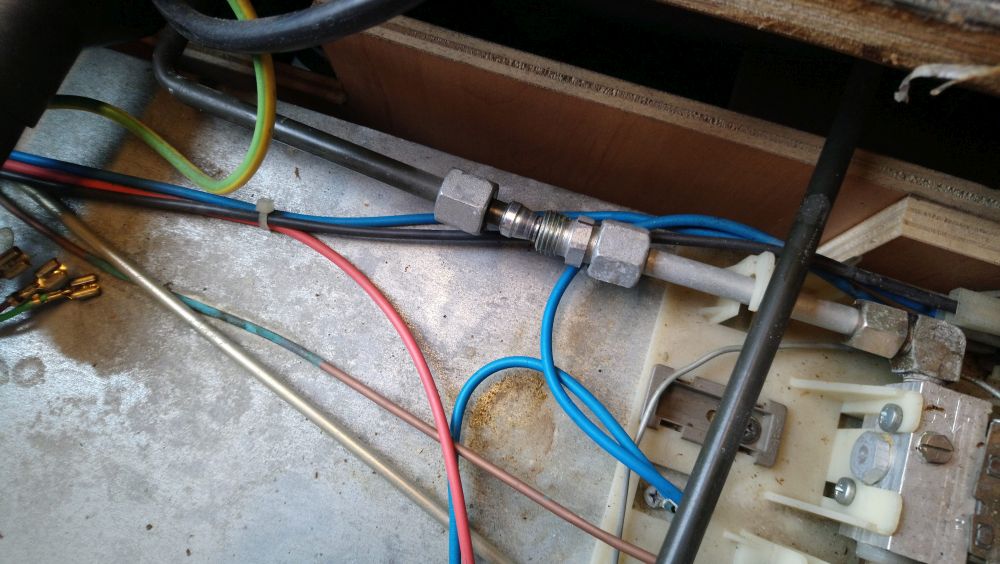
Gas supply line on top of fridge – shown disconnected
With all the required electrical and gas connections disconnected we can move on to actually removing the fridge. It is held in by four screws on the inside of the fridge itself and some more screws at the rear. To remove the rear screws unclip the top fridge vent from the outside of the van.
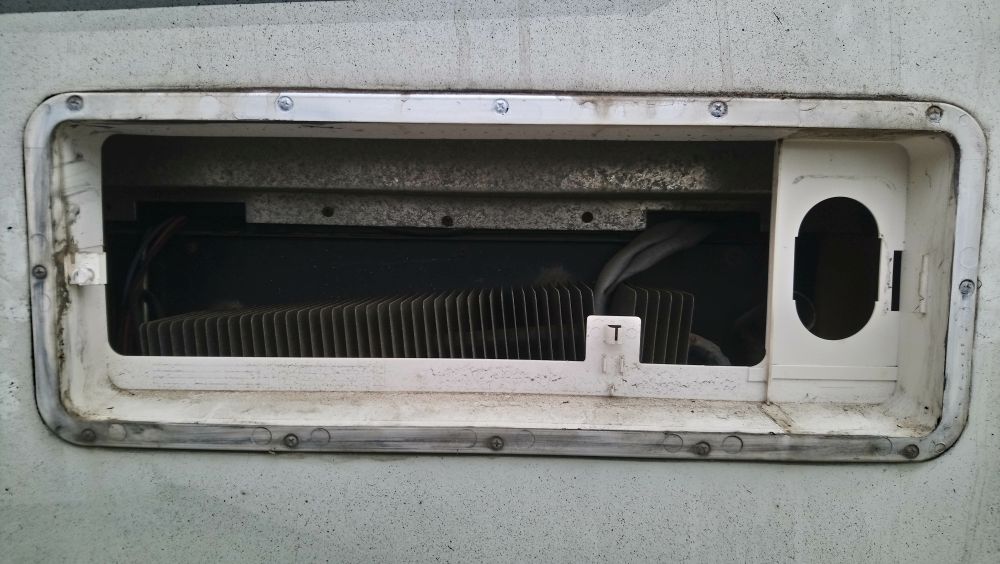
With the top vent removed you should be able to see the rear of the fridge like this (hopefully your van/vent are cleaner than mine – this is just after a 1700mile trip!)
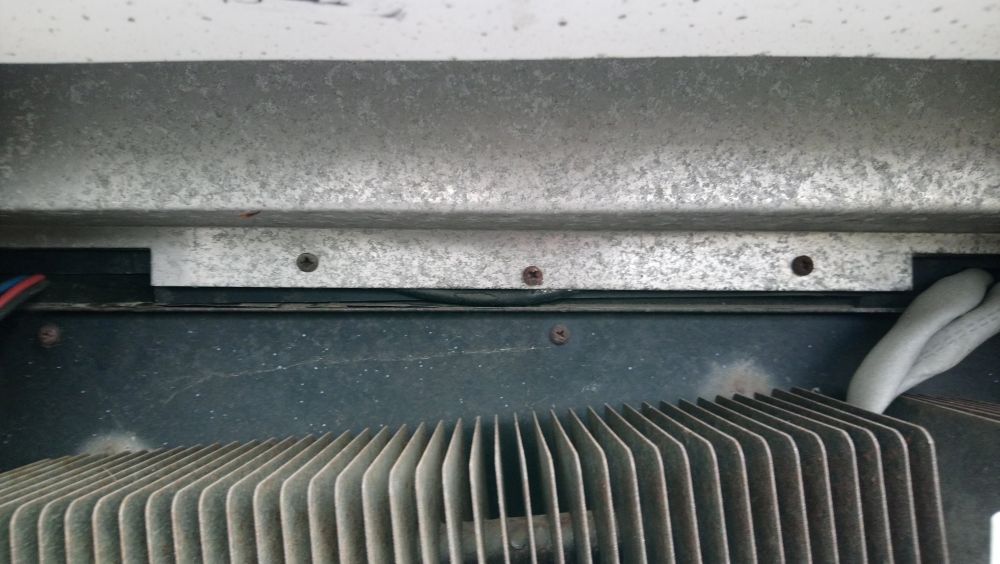
Looking inside the vent you should see some screws going through an aluminium panel like this – remove these screws
Back at the front of the fridge there are some bits of trim/woodwork to remove to allow more wriggle room for the fridge to slide out. Firstly there is an outer door over the fridge door itself. With the fridge door open you can access the screws holding the door runners on to the door, remove these to allow the outer door to swing out of the way of the fridge.
Screws holding the door runners onto the outer door – two at the top, two at the bottom (not pictured)
Next remove the trim above the fridge control panel – the plastic control panel cover and two bits of woodwork.
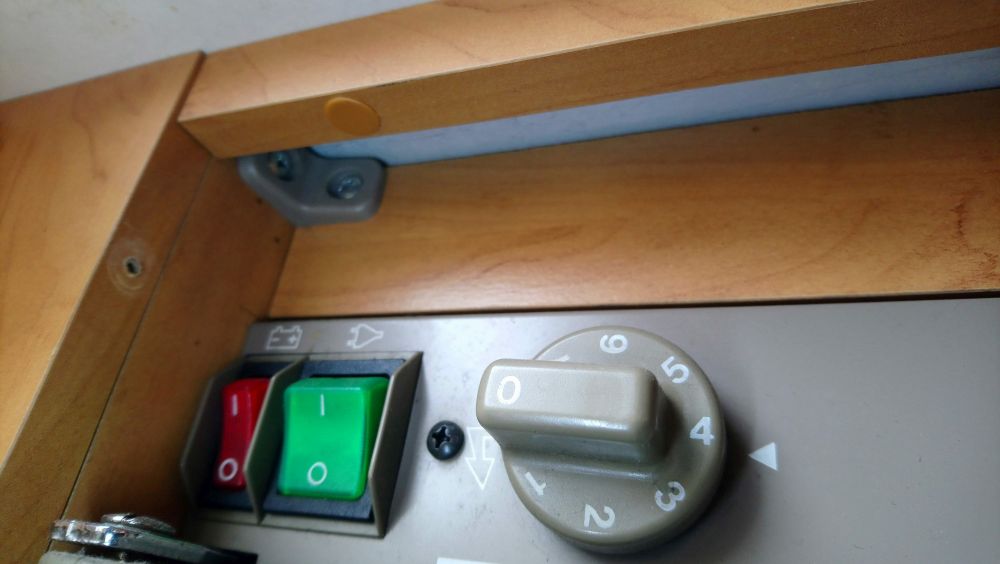
The plastic cover (already removed here) is held on by one screw at each side, the upper piece of wood is held on to the worktop above by screws under the brown circular caps and the piece of wood directly above the control panel is held on by L-brackets (you can see the left bracket in this picture)
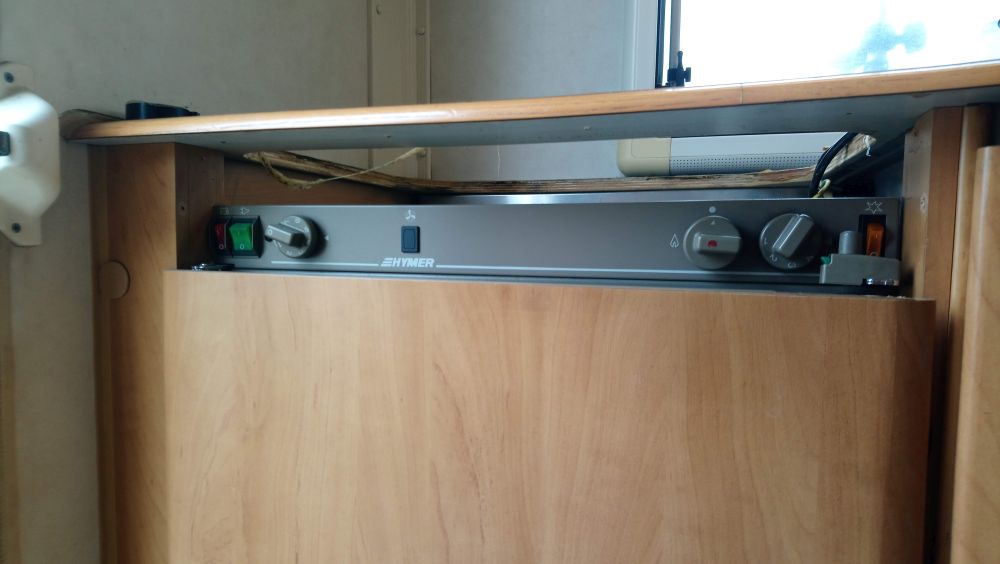
With the trim removed you should be left with something that looks like this
And the whole fridge can finally be slid forwards out of it’s hole. It may be a tight fit and require a bit of jiggling but it should come out easy enough!:-
Reassembly is basically the whole process in reverse.
Click below for details on troubleshooting a fridge not cooling properly on gas
Motorhome fridge troubleshooting – fridge not working on gas
Hopefully this helps you!, any questions or comments please leave them below
Found this information useful? – Want to support Motor-Roam?
Click here to find out how!

September 25, 2019 at 1:03 pm
Hi and thanks for a very informative piece. But I’m having trouble putting the wooden panel back on to the front of the fridge. Is there a special way to do this. With the plastic runners on the wooden front when I close the wooden part they won’t fit into the pieces on the actual fridge. I have no idea of how to ata h the wooden bit . I would be eternally grateful if you could perhaps explain to me quickly how to do this. Sorry for takin your time up . Cheers.
Terry
September 27, 2019 at 4:17 pm
Hi Terry – I attached the wooden door by leaving the plastic sliders attached to the fridge door, then when both the wooden door and fridge door are fully open there should be enough of an offset between the outside edge of the two doors to expose the screw holes in the ends of the plastic runners – you can then screw the runners onto the wooden door. Hope this helps, if you are still having problems let me know & I can take a photo to explain what I mean! Cheers, Dan
September 27, 2019 at 6:09 pm
Ah I just looked yes I have done it , thank you so much. What was a really easy job but I couldn’t for the life of me figure it out. Thank you for taking the time and trouble to reply . Much appreciated.
August 28, 2022 at 4:03 pm
Hi all. Does anyone know where I could source the plastic flap covering the control panel. Guest in the MH snapped it off trying to open the fridge. Very informative post. Will bookmark for when my fridge packs it in.