Quick preventative maintenance job this time – The sump on our old Fiat Ducato based Hymer was looking very crusty so I thought I would renew it while I was changing the oil before it rotted through completely and dumped all the engine all at an inopportune moment! Continue reading
Category: Technical Articles (page 4 of 6)
Help our reader!
Common Problem?
It seems to be a common problem with Ducato’s that the fuel gauge either intermittently stops working, or fails completely. There are a couple of common causes for this (note: this is for a 1999 Ducato 2.8idtd. much earlier or later vans are likely to be different):-
Oil Pressure Warning light Problems?
The Oil Pressure Warning light on the dash is designed to let you know if the engine oil pressure drops below a safe level, so you can shut off the engine – hopefully before any irreversible damage is done!
Rusty Crossmember?
I recently made the rookie mistake of peeling another layer of ‘the onion’, our beloved 1999 Hymer B544 (as our patron-saint AvE would say – ‘you just keep peeling back layer after stinking layer until you’re left with nothing but tears….’)
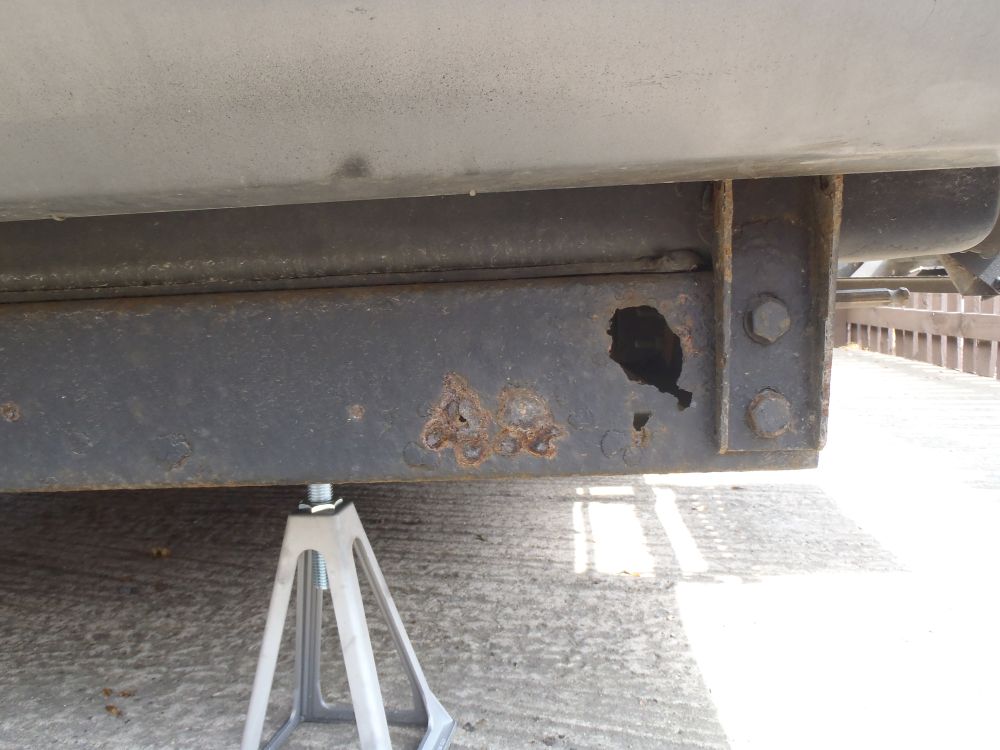
It started when I noticed some rusty looking bubbling on the rear crossmember, a gentle investigative poke later and a large chunk had fallen out and landed on the floor, leaving a nice patch of daylight in the crossmember!:-
The rear crossmember is just bolted in place by two bolts on either side, so after supporting the surrounding structure with a couple of stands the crossmember could be taken out so I could see what I was dealing with:-
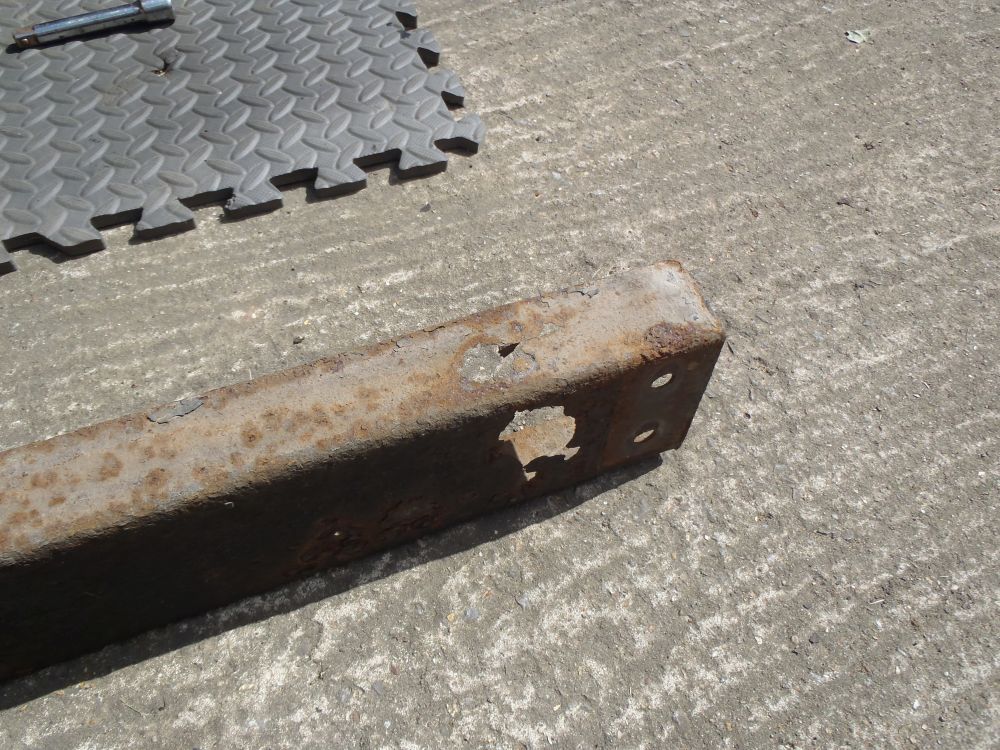
Once it was out I could see the top section has rusted through as well as the rear section (as shown in the photo above, so it was clear the repair was going to be a bit bigger than first thought…….
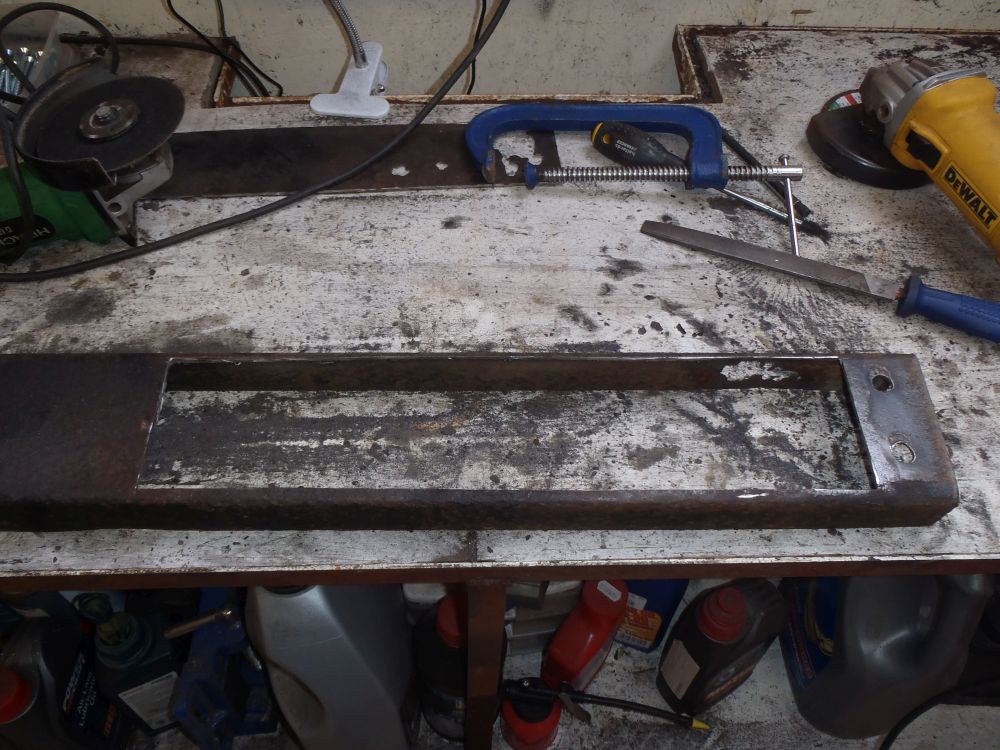
Once I had cut out the rusty metal and got back to decent steel this was the size of the hole that needed to be repaired!:-
The same process was carried out for the smaller hole on the top, then it was just a case of cutting some new steel sections (or in this case old steel sections scavenged from an old oil tank!), welding them in and spraying the whole cross member with underbody schutz to protect it and hide my less-than-perfect welding!:-
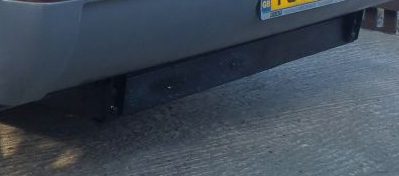
You would never know I’d been here 🙂
Step a bit clunky?
Recently while I was investigating a faulty step warning buzzer I discovered a number of the teeth on the gear that actuates the step were very worn, which explains the rattly operation and occasional jumping of the step as it goes up and down. Here’s how I repaired the gear for free with a mig welder and an angle grinder…..
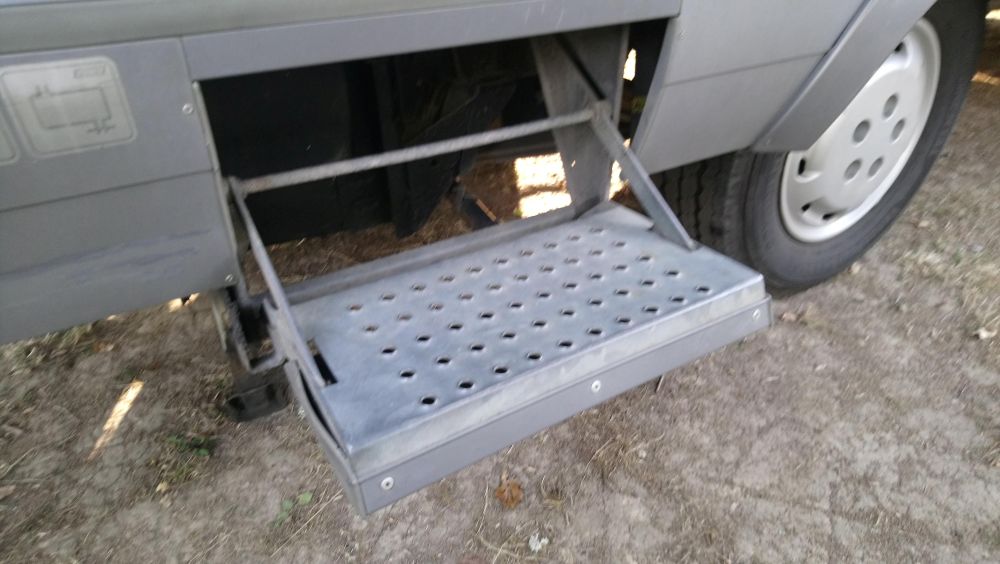
For reference this is the type of electric step we have on our 1999 Hymer B544 mechanism, it is a simple unit that folds out from the trim under the habitation door:-
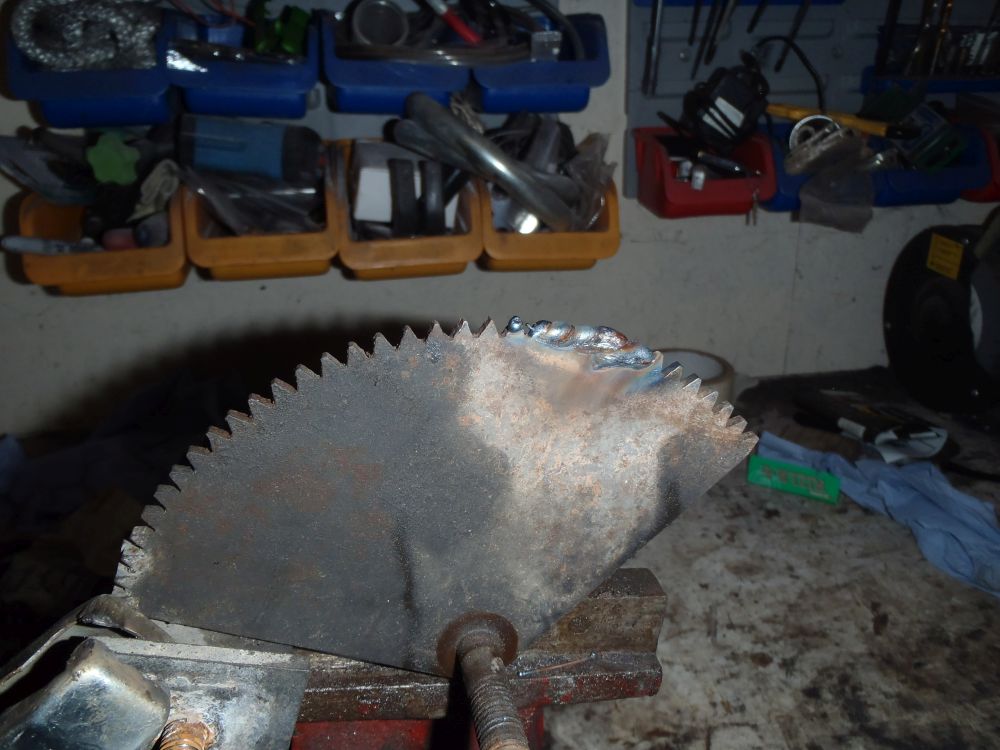
This is the worn gear, you can see the section where the teeth have almost completely worn away:-

First step was to build up the worn area with the mig welder (I am by no means an expert welder, so please forgive the state of the weld!):-
Next it is just a case of re-cutting the teeth with a plasma disc in an angle grinder. The step is not a precision piece of equipment so it doesn’t need to be especially accurate!
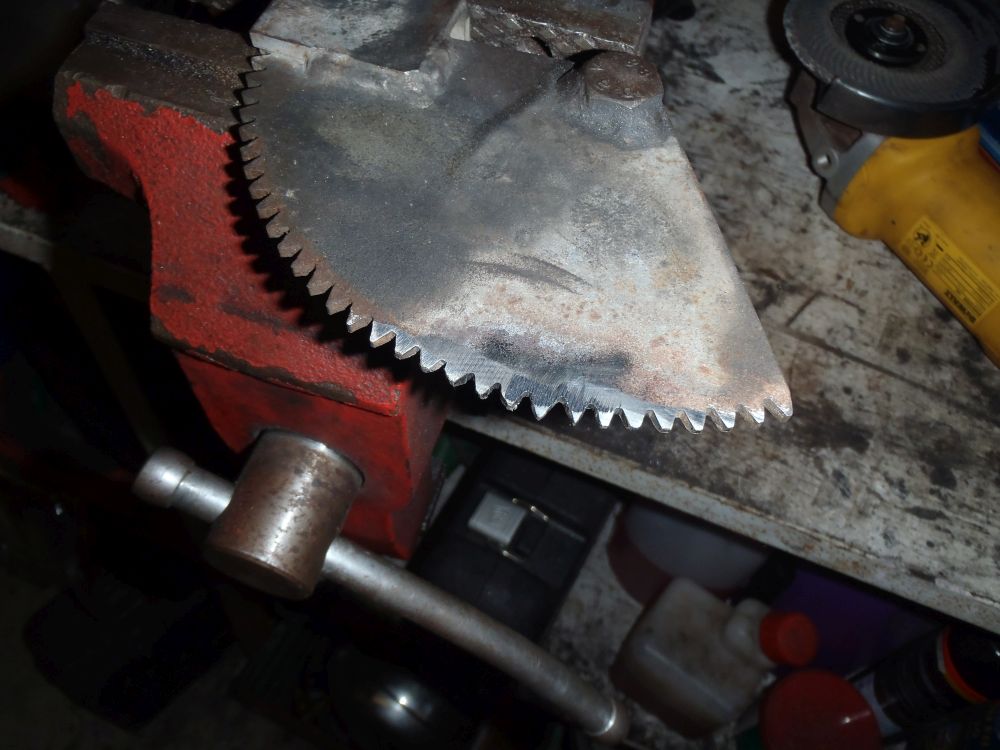
Then just a case of putting the step back together, as a Haynes manual would say ‘reassembly is the reverse of removal’ – good as new 🙂
UPDATE – Ron Bentham who runs the ‘Classic Hymers Technical’ Facebook group has been in touch to let us know that the Motor used on these steps is a part used on Land Rovers, if your motor fails and needs replacing you should be able to find a new one by searching for part number RTC 6640 – You can find Ron’s facebook group here:- https://www.facebook.com/groups/297054424534823/
Faulty Warning Buzzer?
Have you made the same mistake as us and driven away while the step is still down? Potentially a costly mistake!
Ever since we bought our 1999 Hymer B544 the warning buzzer that lets you know the step is down when the engine is running hasn’t worked – this never bothered me too much but after driving half way home from a campsite the other day with the step down I figured I should probably look into it……….
The electrical circuit is pretty simple, there is a buzzer that gets +12V whenever the engine is running (from the alternator D+ terminal) and the circuit to ground is completed by a switch that is closed when the step is deployed.
The switch itself is located on the step mechanism and when I disconnected the wiring and earthed it on the chassis with the engine running the buzzer sounded, which pointed to the switch itself being at fault.
For reference, this is the type of step our bus has, if yours has one of the more modern fancy steps I imagine the warning buzzer system will be similar, but I’ve not investigated to check this out:-
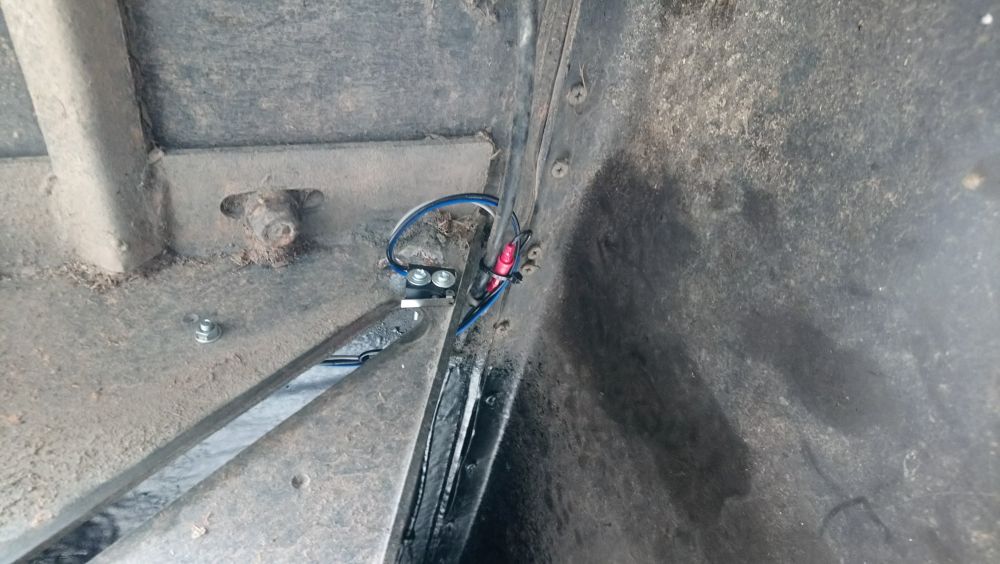
On removing the switch to investigate I discovered it is a simple plunger mechanism that is activated by the step itself as it retracts, but ours was completely rusted solid in the ‘up’ position and well beyond repair!:-

I couldn’t find a direct replacement switch so instead bought a cheap waterproof (IP rated) lever action microswitch for £4.99 from eBay:-
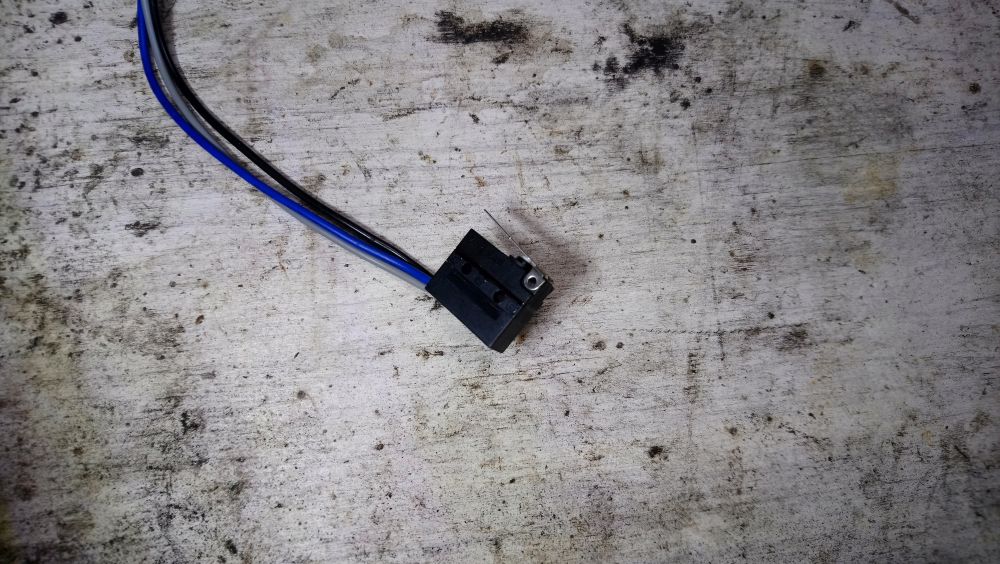
This switch is actuated by the metal lever on the top of the switch in the photo above, there are three wires – a common, normally open wire and a normally closed wire, but you only need two of the wires for this application.
I needed the switch to close the circuit when the lever is not actuated so selected the common and normally closed wires to connect to the wiring on the bus. There was no wiring diagram with the switch or markings on the switch itself but a quick check with a multimeter will determine which wires are joined when the lever is not actuated (if you don’t have a multimeter trial and error would work too! – you are not going to damage anything by connecting it up wrong, you will just end up with a buzzer that still doesn’t work, or one that is on when the step is up)
Here is the switch mounted in position on the step mechanism so the step actuates the lever when it is fully closed/up – I just used two small bolts through the existing mounting holes on the switch and drilled matching holes in the step bracket to mount it to. You can see here where the step slides up a slot in the bracket and will operate the lever when it reaches the end:-
All working again now – annoying warning buzzer reinstated! Total repair cost £4.99
Siezed Steady Leg?
When we originally purchased our old Hymer B544 both rear steady legs were seized solid – I think they had been left unused in the up position for some time and water had got to them and rusted them up completely. I managed to free one of them with brute force and lots of penetrating lubricant but the other wouldn’t shift at all – here’s how I went about overhauling it:-
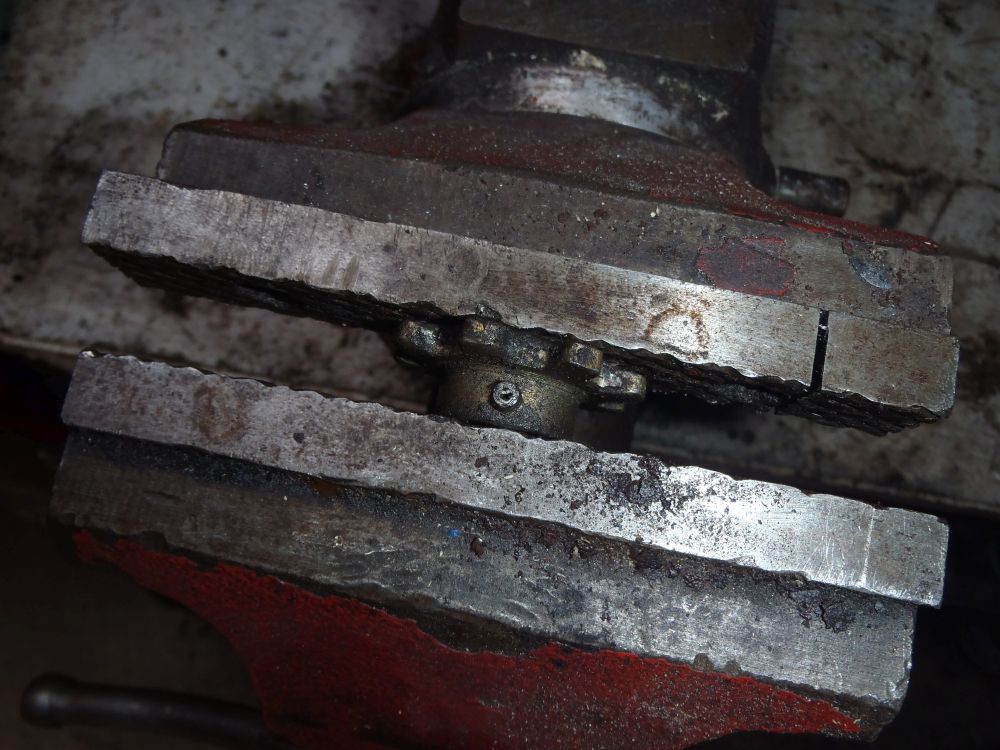
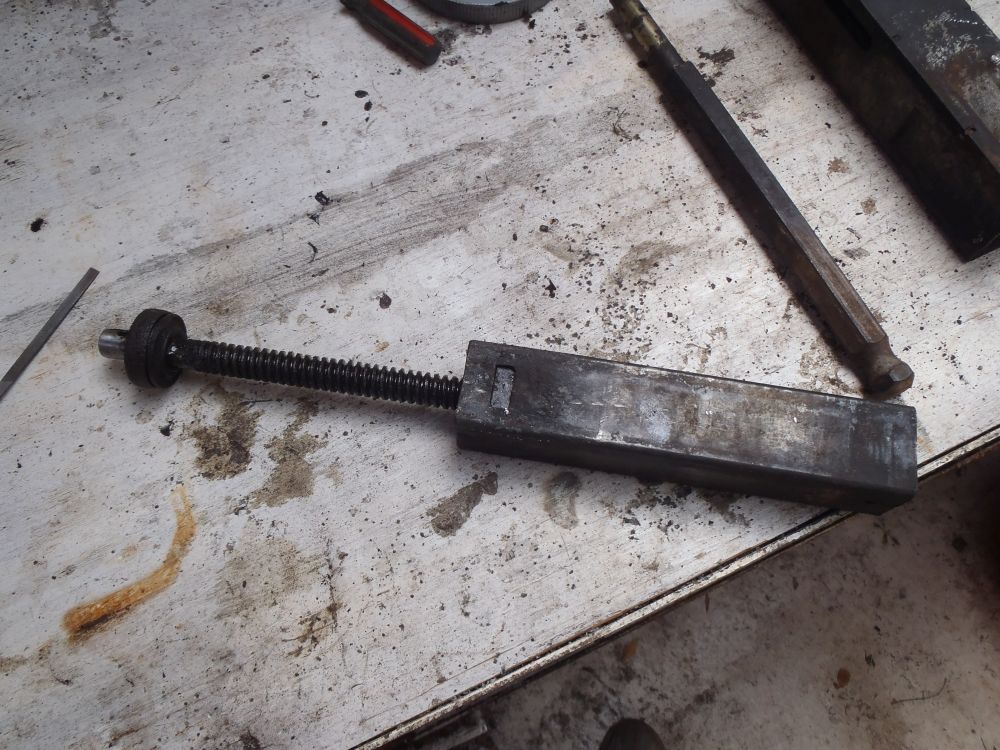
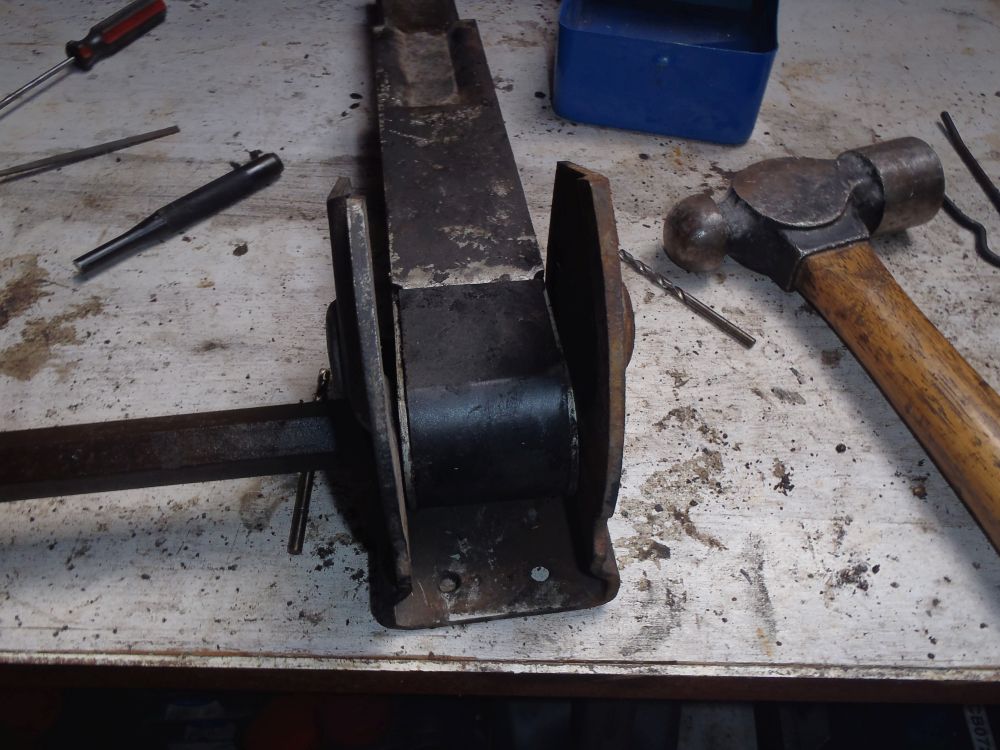
There mechanism in the top of the steady legs works with two small gears that are held on shafts with roll pins – using brute force to try and free the seized leg just sheared both roll pins!, there was no choice but to strip it down completely to sort in out. Once it was all dismantled this was the pile of parts I was left with, just a matter of reassembling the jigsaw…….
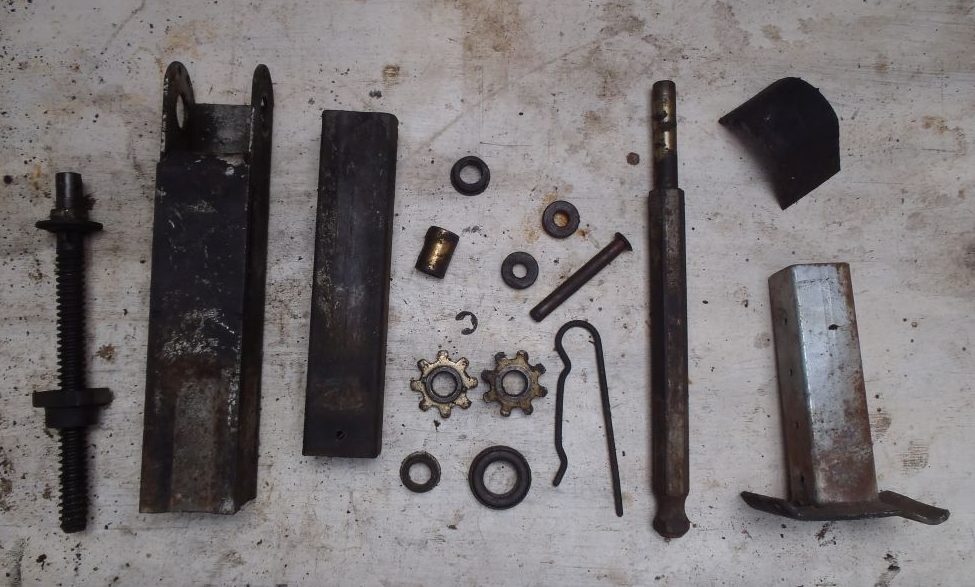
The main problem was the threaded shaft on the left of the picture above. The nut that runs on the shaft and extends the leg was solidly rusted onto the shaft. To free it off I held the shaft in a vise and heated the nut up with a blow torch until it was red hot, then using a pair of vice grips I could turn the shaft and free it off. Then is was just a case of greasing the threads and running it up and down them a few times to clean them off.
The next job was to remove the remains of the old sheared-off roll pins by driving them out with a pin-punch so they could be replaced. Here is the input shaft in the vice:-
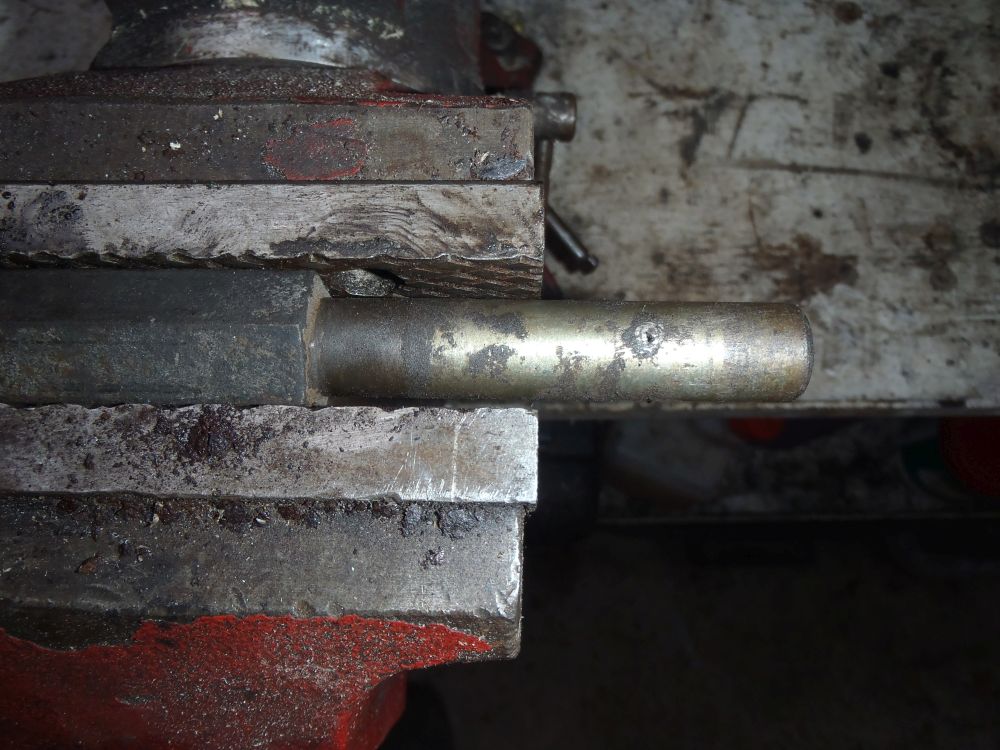
And with the roll pin remains removed:-
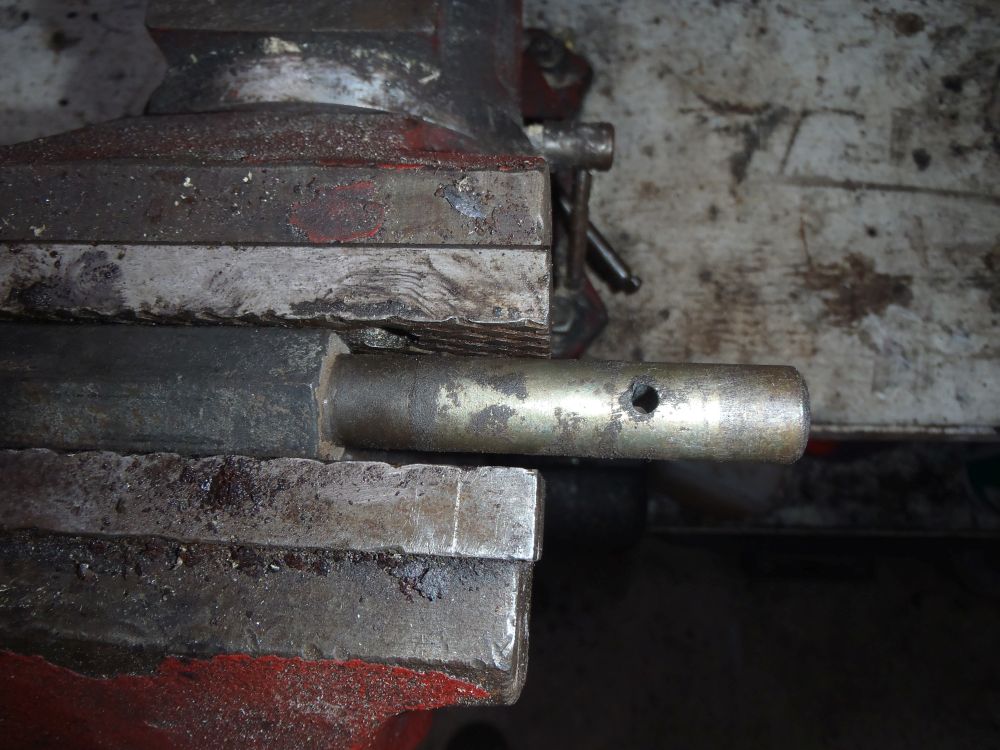
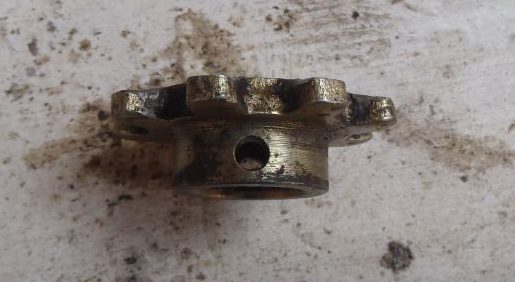
The same process was repeated with the gear:-
Roll pin remains removed:-
The same process was repeated with the threaded shaft and the gear that attaches to the top of that, I don’t have any photos of that but you get the idea…..
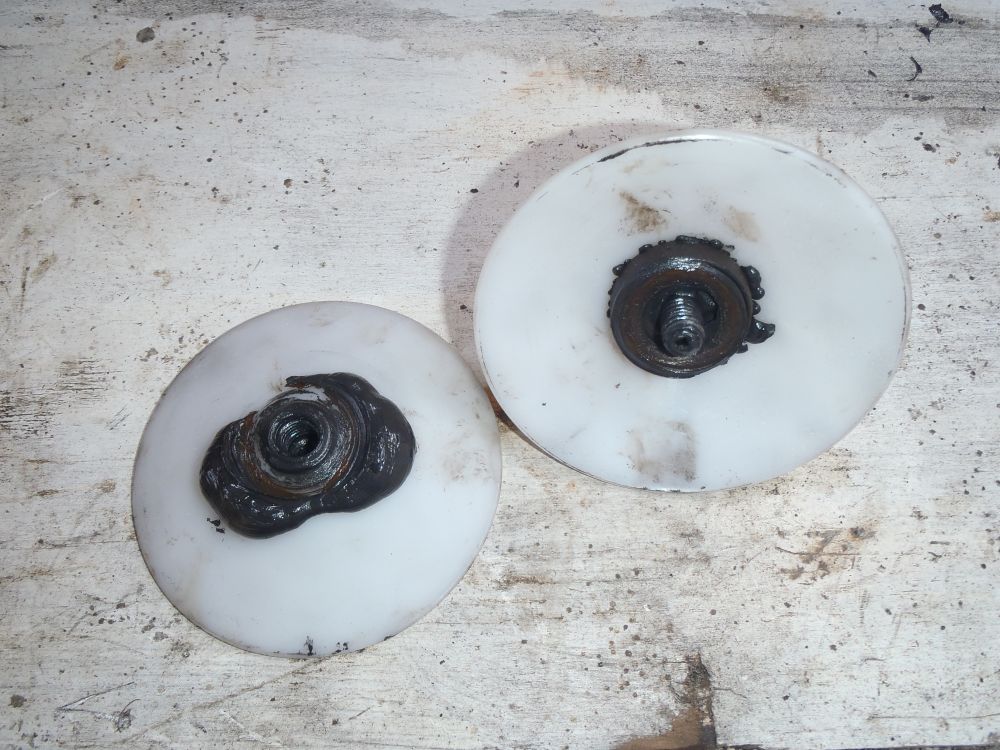
The bearing from the top of the threaded shaft was dry and rusty, I used a bearing packer to force it full of fresh moly grease. If you don’t have a bearing packing it’s not the end of the world as the loadings aren’t very high and it doesn’t need to handle any speed so probably would have been fine left dry, but and sort of lube you can get in there will help it’s longevity and make the legs smoother & easier to use :-
Here is the bearing back on the threaded shaft:-
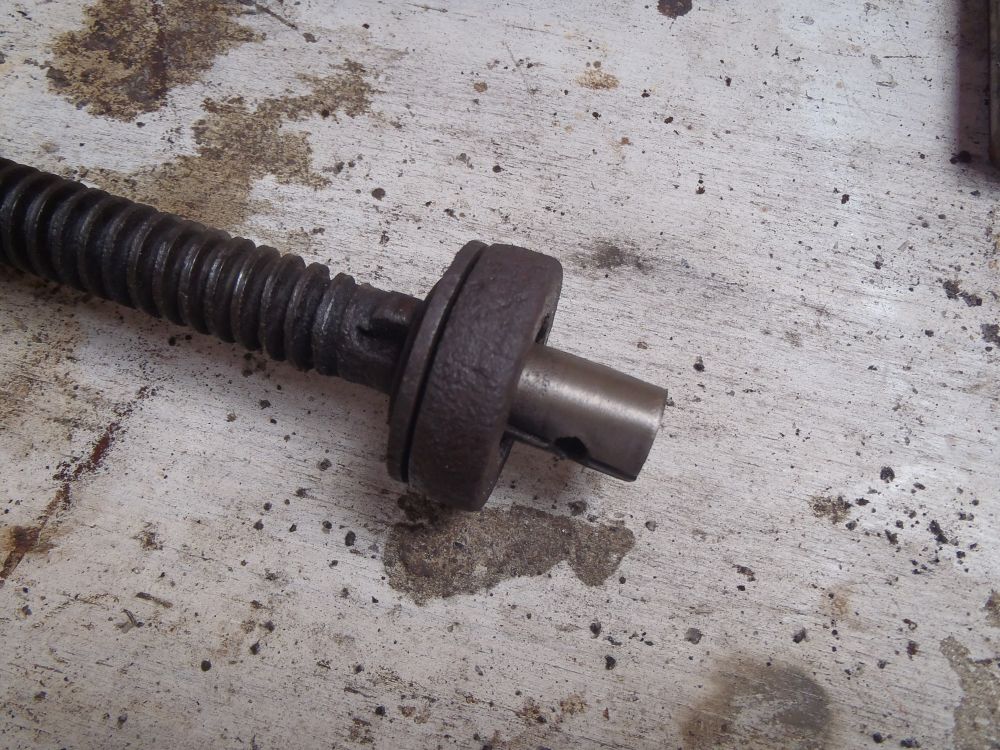
Next step is to refit the threaded shaft to the lower section of the leg, This is just a case of sliding the square nut in and hammering the tabs in to hold it in place (you will have had to bend the tabs out to get it out in the first place):-
You can then refit the threaded shaft and low leg back into the main leg ready to refit it’s gear, here is the lower section back in with the gear in place:-
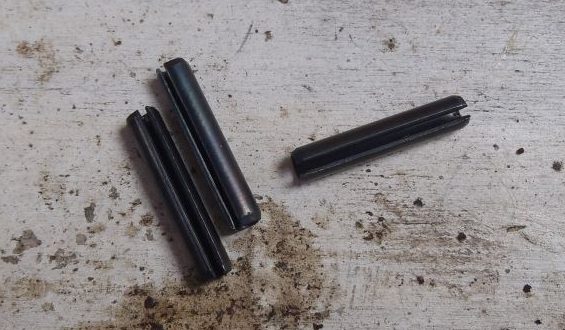
These are the roll pins I got from a local agricultural engineering place to replace the broken ones, I could only get slightly larger pins which meant I had to drill out the holes to a larger size, but if you can get the right size pins you shouldn’t need to do this!:-
Next is the drive shaft with it’s bushings, spacer and gear, with the roll pin hammered into place to hold the gear:-
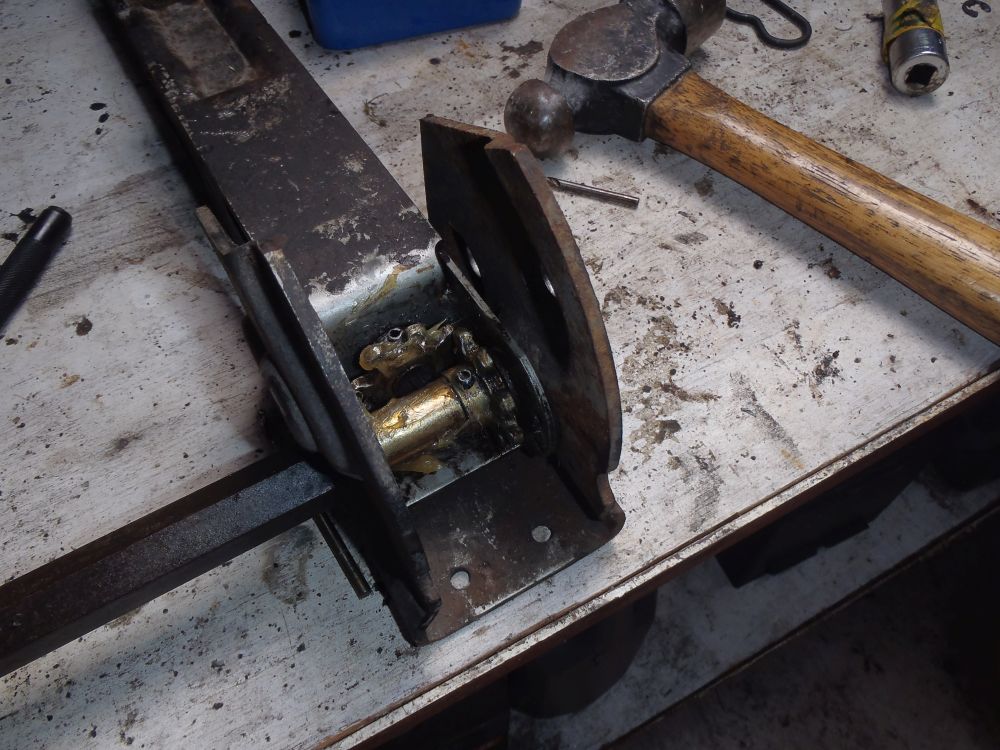
A bit of grease on the gears and the plastic cover can be refitted to protect them:-
Last job is to refit the small shaft with two rollers that make the leg fold away as it is wound in. This is held in place with a small e-clip:-
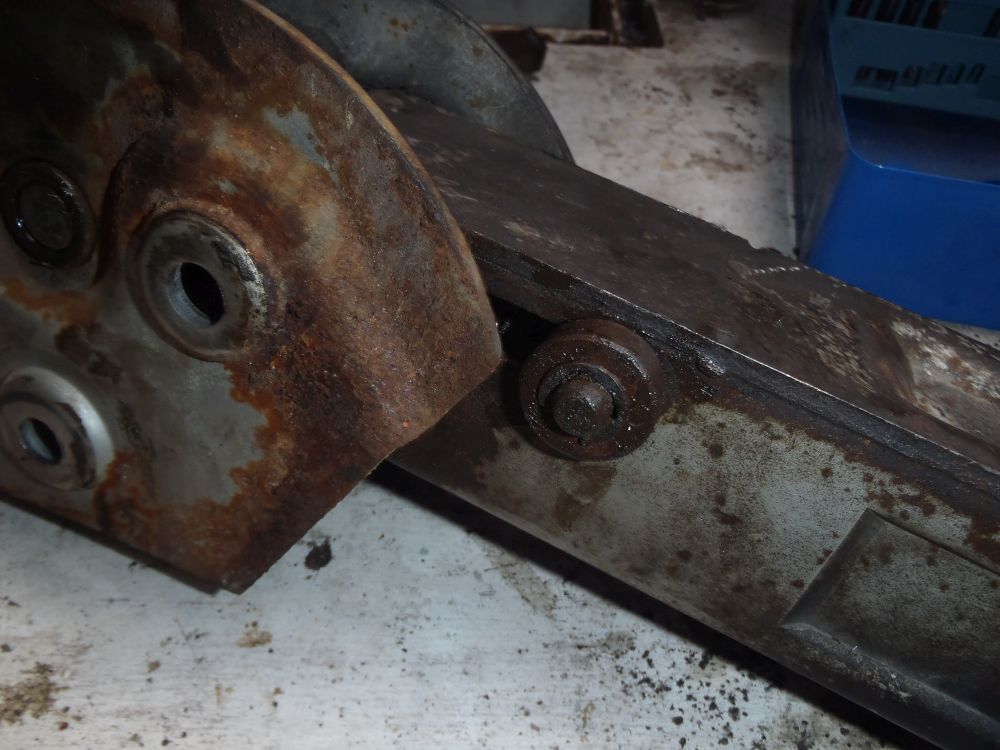
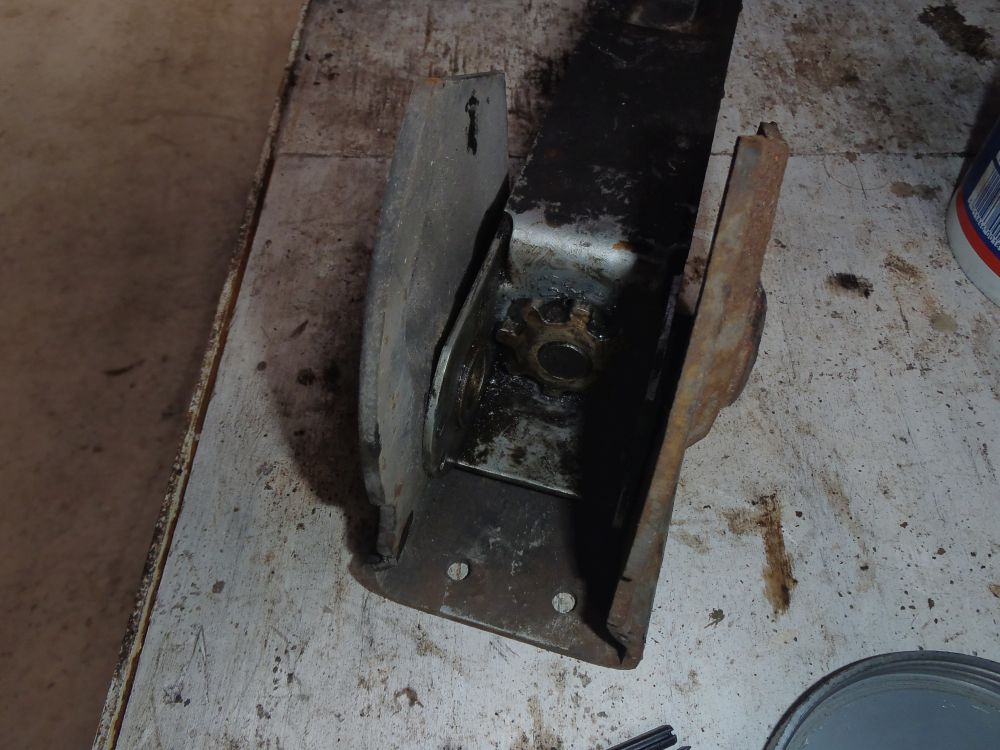
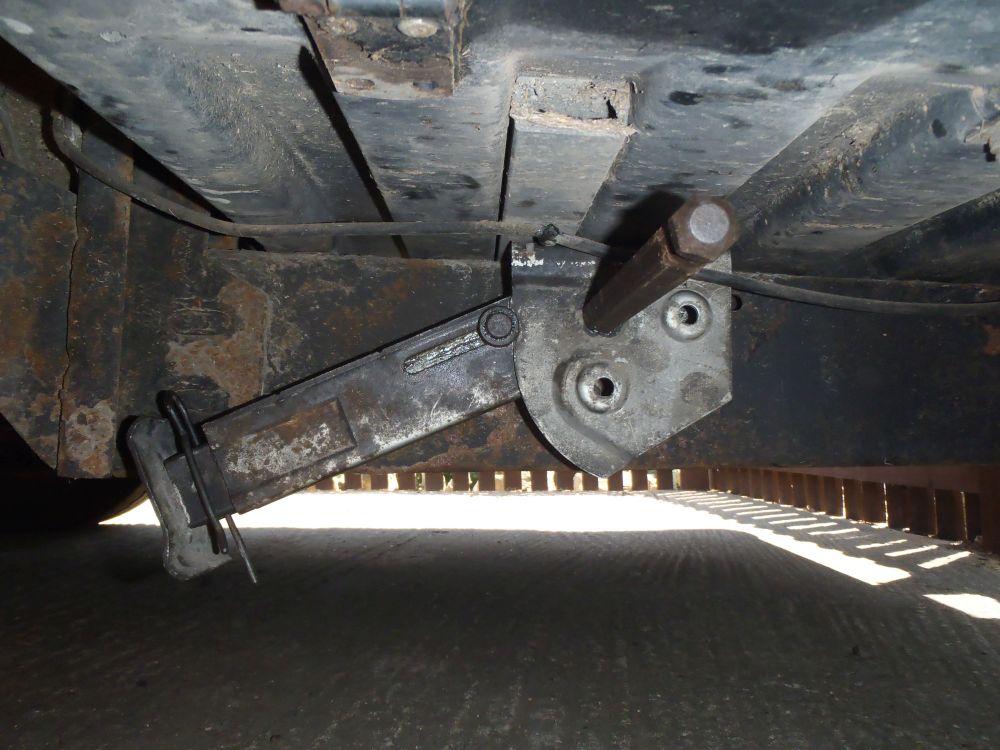
All done, here is the whole assembly back on the bus and working just like new!:-
Hope this helps if you find yourself in the same situation, and questions let me know in the comments below……..
Trav-L-Cool air conditioning system
Like a number of old vans (and possibly some new ones!) our Hymer B544 came to us with a Trav-L-Cool air conditioning system installed. These are ‘evaporative’ coolers so work differently to compressor driven air conditioners like you would find in cars and offices everywhere.
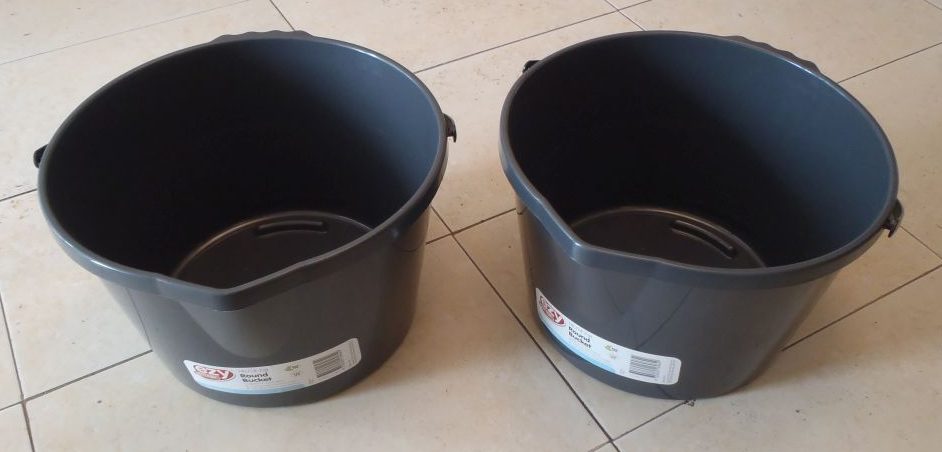
The ‘2 bucket method’
When winter camping lots of Motorhome travellers prefer to not use the on-board grey water tank, instead going with the ‘2 bucket method’
Follow us on Facebook!

© 2026 Motor-Roam
Theme by Anders Norén — Up ↑