Les Rousses is a small ski resort in the Haut Jura region on the Frace-Switzerland border with 48km of Pistes. There is dedicated motorhome parking at the bottom of the Balancier chairlift with a Flot Bleu terminal for fresh water and waste discharge.
Continue readingAuthor: Dan (page 3 of 10)
The Valloire ski area is linked to Valmeinier and offers 150km of pistes. There is a serviced & barrier controlled Aire at the bottom of the Les Verneys chairlift that costs around 13 Euro per night and includes water/waste/power/WiFi. (There is a power connection for each spot, limited to 6 Amps)
Continue readingSaw this recently on a van next to me in a ski resort car park – clever modification of a rear mounted bike rack to carry skis:-
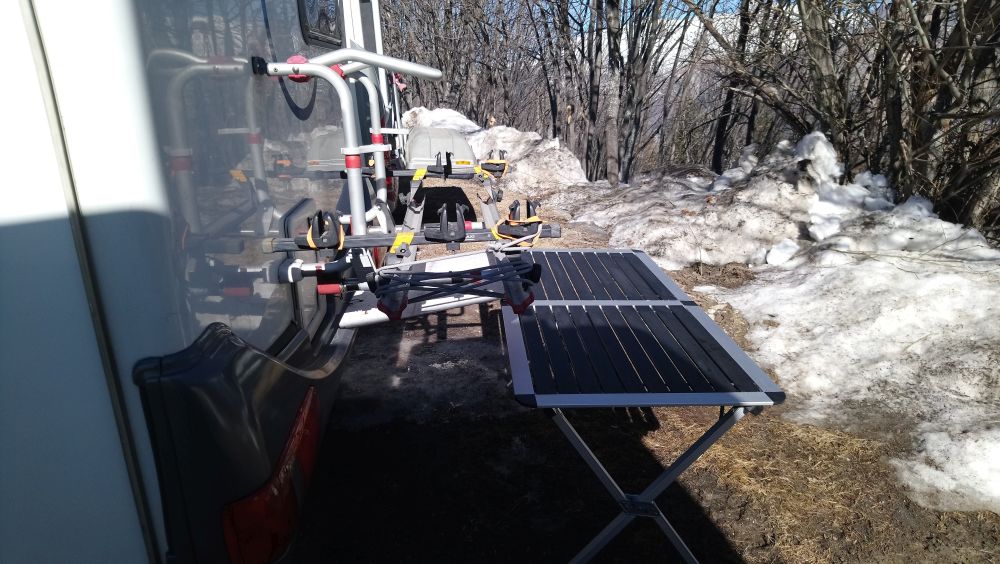
It’s a set of standard, universal ‘gutter mount’ roof bars clamped to the bike carrying channels (the bars have been cut down to suit) Standard roof-bar ski carriers are then mounted to the bars, simple and cheap solution to carrying skis!
This approach could also be extended to anything designed to mount to roof bars, providing you don’t exceed the weight limit of your bike carrier………
Found this information useful? – Want to support Motor-Roam?
Click here to find out how!
For a while we had a nasty vibration in the van (1999 Ducato Hymer B544) when climbing hills at full load around 60-70mph, this turned out to be due to a worn CV joint in one of the driveshafts. In a motorhome the driveline has a pretty tough life – pulling a vehicle that is fully loaded pretty much permanently – so I decided to replace both the driveshafts while I as at it – here’s how:-
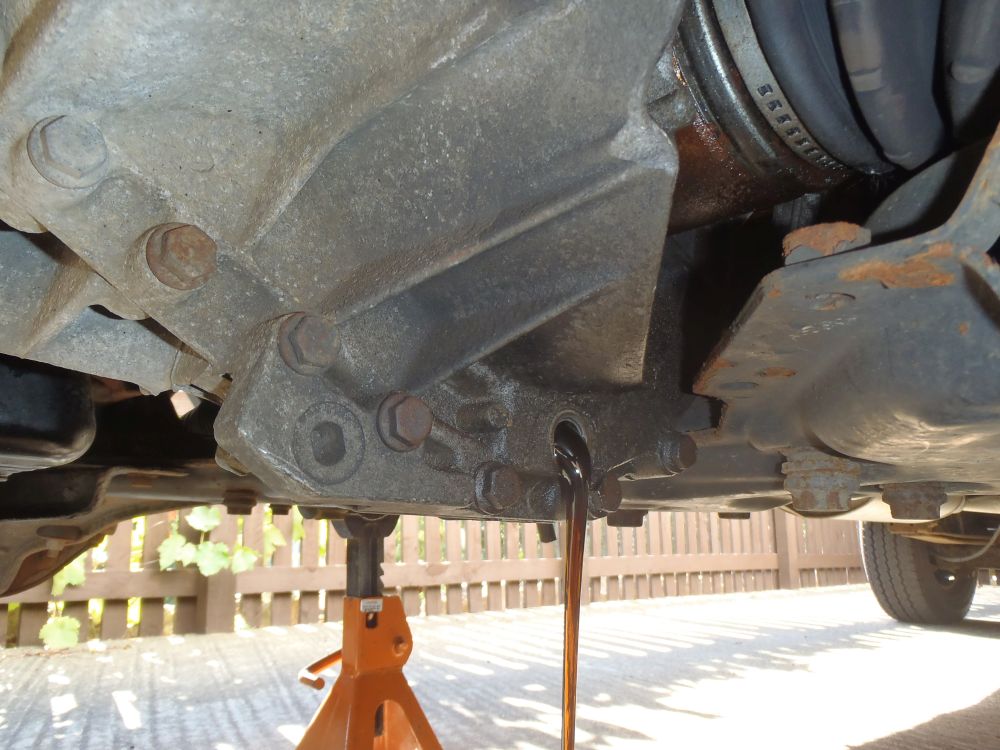
First job was to secure the van on axle stands and drain the gearbox oil (it will all come out anyway when you remove a driveshaft, so you might as well do it now!) The drain plug is in the bottom of the gearbox underneath the inboard end of the left hand driveshaft.
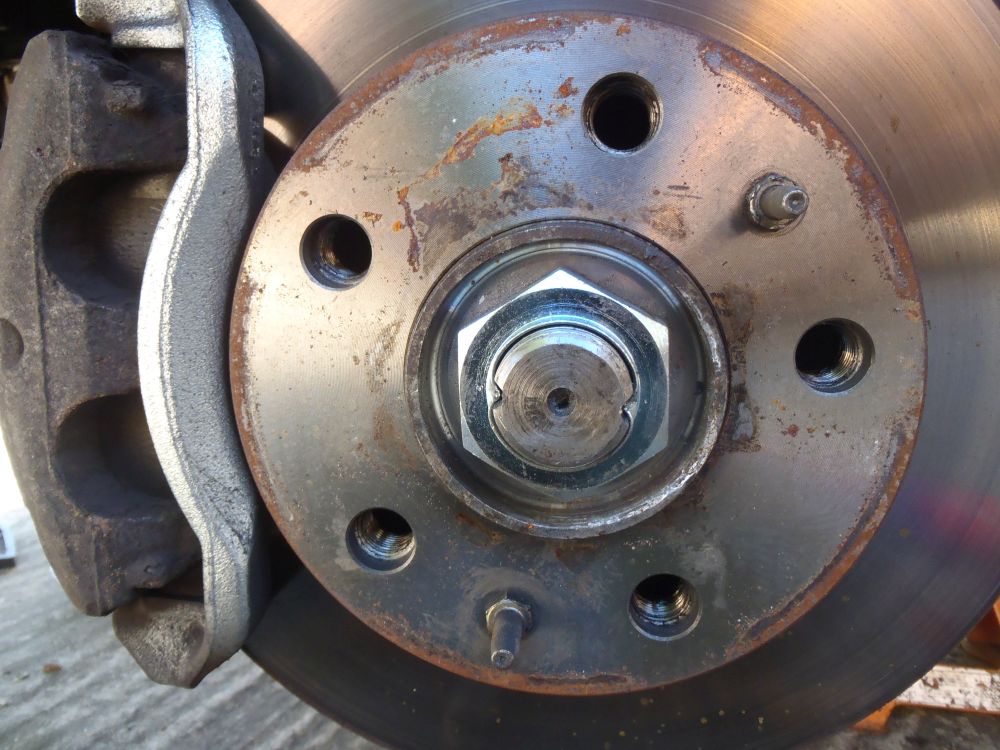
I replaced the left hand driveshaft first, to release the driveshaft from the hub you need to remove the large hub nut which is staked onto the driveshaft – it will be VERY tight!
To stop the whole assembly from turning while you remove the hubnut you can put a couple of wheel bolts back in and use a large bar to brace it like this – I used a 1/2″ breaker bar for this.
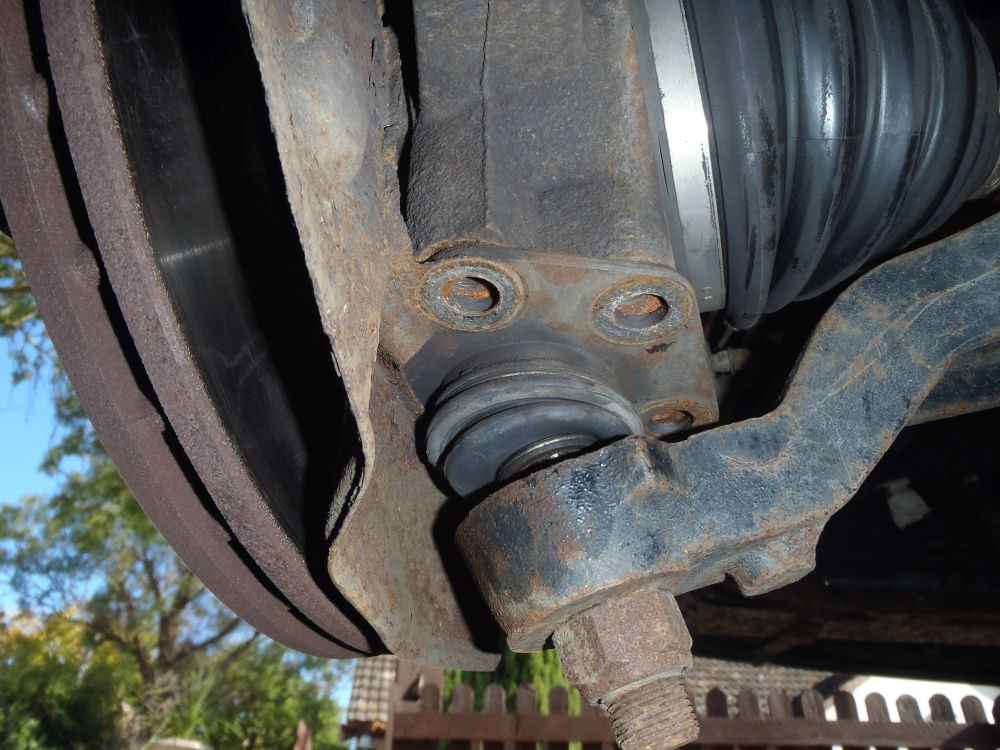
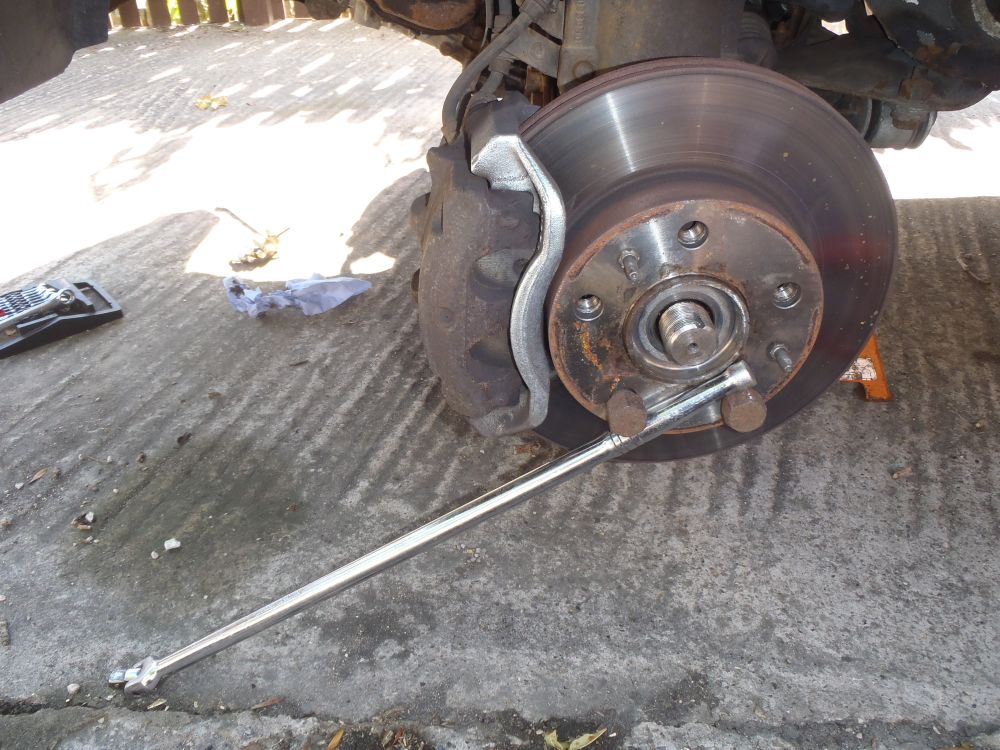
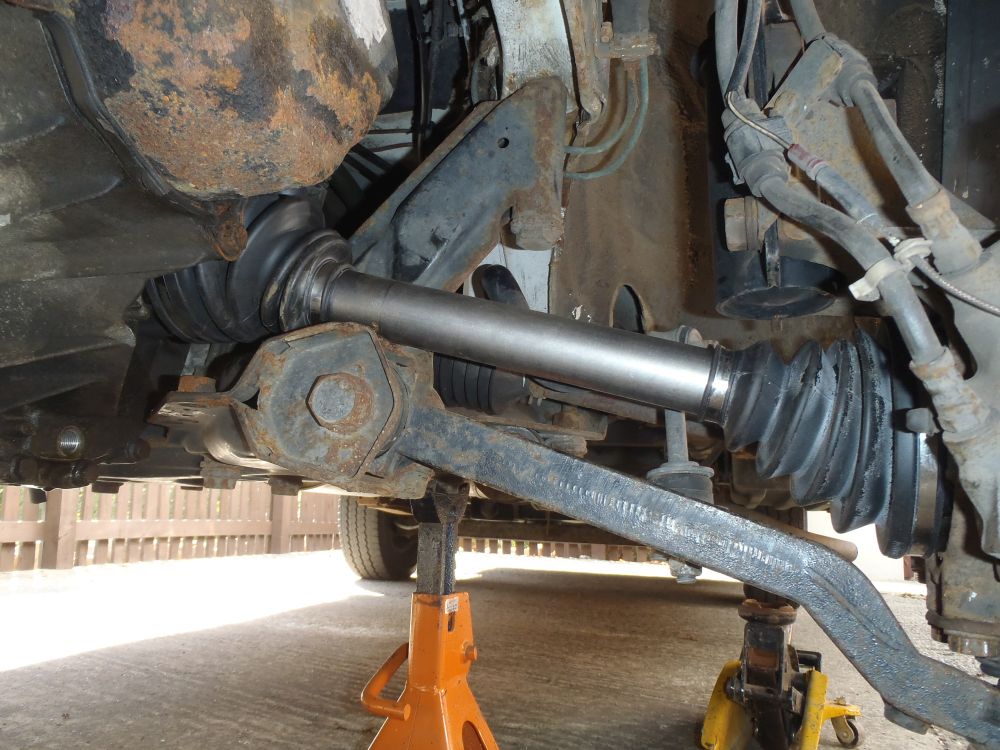
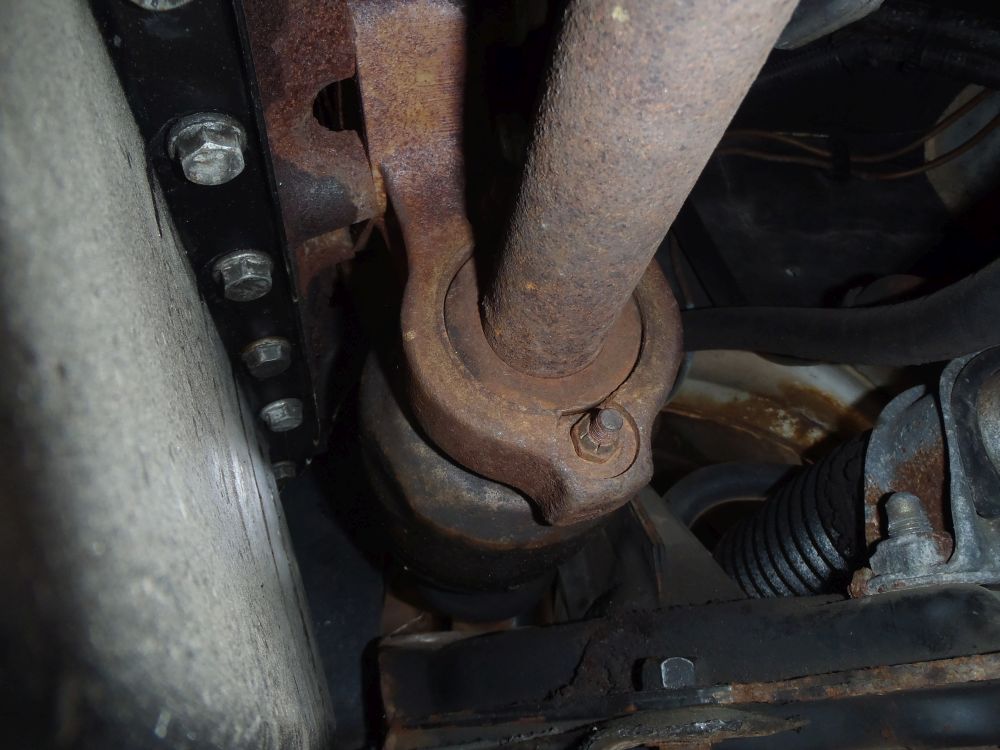
To free the end of the driveshaft from the hub we need to be able to move the hub away from the gearbox. There are a couple of ways to achieve this but I find the easiest method is to unbolt the lower ball joint from the hub to allow the whole suspension strut to swing outwards.
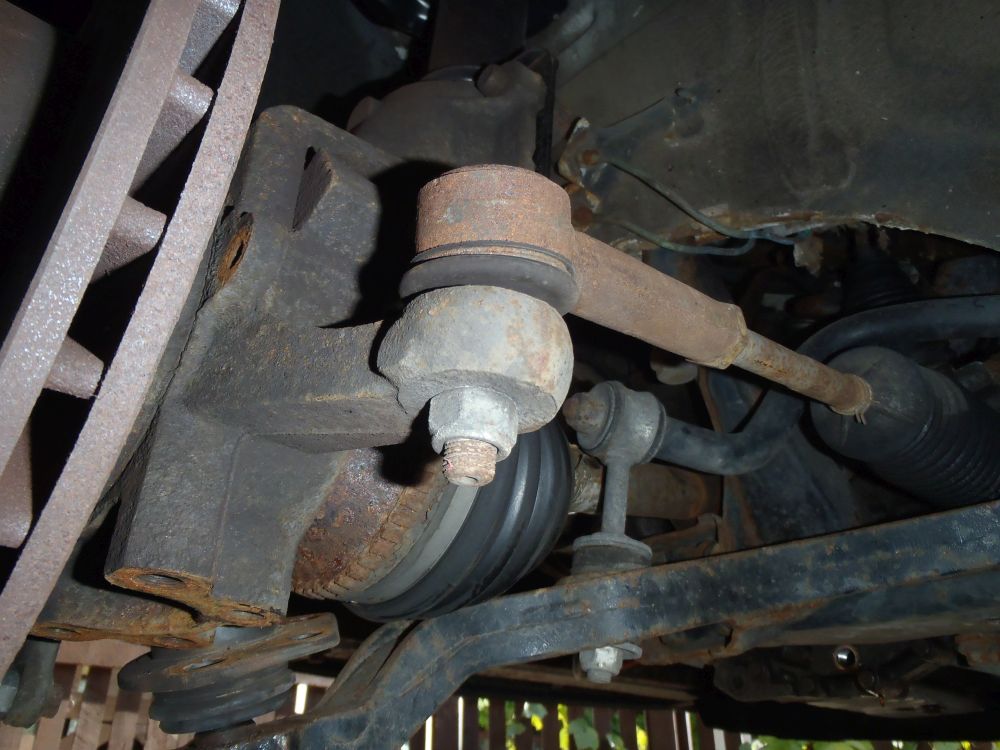
To allow the strut to move far enough you will also need to disconnect the steering arm by removing the ball joint securing nut.
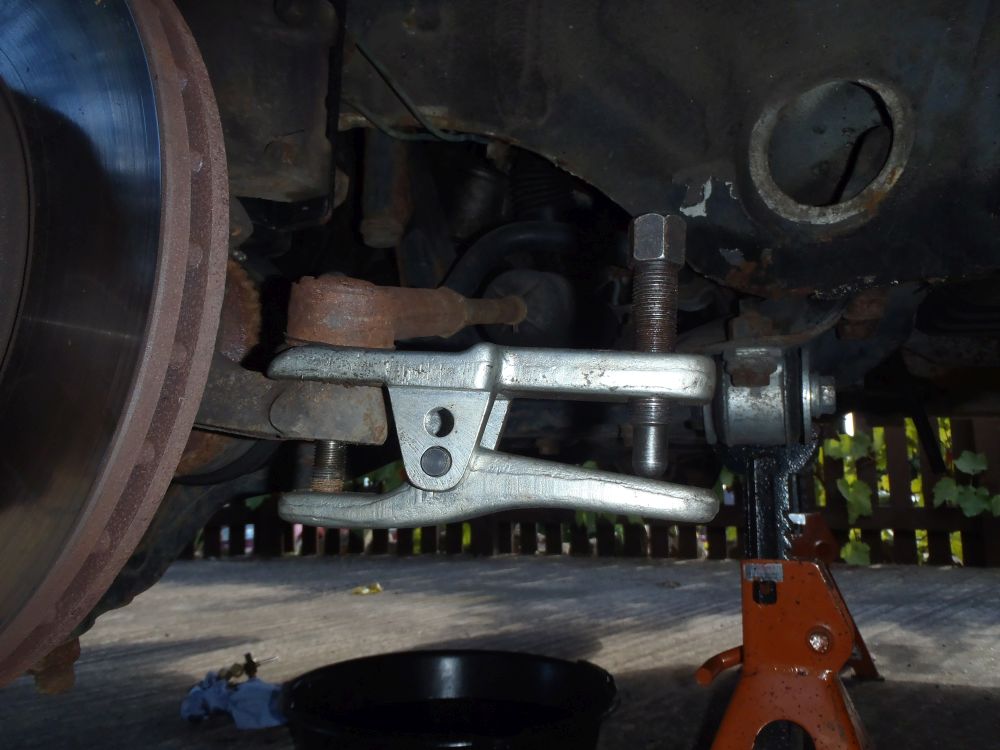
A large ball joint splitter can be used to free the ball joint from the hub. If you don’t have a splitter you could instead unscew the steering rack arm from the ball joint, but this can upset the steering geometry if you don’t screw it back in by the exact same amount when you reassemble it.
Note: you will need to lever the lower suspension arm downwards to separate the arm from the hub. Disconnecting the anti-roll back drop link from the suspension arm will make this easier.
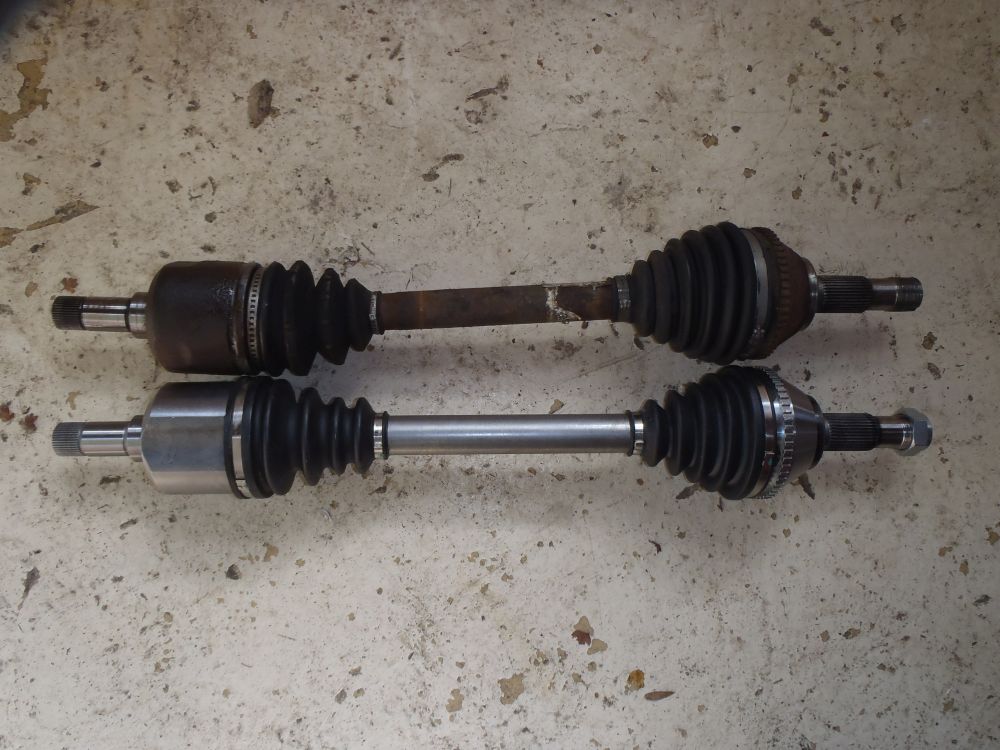
Once the outer end of the driveshaft is free from the hub you can pull the whole thing out of the gearbox – it might need a sharp tug on the inside CV joint to free it. Here is the old driveshaft on the top, shiny new one underneath.
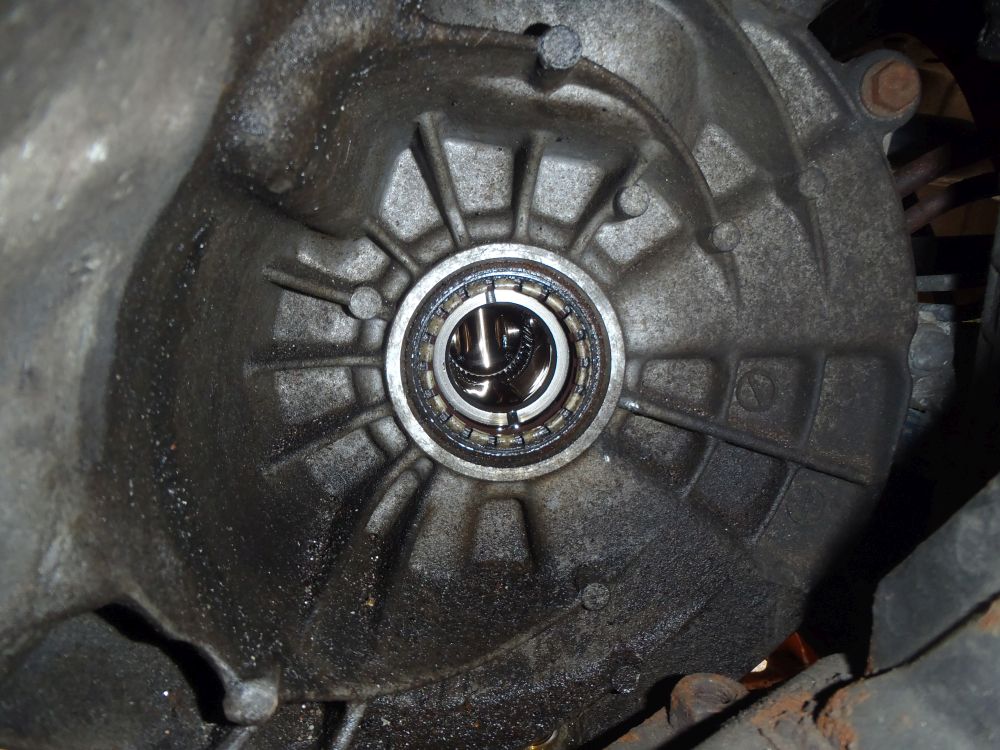
It is a good idea to replace the driveshaft seals in the gearbox while the driveshafts are out – here is the old seal at the gearbox output.
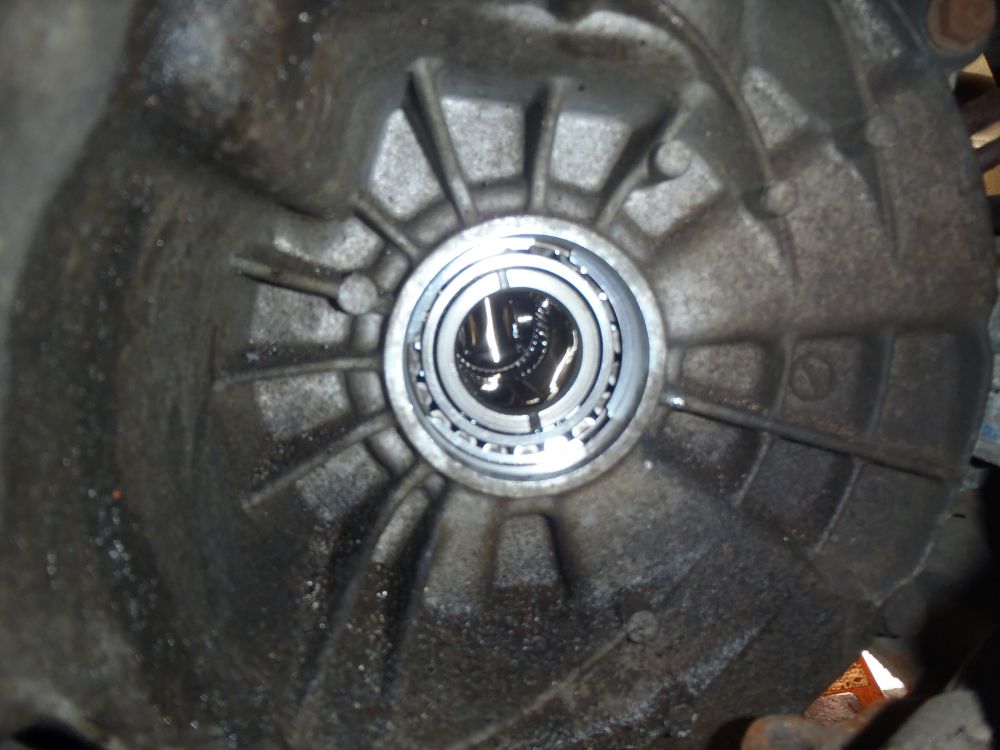
Use a large screwdriver or pry bar to lever the old seal out, being careful not to scratch the bore it goes in. Here is the gearbox with the seal removed.
Ensure the bore is clean and lubricate the new seal with a bit of fresh gearbox oil before carefully pushing it into the gearbox. Make sure it goes in straight and seats properly.
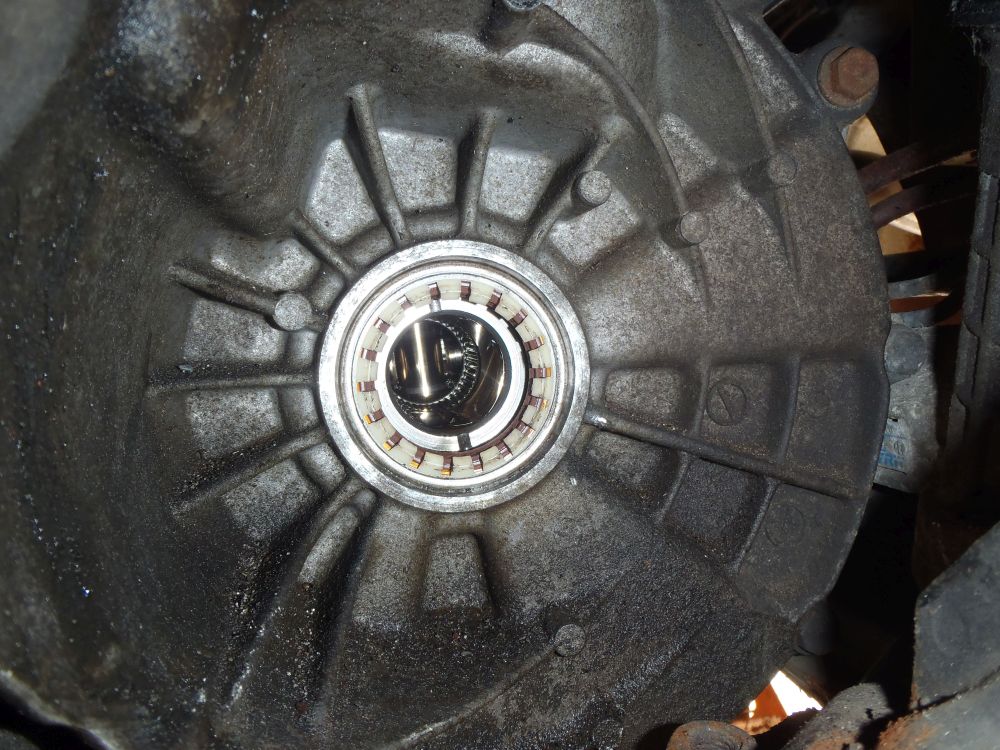
Here is the new driveshaft in place and everything reassembled. Be careful when inserting the driveshaft into the gearbox that the splines don’t damage the seal as it goes in as this will make the new seal leak – a helper can be handy here to take the weight of the driveshaft while you guide it into place.
The process for replacing the right hand driveshaft is essentially the same except it has an intermediate bearing to support the inboard CV joint. You will need to unbolt the bearing carrier from the back of the engine block to remove the driveshaft.

Once the driveshaft is out you can take the bearing carrier off, you will be left with something like this (new driveshaft on top, old on the bottom)
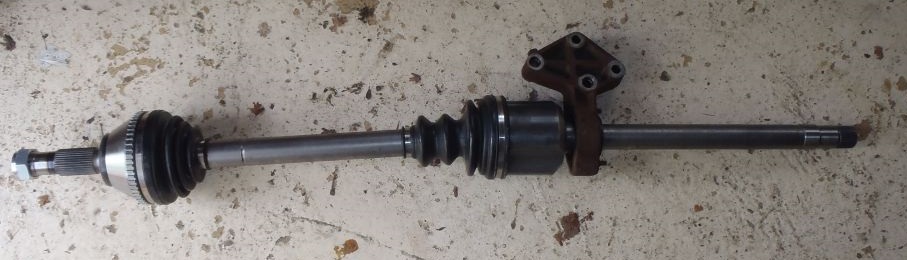
And here is the new driveshaft with the bearing carrier fitted, ready to be fitted to the van.
Once everything is back together don’t forget to refill the gearbox with fresh oil – it can be filled by removing the reversing lamp switch from the top of the gearbox and filling through the hole the switch goes in. There is no way of measuring how full the gearbox is so you will need to measure out the correct quantity of oil before filling. Some people recommend slightly over-filling the gearbox to help protect 5th gear, which can be a problem with these boxes. I use 2.7 litres, but my 5th gear had nearly 200000km on it with a 2.5 litre fill level without causing any problems!
If you found this useful you might like to read the other posts on suspension/driveline overhaul:-
Suspension struts, Engine Mounts, Brakes & Wishbones
Any questions or comments? – let me know below!
Found this information useful? – Want to support Motor-Roam?
Click here to find out how!
One of the most annoying things on our Hymer Motorhome is the barely adequate headlights – main beam is not too bad but dipped beam is terrible! I decided to try some different bulbs to see if I could improve the situation…..
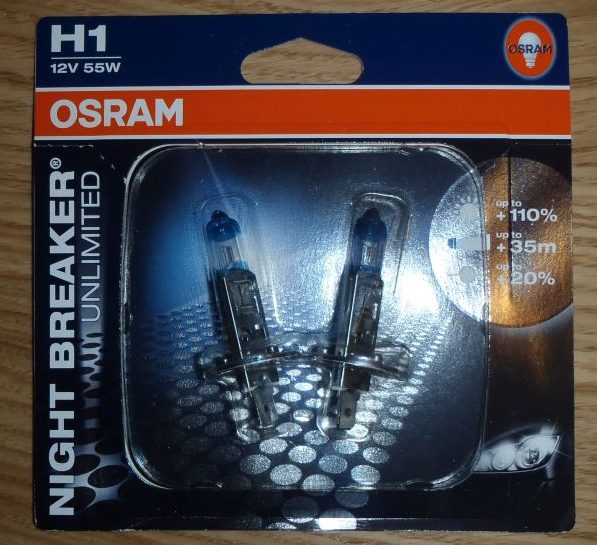
The safe choice is something like these ‘Night Breaker’ bulbs from Osram, basically a better quality standard bulb that offers 10% more light and 35m better visibility than a typical bulb
I also decided to try some of the cheap LED bulbs that seem to be flooding the market, so bought a pair of these H1 LED bulbs from eBay:-
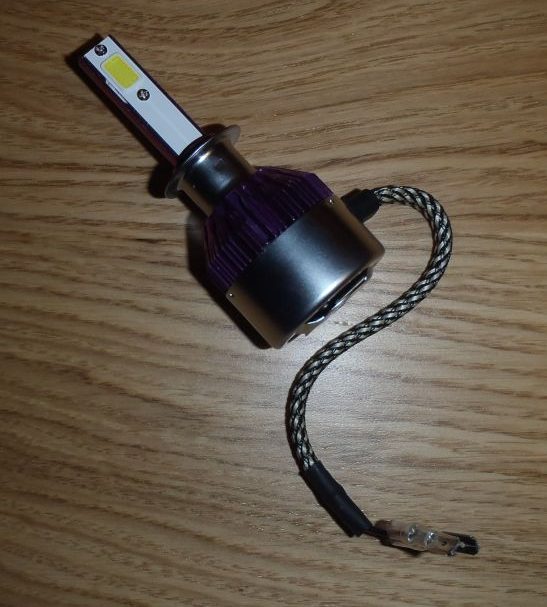
There are a bit of a fiddle to fit, as you need to modify the wiring to suit the two male spade terminals on this bulb, and the big heatsink/fan assembly sticks out of the back of the bulb holder so the rear cover no longer fits. I was also dubious as to how long they would last as they are driven pretty hard, but they’ve been in about six months now and are still going strong so far.
The light output is a reasonable amount better than standard bulbs, and is much whiter, which helps with clarity. The beam pattern seems better defined somehow as well. The cycnic in me is still expecting them to fail spectacularly at some point though, so there’s still a pair of Night Breaker bulbs in the door pocket 🙂
Found this information useful? – Want to support Motor-Roam?
Click here to find out how!
Our Motorhome is now over 20 years old, and when we travel we are obviously reliant on it for both travel and accommodation! Accidents happen, things wear out, and stuff breaks – usually at the most inconvenient moment! In order to ensure you can cope with most dramas on the open road it pays to have a decent tool kit with you, but with space and payload at a premium it is a fine balancing act to find a useful enough set of kit without packing the whole van out with a full garage load of equipment……
This is what I travel with, it’s a self contained Magnusson tool kit I picked up from Screwfix, or Toolstation…..or somewhere – I can’t remember exactly!
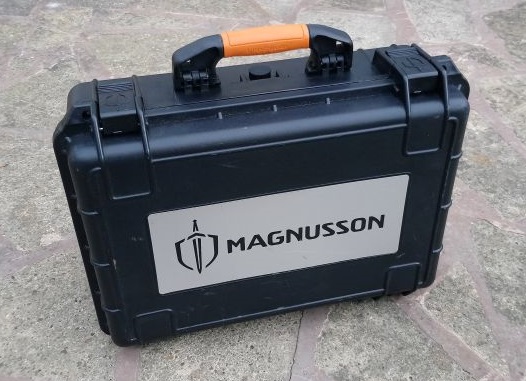
Everything is contained in this heavy duty waterproof storage case with handle
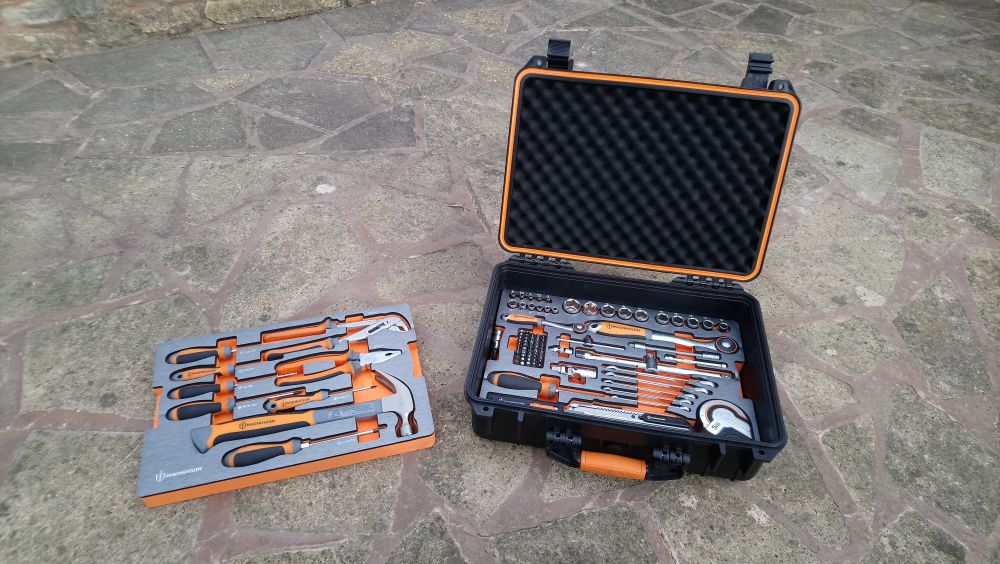
Inside are two high density foam storage trays keeping everything organised and stopping the tools from rattling about while we’re driving. Even the inside of the case itself is padded!

The upper tray contains pliers, screwdrivers and a hammer
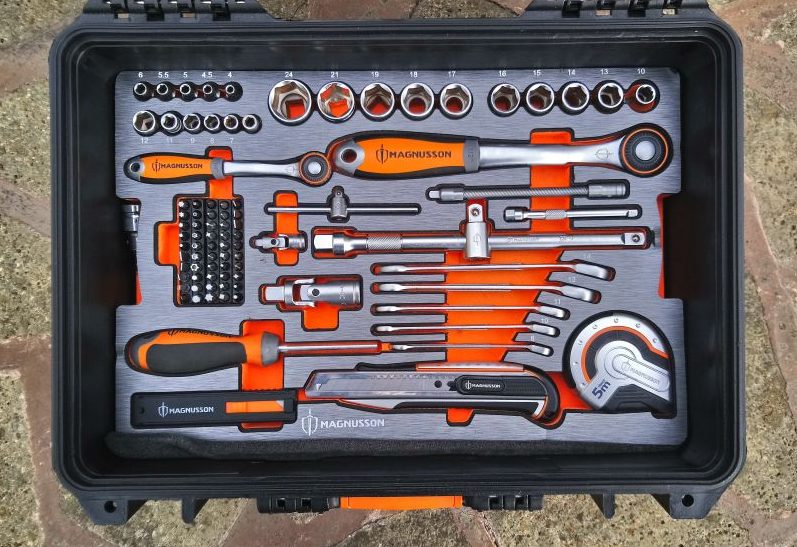
While the lower tray contains combination spanners, a bit driver with a good selection of bits, sockets from 4-19mm + 21mm & 24mm (so it will even handle Ducato wheel nuts), two ratchet handles, extension bars, a tape measure and a knife with spare blades.
The only thing I have added is an 8mm Hex key in a 1/2″ drive socket – which is for removing the cap head bolt that secures the spare wheel in our Hymer Motorhome. All the tools are decent quality (not professional quality, but much better that most of the ‘DIY’ type tool sets you see) so it should last for many years on the road. The whole lot weighs 9kg in total, so doesn’t take up too much payload.
This has saved our bacon a few times and easily paid for itself several times over. What do you carry? – any tools/equipment you couldn’t be without on the road? – let me know in the comments below!
While up at 1350m in Montalbert in the Alps the handle that operates the grey water drain valve on our 1999 Hymer B544 decided to snap off! Fortunately, I managed to get hold of a replacement valve, unfortunately changing it meant lying underneath the van on an icy carpark at -2degC…..
Continue reading
The Schaudt Elektroblock is an all-in-one power distribution, control and battery charging system for Motorhomes & Caravans – predominantly fitted to German built vehicles. Our’s recently started misbehaving on a recent trip to Europe, and while it was sent away and repaired by a specialist after the trip it made me lose some faith in the 20 year old components it is made from!
Continue readingThe 8140.43 2.8L Diesel engine used in various Fiat Ducato, Peugeot Boxer, Citroen Relay and other vans and MotorHomes uses a fairly unusual cold start system, here we’ll look at how it works so if you need to do any troubleshooting, you know where to start!
Continue readingA lot of information on the internet would suggest that swapping out your replaceable gas bottles for a refillable system is an upgrade that would benefit everyone, but as with many things the reality is a little more complicated…..
Continue readingFollow us on Facebook!

© 2026 Motor-Roam
Theme by Anders Norén — Up ↑